The rhythmic clang of machinery, copper pipes gleaming in torchlight, and the satisfying hum of automated production—industrial architecture in Minecraft offers builders the perfect blend of form and function. For adult creators who appreciate both aesthetic sophistication and practical design, steampunk-inspired industrial builds represent one of the most rewarding challenges in the game.
This autumn, as we think about harvest and production, there’s no better time to explore industrial architecture. Whether you’re processing mountain ores, manufacturing desert glass, or establishing a nether quarry empire, this guide will show you how to create imposing, functional factories that capture the Victorian-era industrial aesthetic while incorporating Minecraft’s unique building opportunities.
You’ll learn strategic biome selection, master the steampunk material palette, understand vertical architecture principles, and discover techniques for making your industrial builds feel both authentic and functional. Let’s fire up the furnaces and get building.
The Steampunk Industrial Style in Minecraft
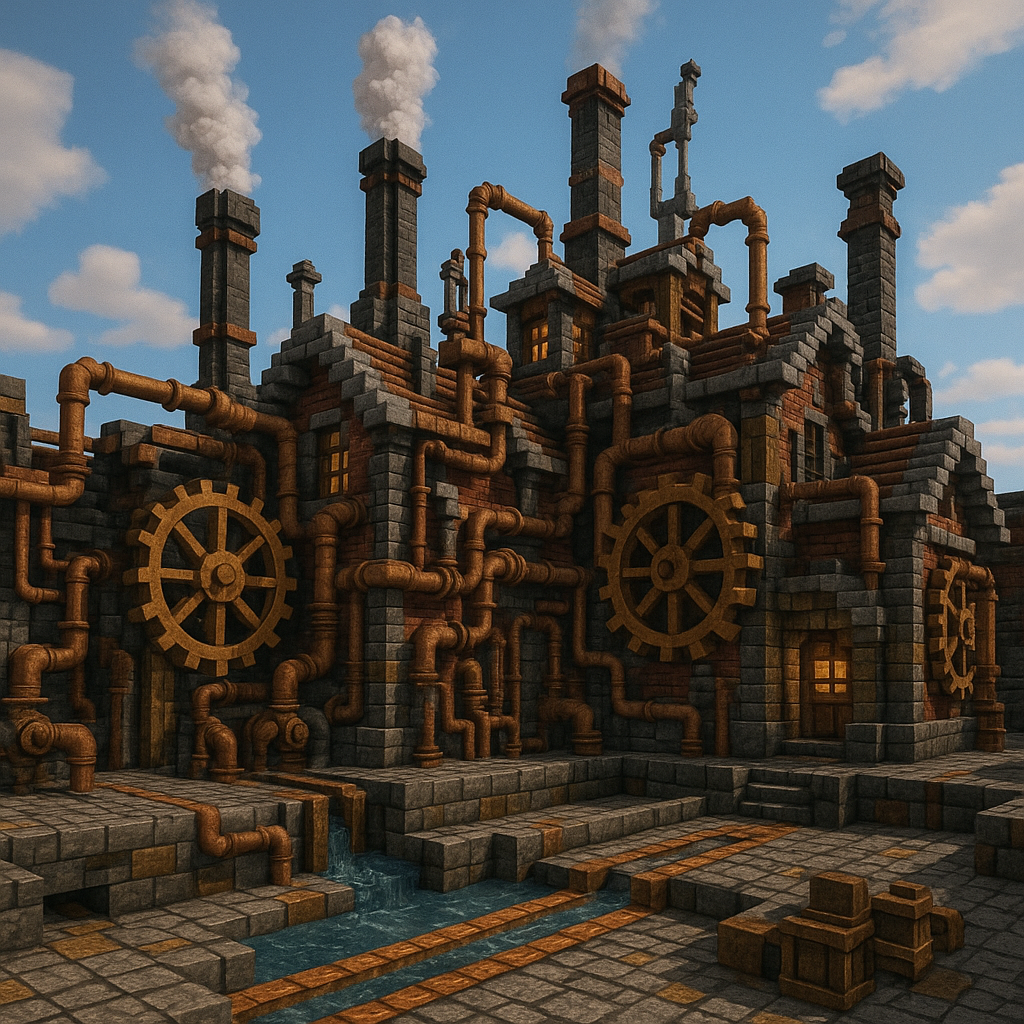
So what exactly is steampunk in Minecraft? Think Victorian-era industry meets fantasy technology. It’s that sweet spot where brass fittings, exposed machinery, and weathered copper come together to create something that looks complex, purposeful, and honestly just really cool.
What makes this style so appealing? For one, it’s different from your typical builds. Medieval structures are great, but they’ve been done to death. Modern builds can feel sterile. Steampunk industrial hits differently—it’s got character, texture, and tells a story about innovation and progress.
Core steampunk elements include:
- Exposed structural supports (chains and iron bars everywhere)
- Copper in all its beautiful oxidation states
- Riveted metal panels (hello, strategic button placement)
- Warm, functional lighting that doubles as machinery
- Visible gearing and mechanical components
- Steam effects from campfires and bubble columns
- Dramatic vertical architecture
The best part? Industrial builds celebrate the beauty of utility. Every pipe, every support beam, every window should suggest a purpose. Even if it’s purely decorative, it should look like it’s doing something important. That’s the magic of industrial design—form follows function, and function looks fantastic.
If you’re coming from medieval architectural styles, industrial building will feel like a breath of fresh air. Less about defense, more about showcasing the impressive machinery of progress.
5 Key Principles for Industrial Building
Master These Fundamentals for Epic Minecraft Steampunk Factories
Embrace Imposing Scale
Industrial buildings need to feel overwhelming. Think bigger than your instincts suggest—factories should dominate the landscape, not blend in.
Master the Material Palette
Stick to copper (all oxidation states), stone brick, dark oak, and iron. Limited palette creates cohesion. Mix oxidation states for authentic aging.
Add Weathering & Texture
Real factories show age and use. Mix damaged blocks, vary copper oxidation, add imperfections. Over-smoothing kills authenticity.
Show Visible Functionality
Every element should suggest purpose. Visible machinery, material pathways, working redstone. Even decorative builds need clear function.
Obsess Over Details
Pipes, rivets, gears, steam effects—details make builds memorable. Every surface needs 3-4 blocks of depth variation. Layer your complexity.
Location, Location, Location: Choosing Your Industrial Site
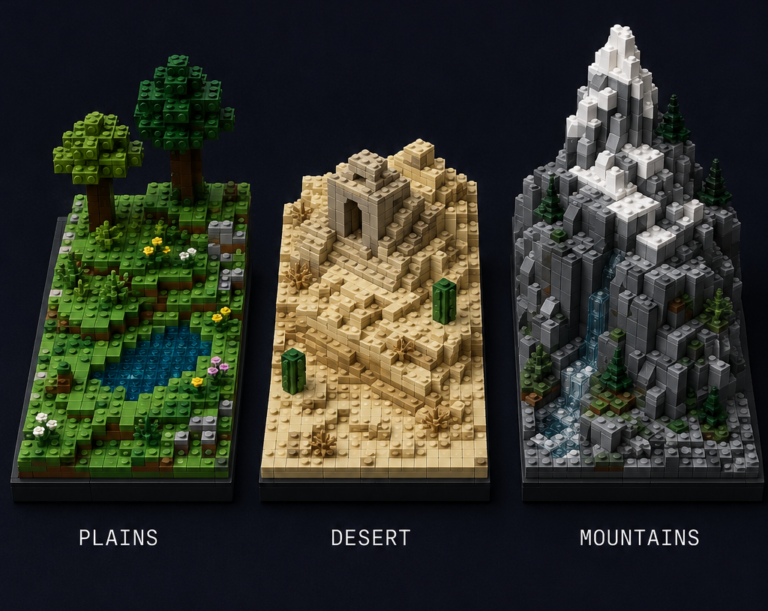
Picking the right biome for your factory isn’t just about aesthetics (though that matters too). Different biomes offer unique resources and building opportunities that can make or break your industrial vision.
Mountain Biomes: The Mining Empire
Mountain biomes are basically begging for industrial builds. Those dramatic cliffs? Perfect for factories that cling to the rock face. The natural elevation? Great for gravity-fed processing systems that actually make sense.
Why mountains work:
- Exposed ores everywhere (iron, coal, copper, emeralds)
- Free building material (stone for days)
- Natural terrain creates dramatic possibilities
- Vertical space for impressive structures
Build ideas that shine here:
- Ore processing plants carved into cliff faces
- Smelting facilities using natural lava channels
- Cable car systems connecting mountain peaks
- Terraced factory complexes following the terrain
- Railway systems winding through valleys
For autumn builds, imagine your mountain facility working overtime to stockpile materials before winter. Storage silos built into the cliff, steam rising from the smelters, and that satisfying industrial hum echoing through the valleys.
Desert Biomes: The Sand & Glass Tycoon
Desert biomes offer a completely different vibe—harsh sunlight, weathered aesthetics, and endless opportunities for glass manufacturing. The open space lets you build sprawling complexes, and that heat? It becomes part of your design story.
Desert advantages:
- Abundant sand and sandstone
- Perfect for glass foundries
- Open space for large complexes
- Unique weathering aesthetic
What to build:
- Glass manufacturing facilities with roaring furnaces
- Sandstone quarries with visible cutting operations
- Terracotta processing plants
- Pump stations (water management as design element)
- Covered railway systems protecting goods from sun
Design-wise, deserts push you to think about heat protection. Deep overhangs, shade structures, cooling systems—these practical considerations become interesting architectural features. And that heavily oxidized copper? It looks incredible against desert sandstone, like it’s been baking in the sun for decades.
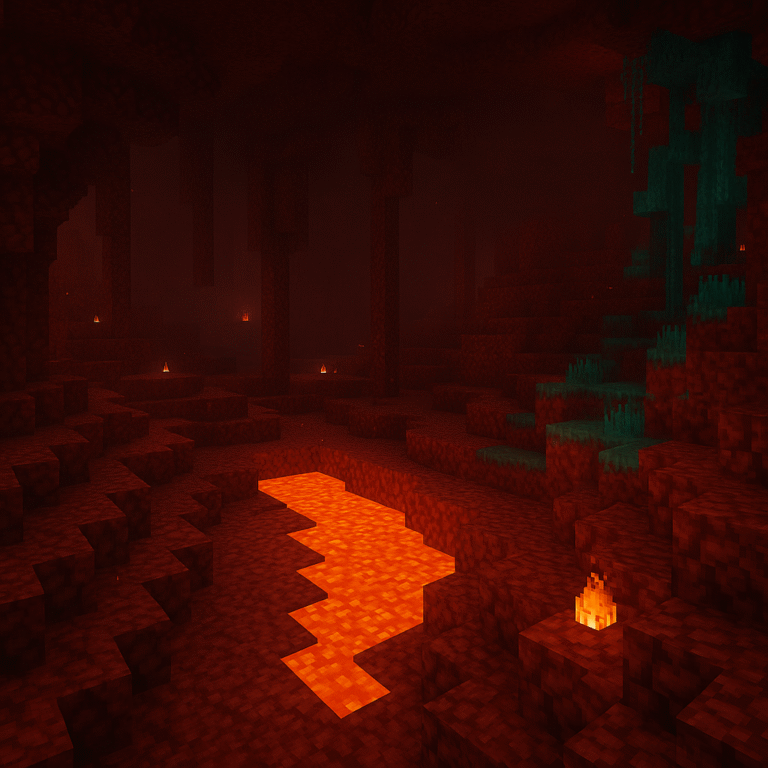
Nether: The Ultimate Industrial Frontier
Okay, the Nether is next-level. The resources are incredible, the atmosphere is inherently industrial, and honestly? If your factory looks good in hell, it’ll look spectacular anywhere.
Why the Nether rocks:
- Resource density is insane (ancient debris, basalt, blackstone)
- Natural lava flows = built-in power aesthetic
- Danger justifies heavily reinforced design
- Already feels industrial
Signature Nether builds:
- Ancient debris processing facilities
- Basalt quarries with visible piston mining
- Gold processing centers
- Nether brick manufacturing showing full production pipeline
- Quartz refinement facilities
The Nether forces you to build structures that look tough and purposeful. Enclosed walkways? Necessary. Reinforced windows? Absolutely. Defensive positioning? Of course. These practical requirements create authentic industrial aesthetics automatically.
For autumn themes, think of the Nether as your year-round production facility—the place that keeps running through winter, stockpiling resources for overworld distribution.
Building Your Industrial Empire: Design Fundamentals
Let’s talk about what actually makes industrial builds work. These principles apply whether you’re in mountains, deserts, or dimensions of fire.
Material Palette & Texturing
Your material choices make or break the steampunk aesthetic. The good news? The core palette is pretty straightforward once you get it.
Primary materials:
- Copper (all oxidation states) – This is your star player
- Stone bricks – Your structural foundation
- Dark oak – Warmth and organic contrast
- Iron bars, chains, trapdoors – Your metal framework
Accent materials:
- Stripped oak and gold blocks (brass-adjacent colors)
- Smokers and blast furnaces (functional decoration)
- Glass panes and tinted glass (industrial windows)
Here’s the secret to great industrial texturing: variation is everything. Don’t build large walls from one material. Mix regular stone bricks with cracked variants. Add stairs for relief. Incorporate chains for vertical interest. Use slabs to break up surfaces.
Weathering technique: This is where the magic happens. Use fresh copper for new sections, weathered copper for older areas, and heavily oxidized copper for rooflines and forgotten corners. Mix oxidation states within the same structure to suggest age and history. Add “rust stains” below iron bars using terracotta. Your factory should look lived-in, not fresh from a catalog.
Vertical Architecture & Scale
Industrial buildings need to feel imposing. Cozy doesn’t work here—you want visitors to feel slightly overwhelmed by the scale and purpose of your structures.
Why go vertical:
- Visual impact (tall = impressive)
- Functional storytelling (ore in at top, product out at bottom)
- Space for visible conveyors and machinery
- Dramatic internal spaces
Scale tips:
- Start with minimum 20×20 footprint (go bigger if you can)
- Height should match or exceed width
- Interior ceilings should feel tall
- Think “factory floor,” not “living room”
For structural support, make it visible and part of the aesthetic. Exposed “girders” using fence posts, chains, and iron bars don’t just look industrial—they break up walls and add character. Place them at corners, flanking windows, running vertically to emphasize height.
Multi-level planning:
- Ground floor: Material intake/output (big doors, loading zones)
- Mid-levels: Processing machinery (furnaces, storage, workstations)
- Upper floors: Control rooms, offices, roof access
Each level should be visible from the exterior through window placement and material changes.
Functional Elements That Enhance Aesthetics
The coolest thing about industrial builds? Making functional stuff look amazing (or making decorative stuff look functional).
Redstone integration: You don’t need complex circuits. Visible redstone dust suggests wiring. Repeaters become control panels. Even a simple lever-to-piston setup adds life. The key is making redstone visible and central to your design. (Check out our comprehensive redstone guide if you want to go deeper.)
Water and lava features:
- Water cooling systems (flowing water = temperature management)
- Lava channels (power generation aesthetic)
- Glass-walled lava tubes running through facilities
- Water wheels (decorative but convincing)
Lighting as machinery:
- Lanterns = boiler lights or control panels
- Sea lanterns = electric lighting or molten metal glow
- Furnaces = active smelting operations
- Campfires = smoke effects and atmosphere
Movement and animation: This separates good from great. Minecart systems (even simple loops) add life. Flying machines create overhead cranes. Pistons provide rhythmic machinery movement. Water streams visibly carry items between stations.
Steampunk Signature Details
Now for the fun stuff—the details that make people stop and really look at your build.
Pipe systems: The most iconic steampunk element. Use birch/dark oak fences for large pipes, end rods for narrow conduits, chains for flexible connections, and iron bars for rigid piping. Run pipes everywhere—walls, ceilings, between buildings. Some should connect to machinery, others to “nothing” (suggesting abandoned older systems).
Gear and cog aesthetics: Minecraft doesn’t have circles, but you can fake it. Fence gates arranged radially for small gears, stair blocks for larger cogs, barrels for drive shafts. It doesn’t need to be mechanically accurate—just needs to read as machinery from normal viewing distance.
Riveted panels: Place buttons in regular patterns on iron blocks or dark prismarine. Create rivet rows along edges, at structural joints, in decorative patterns. This simple trick dramatically enhances the “metal panels bolted to frames” aesthetic.
Steam effects: Campfires beneath trapdoors create smoke that reads as steam vents. Bubble columns suggest underwater machinery. Place these strategically near smelters, at pipe junctions, or from rooftop vents.
Tutorial: Building a Steampunk Ore Processing Facility
Ready to build something awesome? This tutorial walks you through a complete, functional ore processing facility. It’s intermediate level, so you should be comfortable with basic building fundamentals, but nothing here is crazy complicated.
Build Specifications
The basics:
- Footprint: 21×21 blocks
- Height: 18 blocks
- Difficulty: Intermediate
- Build Time: 3-4 hours (take breaks!)
- Best in: Mountains (but works anywhere)
Materials you’ll need:
- 800 stone bricks (regular and stairs)
- 400 copper blocks (various oxidation states)
- 200 dark oak planks
- 150 iron bars
- 100 chains
- 80 glass panes
- 50 iron trapdoors
- 32 lanterns
- 24 furnaces/blast furnaces
- 16 hoppers
- 12 chests
- Assorted detail blocks (buttons, levers, pressure plates)
Phase 1: Foundation & Frame
Start by marking out your 21×21 footprint. If you can build into a hillside, even better—it’ll look more naturally integrated. Clear the area and lay a stone brick foundation one block deep. This gives your building visual weight and stops grass from growing underneath.
Create 2×2 stone brick pillars at each corner and at the midpoint of each wall—make them seven blocks tall for now. These support the whole structure. Connect the pillar tops with chains to create a visible framework. This isn’t just decoration; it guides your wall construction and shows off that industrial engineering aesthetic.
For interior planning, think in three levels:
- Ground floor: 5 blocks interior height (material handling)
- Middle floor: 4 blocks interior height (processing)
- Upper floor: 4 blocks interior height (control room)
Mark these divisions with temporary blocks so you maintain proper spacing as you build.
Phase 2: Walls & Exterior Details
Build your walls with stone brick, but mix in cracked variants every few blocks for texture. Use stone brick stairs placed outward from the wall to create relief details—these suggest reinforcement bands and add depth.
Windows: Use iron bars as frames with glass pane inserts. Industrial windows should be small and functional, not decorative. Place them irregularly rather than in perfect symmetry. Upper floors can have more (offices need light), ground level fewer (security and structure).
Exterior pipes: This is where it gets fun. Using dark oak fences as large pipes, run them vertically from ground to roof. Add horizontal runs suggesting interconnected systems. Use chains as flexible connectors, iron bars for rigid sections. Make pipes pass through walls via small openings. Even though they’re decorative, they should look purposeful.
Add external support structures—small buttresses using stone brick stairs and chains. Build an external staircase with iron bar railings. Consider a loading platform extending from one wall with wooden supports underneath. Industrial facilities need maintenance access, and showing that adds authenticity.
Phase 3: Functional Interior
Ground floor handles intake and output. Create a loading area with chests for incoming ores. Install a line of furnaces with hoppers feeding from above and collecting below. It doesn’t need perfect automation—visual functionality matters more. Add iron bar railings around machinery, lanterns for control panels.
Middle floor is your storage and secondary processing hub. Organized chest banks with signs, additional furnaces, decorative machinery (pistons that don’t move, observers facing each other, visible redstone dust suggesting circuits). Add dark oak flooring—wood platforms feel authentic in industrial settings and add warmth.
Upper floor becomes your control room. Create a windowed area overlooking the processing floor. Make a “control panel” with buttons, levers, and pressure plates on iron blocks. Add a minimal office (workbench as desk, chest for storage). Include ladder access to the roof—maintenance access should be visible.
Connect floors with industrial-style circulation. Internal staircases work, but consider ladder systems with platforms at each level, or even a minecart elevator if you’re feeling ambitious.
Phase 4: Steampunk Finishing Touches
This is where good becomes exceptional.
Riveted panels: Add buttons in rows of three along wall sections, corners, flanking windows. Mix stone and copper buttons for varied metal types. This simple detail transforms the aesthetic completely.
Interior pipes: Using various copper oxidation states, create smaller pipes between machinery. Fresh copper near heat sources, oxidized copper in upper corners. Add pipe junctions using stairs, slabs, and full blocks for three-way connections and valve wheels.
Strategic lighting: Lanterns near machinery (control panels), sea lanterns in floors (illuminated grating), furnaces in walls (warm machinery glow), campfires beneath iron trapdoors in roof vents (smoke effects).
Weathering: Vary copper oxidation within surfaces—wax some blocks, leave others natural. Place iron bars randomly suggesting old reinforcement. Add cracked stone bricks near high-use areas.
Roof details: Create a flat roof but add mechanical components—gears using fence gates, pipes extending upward with chain steam vents, a small chimney with campfire smoke. Edge the roof with stone brick slabs, add copper guttering using trapdoors. below. This doesn’t need to be a fully automatic system—visual functionality matters more than perfect efficiency. Use iron bars to create protective railings around machinery, and add lanterns suggesting control panels.
Middle floor houses your primary storage and secondary processing. Create organized chest banks with signs marking contents (iron ore, coal, copper, etc.). Install additional furnaces for secondary smelting, and use some decorative machinery: pistons that don’t actually move, observers facing each other, redstone dust in visible patterns on walls suggesting circuitry. Add dark oak flooring—wooden platforms in industrial settings feel authentic and add warmth to otherwise harsh spaces.
Upper floor becomes your control room and offices. Create a windowed area overlooking your processing floor below. Install a “control panel” using buttons, levers, and pressure plates arranged on iron blocks. Add a small office area with minimal furniture (workbench as desk, chest for storage). Include roof access via a ladder in one corner—flat roofs should be accessible for maintenance, even if that maintenance is purely conceptual.
Connect floors with visible access. Internal staircases work, but consider more industrial solutions: ladder systems with platforms at each level, or even a minecart elevator if you’re feeling ambitious. Make circulation routes visible and functional, avoiding hidden transitions between levels.
Phase 4: Steampunk Finishing Touches
Now for the details that transform good into exceptional. Add riveted panel effects throughout—buttons placed in rows of three along wall sections, at corners, and flanking windows. This simple detail dramatically enhances the manufactured metal panel appearance. Mix button colors (stone for most, copper for accent areas) to suggest different metal types.
Build out your copper pipe network inside. Using copper blocks of various oxidation states, create smaller pipes running between machinery. Fresh copper near furnaces suggests heat exposure preventing oxidation. Heavily oxidized copper in upper corners suggests age and exposure. Add pipe junctions using creative combinations of stairs, slabs, and full blocks to create the appearance of three-way connections and valve wheels.
Install atmospheric lighting strategically. Place lanterns near machinery as if they’re control panel lights. Use sea lanterns in floor areas suggesting illuminated grating. Add furnaces face-out in walls where you want warm, active-machinery glow. Place campfires beneath iron trapdoors in roof vents for smoke effects. Lighting should feel functional, not decorative.
Add weathering and texture variation throughout. Where copper exists, vary oxidation states within the same surface—wax some blocks, leave others to oxidize naturally. Place iron bars in seemingly random locations suggesting old structural reinforcement. Add “damage” like cracked stone bricks near high-use areas or where machinery impact would occur.
Final exterior details include roof elements: create a flat roof but add mechanical components—gears using fence gates, pipes extending upward with chain as steam vents, a small chimney with campfire smoke. Edge the roof with stone brick slabs creating a lip, and add copper guttering using trapdoors in the down position. These small details reward closer inspection and enhance the overall industrial aesthetic.
Autumn Harvest & Production Themes
Industrial builds and autumn just work together. Both celebrate productivity, preparation, and that satisfying feeling of getting things done. Autumn is harvest season—summer’s efforts culminating in stored resources for winter. Your factory tells the same story, just at industrial scale.
Seasonal design choices:
- Copper’s orange oxidation mimics autumn foliage
- Orange terracotta adds harvest vibes
- Warm golden lighting creates autumn atmosphere
- Hay bales near loading areas suggest agricultural crossover
Agricultural-industrial crossover ideas:
- Wheat processing mills (grain to flour)
- Pumpkin and melon canning facilities
- Apple cider press operations (get creative with pistons and barrels)
- Cold storage facilities for winter preparation
These builds justify large, heavily insulated structures with minimal windows and massive doors. They make practical sense while looking fantastic.
Visual elements for autumn atmosphere:
- Pumpkins and jack o’lanterns as decoration and lighting
- Wagons (minecarts) filled with wheat
- Barrels stacked near warehouses
- Hay bales under covered storage
Your mountain smelting facility processes ore faster in autumn, stockpiling metals before winter weather hits. Your desert glass foundry runs extra shifts during harvest when construction projects increase. Your Nether operation runs year-round but ships more to the overworld as communities prepare for winter.
Even in creative mode, these seasonal narratives add depth and context to your builds.
Taking Your Industrial Builds Further
Once you’ve nailed a single structure, the next level is compound design—multiple buildings working together as cohesive complexes.
Planning multi-building complexes:
- Look for terrain with different elevations (visual interest + practical advantages)
- Designate zones: processing, storage, administrative, worker amenities
- Leave space for connecting infrastructure
Connecting structures:
- Minecart railways on elevated tracks (practical + spectacular)
- Pipe bridges using fences and chains (suggests resource transfer)
- Covered walkways at upper levels with glass roofs and iron bar supports
Creating cohesive districts:
- Use the same material palette across all buildings
- Vary proportions, heights, and details (consistent but not uniform)
- Each structure should have clear purpose while feeling connected
- Newer buildings = more fresh copper, legacy structures = heavy oxidation
Zoning your complex:
- Processing areas: Central, visible, complex (the showpieces)
- Storage facilities: Larger, simpler, work well at edges
- Administration: Smaller, refined, prominent at entrances
- Worker housing: Bridges industrial and residential, at district edges
Integration with existing worlds needs thoughtful planning. Maybe your medieval village has an industrial district representing technological progress. Your modern base might incorporate steampunk as historical preservation or artistic contrast. Create pathways connecting old and new, architectural elements referencing both styles.
Resource management for large projects:
- Build a copper farm (dripstone + cauldrons)
- Bulk collect stone brick ingredients
- Pre-gather iron for bars and chains
- Consider builder-friendly mods like Litematica for maintaining proportions
Avoiding Industrial Design Pitfalls
Let’s talk about common mistakes so you can skip them entirely.
Over-smoothing = unrealistic perfection Real facilities show age and use. If everything looks pristine, it lacks authenticity.
- Fix it: Mix damaged variants with regular blocks, use multiple copper oxidation states, add small imperfections
Scale issues = toy factories Building too small makes everything feel like a model rather than the real deal.
- Fix it: Go bigger than your instincts suggest. 15×15 becomes 20×20. 10 blocks tall becomes 15. Industrial = imposing
Neglecting function = hollow prettiness Even decorative builds should suggest clear purpose.
- Fix it: Show where materials enter, how they’re processed, where goods exit. Include visible machinery and work spaces
Color confusion = too many materials Industrial aesthetics rely on limited, consistent palettes.
- Fix it: Stick to 4-5 primary materials. Use others as small accents only. When in doubt, remove a material rather than adding another
Flat facades = boring buildings Two-dimensional walls kill visual interest.
- Fix it: Add protruding pipes, buttresses, platforms, stairs. Create recessed windows and doors. Every wall needs 3-4 blocks depth variation
Conclusion
Industrial steampunk architecture offers a rewarding creative challenge that combines aesthetic sophistication with functional storytelling. Whether you’re building in mountains for dramatic ore processing, deserts for glass manufacturing, or the Nether for extreme industrial authenticity, the fundamentals remain the same: embrace imposing scale, master the copper-stone-oak palette, prioritize visible functionality, and obsess over details.
Autumn themes add narrative depth, celebrating harvest and preparation while justifying expanded operations. Your factories aren’t just builds—they’re facilities responding to seasonal demands, stockpiling resources, serving surrounding communities.
The satisfaction comes from that unique position between art and engineering. These structures suggest entire systems of extraction, processing, and distribution. They tell stories about progress, ambition, and the beauty of purposeful design.
Start with the tutorial facility we covered. Experiment with copper oxidation before committing to massive projects. Once you’ve got the basics down, expand into compound designs and transform entire landscapes.
So which biome is calling to you? Mountain cliffs, desert wastes, or the Nether’s infernal heat? Share your steampunk creations in the comments, and tag your builds with #MinecraftIndustrial and #SteampunkMC!
The furnaces are lit, the pipes are singing, and autumn’s productive energy is waiting. Time to build your industrial empire.
Continue Your Building Journey
Ready to expand your Minecraft building expertise? Check out these related guides:
- Minecraft Building Fundamentals – Master the core principles underlying all great builds
- Minecraft Biomes Guide – Explore all biomes for your next industrial site
- Redstone Engineering – Add functional automation to your factories
- Top Minecraft Mods for Builders – Essential tools for large-scale industrial projects
- Minecraft Architectural Tutorial – Develop your architectural thinking for any build style
For inspiration beyond Minecraft, explore how LEGO’s SNOT building techniques create texture variation that translates beautifully to digital block-based building, or learn about advanced LEGO building techniques that inform sophisticated Minecraft construction approaches.
This article contains affiliate links. If you purchase through these links, Bricks and Blocks Creative may earn a small commission at no extra cost to you. This helps us continue creating quality content for adult Minecraft enthusiasts.