
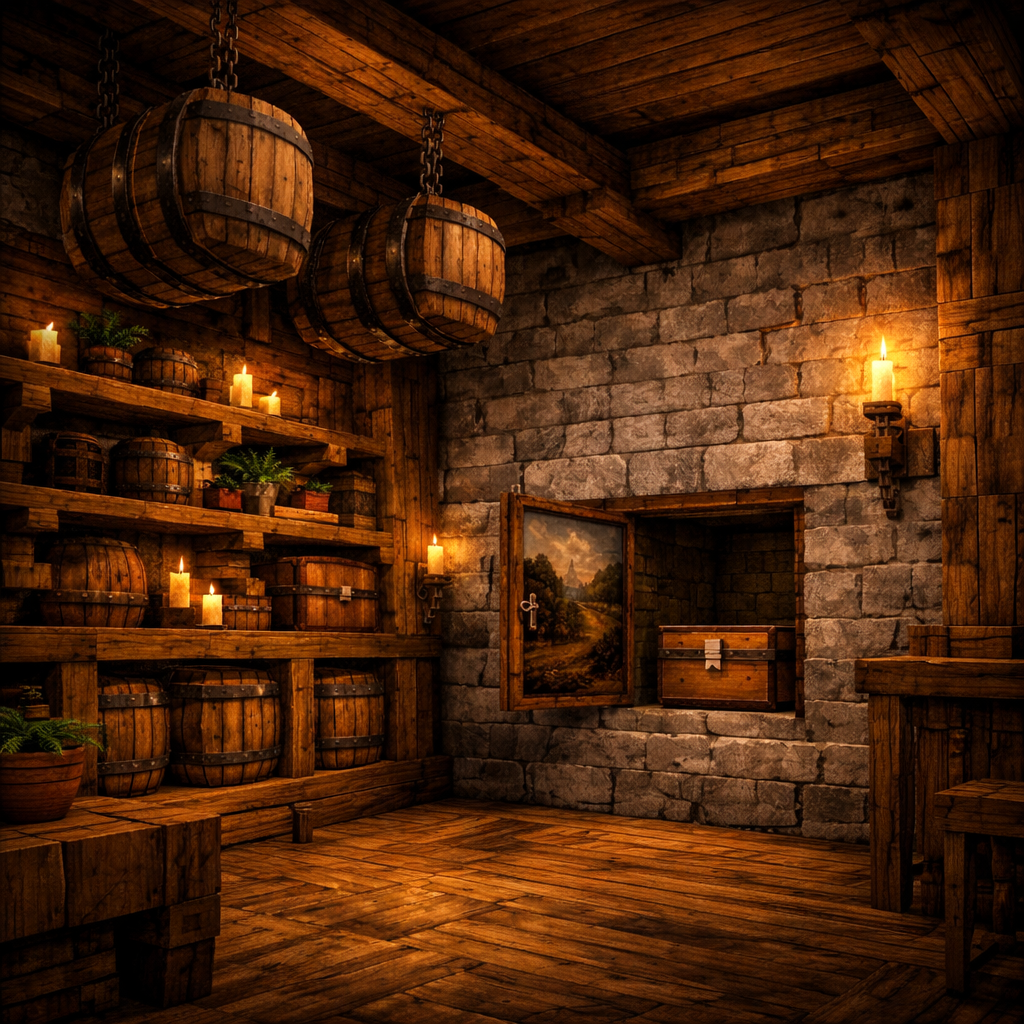
There’s a moment every serious Minecraft builder knows well: you’ve poured hours into a stunning base, the exterior looks incredible, and then you open the door to a wall of randomly placed chests spilling over with everything you’ve ever mined. The interior tells a completely different story from the build you intended. Storage is one of the most underestimated design challenges in the game — get it wrong and your base feels cluttered and chaotic, no matter how good it looks from the outside.
The good news is that thoughtful storage design isn’t just about organisation. It’s an opportunity to add depth, personality, and genuine functionality to your interiors. Whether you’re playing survival or working in creative mode, the same principles apply: your storage system should serve your gameplay, disappear into your build aesthetic, and evolve alongside your projects. This guide covers four interconnected approaches — hidden integration, room-specific systems, aesthetic alternatives to the classic chest grid, and seasonal rotation — that together give you a storage setup that works as hard as it looks good.
The Art of Hidden Storage Integration
The most elegant storage solution is the one you don’t notice at all. Hiding chests and barrels within the architecture of your build isn’t a trick or a workaround — it’s genuine interior design, the same principle that drives built-in bookshelves and under-stair storage in real architecture.
Using Functional Blocks as Covers
Paintings are the classic approach, and for good reason: a chest tucked behind a painting on a wall reads as decoration rather than storage, and accessing it is as simple as breaking the painting and reopening it. For a more interactive solution, trapdoors work beautifully as access panels — set into a fireplace wall or decorative surround, they suggest a functional detail while concealing storage behind them. Cauldrons and composters positioned above chests or barrels create a layered visual that suggests a working environment rather than a storage solution.
The key principle is that the cover object should tell a story about the space. Think about what the room is for, and choose covers that reinforce that function. Some of the most effective options to consider:
- Paintings over chests in studies, libraries, or galleries — contextually logical and immediately convincing
- Trapdoors as access panels set into fireplace surrounds or decorative wall sections
- Cauldrons and composters positioned above barrels in kitchens, breweries, or apothecaries
- Lecterns and crafting tables as cover-and-context combinations in workshop spaces
Floor and Ceiling Storage
Vertical space is chronically underused by most builders, and both the floor and ceiling offer real storage opportunities that can completely disappear into a well-designed interior. Embedding chests or barrels one block into the floor with a carpet or trapdoor on top is one of the cleanest tricks in the game — the storage remains fully accessible (trapdoors and most carpet types don’t block chest opening), and the floor reads as a continuous decorated surface rather than a storage room.
Ceiling storage works on the same principle. Barrels tucked into ceiling beams or rafters read as architectural detail — exposed timber framing, rustic warehouse structure, or industrial infrastructure — while still providing full access. Slabs and stairs used as ceiling materials are transparent to barrel openings, so you can tuck barrels above a half-slab ceiling and access them without any visual disruption to the space below.
Structural Disguises
Perhaps the most satisfying approach is turning storage into architecture itself. A column of barrels stacked with fences or logs at intervals reads as a structural support pillar, not a storage wall. Barrels integrated into a wall alongside decorative blocks like bookshelves, stripped logs, or stone bricks become part of the texture of the space rather than an interruption. The aim is to make the storage feel load-bearing — as if removing it would collapse the room — rather than placed after the fact.
For survival players concerned about security, the decoy principle is worth adopting:
- Keep a visible “junk” chest in your main base holding common blocks — this is what griefers will find
- Stow true valuables below the floor, in a remote underground pocket, or beneath an unassuming grass block outside the structure
- Use double-layer approaches where possible: obvious storage on top, real storage hidden underneath or behind
Room-Specific Organisation Systems
The single biggest organisational mistake in Minecraft is building one centralised storage room and expecting it to serve every function. In practice, returning to a central hub every time you need a specific item breaks your workflow and encourages the kind of chaos where items end up wherever there’s space rather than where they belong. A room-specific approach treats each functional area of your base as its own micro-storage unit, with items placed exactly where they’ll be used.
Distributed Storage Base Layout
OVERHEAD VIEW — ROOM-SPECIFIC ORGANISATION SYSTEM
Grouping by Gameplay Loop
For builders who do maintain a central storage room — and there’s nothing wrong with one — the most effective layout divides storage by gameplay loop rather than by item type. Instead of “all food together, all blocks together,” think about how you actually move through the game. A well-structured central room might divide into zones like:
- Building materials — blocks, slabs, stairs, decorative elements for active projects
- Redstone components — hoppers, comparators, observers, repeaters, and supporting items
- Mob drops and farming outputs — bones, string, feathers, crops, and processed goods
- Adventuring gear — weapons, armour, potions, maps, and exploration essentials
The bulk-versus-access split is particularly useful here. High-volume items — stone, dirt, sand, gravel — can live in a deep-storage area you visit infrequently, while items you reach for constantly sit at eye level in clearly marked, easily accessible bays.
Per-Room Micro-Storage
The most functional bases treat storage as a distributed system. A kitchen or dining area benefits from barrels integrated into counter surfaces and cupboard details, holding food, crops, and fuel within arm’s reach of your furnaces. A workshop or smithy should have ore and ingot storage positioned directly beside your furnaces and anvils — the spatial logic should mirror the workflow, with raw materials feeding into processing and finished goods coming out the other side.
Farm rooms are one of the most natural environments for this approach. Building seed and harvest chests directly into the walls of a farm area means your agricultural workflow is completely self-contained; you harvest, sort, and store without ever leaving the space. Similarly, if you have dedicated Nether or End rooms — spaces designed for dimension-specific gear, blocks, and loot — keeping that storage within those rooms maintains a logical geography across your entire base.
Visual Labelling Without Item Frames
Item frames are the obvious labelling solution, but they can read as cluttered if overused, and in large storage systems they add up to a significant visual burden. There are cleaner alternatives that work just as well at a glance:
- A sample block placed beneath or beside a chest column communicates contents without the item-frame aesthetic
- Coloured wool, terracotta, or concrete as accent blocks can code different sections — warm tones for food and organics, cool tones for ores and processed goods
- Themed decoration around each storage zone — a mini biome, a relevant tool, a contextual block — turns labelling into a design feature rather than a functional afterthought
For truly large-scale storage, decorating each section like a miniature version of what it holds is both functional and a genuine design opportunity.
Aesthetic Storage That Doesn’t Look Like Chests
The “chest monster” — the term builders use for a base where chests have multiplied beyond any original plan until entire rooms are solid box — is almost a Minecraft rite of passage. Most players have built one. The goal is to move beyond it: storage that reads as furniture, architecture, or decorative feature rather than as a grid of identical brown cubes.
Making Barrels Work Harder
Barrels are significantly more design-flexible than chests, and they’re underused by builders who default to chests out of habit. The key is treating them as furniture rather than containers — think about what a barrel communicates in context and build environments that make that legible. Some approaches that work particularly well:
- Hanging from chains — reads as a suspended storage vessel, effective in tavern, warehouse, or industrial builds
- Stacked with composters and fence legs — creates rustic table-and-cask furniture that suits breweries and inns
- Built into counter surfaces at counter height — functions as integrated cabinet storage cohesive with the kitchen around it
- Arranged in radial or circular patterns — breaks the repetitive grid of a standard storage room
Shelving and Display Storage
Built shelving using stairs and slabs is one of the most transferable techniques from real interior design into Minecraft. A shelving unit constructed from stair steps, with barrels, decorative blocks, plants, and light sources arranged across the shelves, reads as a styled bookcase or display unit rather than a storage system. The mix of functional and decorative elements is what makes it convincing — a shelf that holds only barrels looks like storage; a shelf that holds barrels alongside flower pots, books, and candles looks like a room.
This approach scales well and can absorb a significant quantity of storage without becoming visually overwhelming, because the decorative elements break up the repetition and keep the eye moving across the surface.
Shaped Storage Rooms
When a dedicated storage room is unavoidable, the shape of that room has enormous influence on whether it feels designed or haphazard. The rectangle “chest cube” — four walls of chests — is the default precisely because it’s maximally efficient and minimally interesting. Circular layouts, radial walls arranged around a central point, or tiered balcony-style storage that wraps around a central atrium create rooms that feel like they were designed, not accumulated.
For technically inclined players, automatic sorting systems present the most complete integration of form and function. A compact sorting system connected to a central input chest means storage is not only organised but self-maintaining, and the infrastructure of hoppers, comparators, and redstone can be incorporated into the walls and floor as genuine architectural features rather than exposed mechanical clutter. If you’re interested in diving deeper into redstone-based solutions, our guide to redstone fundamentals for builders covers the mechanics you’d need to know.
Seasonal Storage Rotation
Long-term Minecraft players accumulate items at a rate that eventually overwhelms any static storage system. Seasonal rotation — deliberately cycling what’s in active storage based on your current phase of play — is the most sustainable approach to keeping your base functional and your storage manageable over months or years of play.
Thinking in Phases, Not Categories
The rotation concept works best when you think about storage in terms of gameplay phases rather than item categories. Keeping only the current phase’s essentials in active, easily accessible storage — and archiving the others — means your main storage system stays clean and navigable. The four broad phases most players move through look something like this:
- Early-game mining kit — basic tools, torches, food, building blocks for quick shelters
- Mid-game exploration gear — maps, compasses, potions, specific biome resources
- Late-game building materials — curated block palettes, decorative elements, specialty blocks
- Nether/End expedition supplies — fire resistance gear, dimension-specific blocks and loot
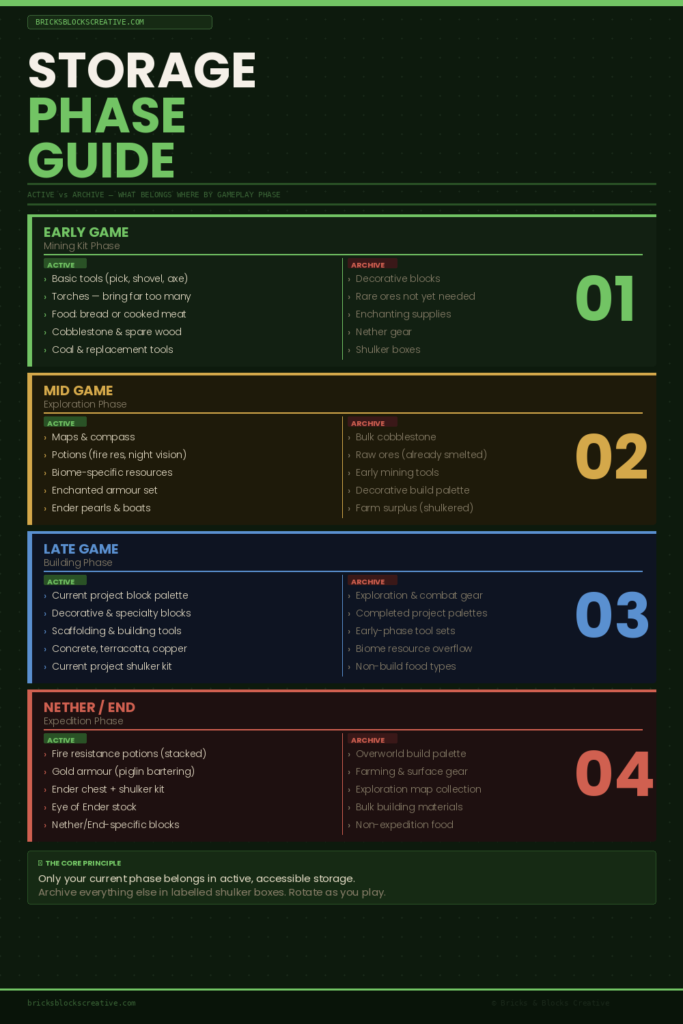
This is particularly valuable for builders working on large projects. When you’re in the building phase of a major structure, your active storage should reflect that — blocks and decorative materials at the front, while exploration gear and combat supplies move into archive.
Modular Storage with Shulker Boxes
Shulker boxes are the natural medium for seasonal rotation. Their portability means an entire set of related items can be treated as a single labelled module — “Nether expedition kit,” “winter build palette,” “ocean exploration gear” — that can be retrieved from archive storage, used, and returned without disturbing the rest of the system. A storage wall of labelled shulker boxes represents a genuinely mature approach to Minecraft organisation that scales with the scope of your play.
The module approach also solves one of the most common builder frustrations: finishing a major project and not knowing what to do with the leftover materials. Rather than scattering them through existing storage (contributing to the chest monster problem) or building a new room, archive the surplus as a labelled shulker box. If you return to that build style, the palette is ready and waiting.
Rotating Your Build Palette
For builders specifically, tying storage rotation to build themes is one of the most practical applications of the seasonal approach. When you’re actively working with a specific block palette — warm sandstones and terracottas for a desert city, dark stones and nether bricks for a gothic fortress — that palette belongs in your active storage, organised and accessible. Older palettes from completed projects belong in archive.
A dedicated project staging area, stocked with the current build’s materials and tools, can be set up and broken down with each major project — the Minecraft equivalent of a studio space. For ideas on how to design those staging areas within a larger base, take a look at our article on Minecraft interior design principles, which covers creating flexible, multi-use spaces.
Bringing It All Together
The four approaches in this guide work best in combination rather than in isolation. Hidden storage handles the items that need to stay invisible — valuables, rarely accessed reserves, items that would interrupt the visual flow of a room. Room-specific organisation ensures your workflow is efficient and spatially logical. Aesthetic alternatives to the chest grid give your interior design the coherence and intentionality that separates a built space from a functional one. And seasonal rotation keeps the entire system from calcifying into the inevitable chaos of an unmanaged collection.
Storage Planner
🧱 Storage Master Achieved!
All storage systems implemented — your base is fully organised.The underlying principle across all four is the same: storage should be designed, not accumulated. Every chest, barrel, and shulker box you place is a design decision — about what belongs where, how accessible it needs to be, what it should look like, and how it serves your current phase of play. Approach storage with the same intentionality you bring to your exterior builds, and your interiors will finally match the quality of the build around them.
What’s your current storage setup — centralised chest room, distributed micro-storage, or something else entirely? Let us know in the comments, and if you’ve solved a particularly tricky storage problem in a way that works with your aesthetic, we’d love to hear about it.
Continue Your Journey
Interior Design in Minecraft: Making Spaces Feel Lived-In — Take your indoor spaces further with principles borrowed from real-world interior design.
Advanced Minecraft Furniture: Beyond Basic Chairs and Tables — A deeper look at creating furniture that doubles as functional, beautiful storage.
Mastering Redstone Engineering: The Ultimate Guide for Adult Minecraft Players — The mechanical knowledge you need to start building sorting systems and automated storage.
Complete Guide to Minecraft Biomes: Resources, Building and Exploration — How to carry your storage aesthetic across different build styles and biome environments.
February 2026 Roundup: What’s New in Minecraft — Stay up to date with new blocks, features, and community builds that could change how you think about storage and design.
Enjoyed this guide? Subscribe to the Bricks and Blocks Creative newsletter for weekly building tips, news roundups, and exclusive content for serious adult builders.


