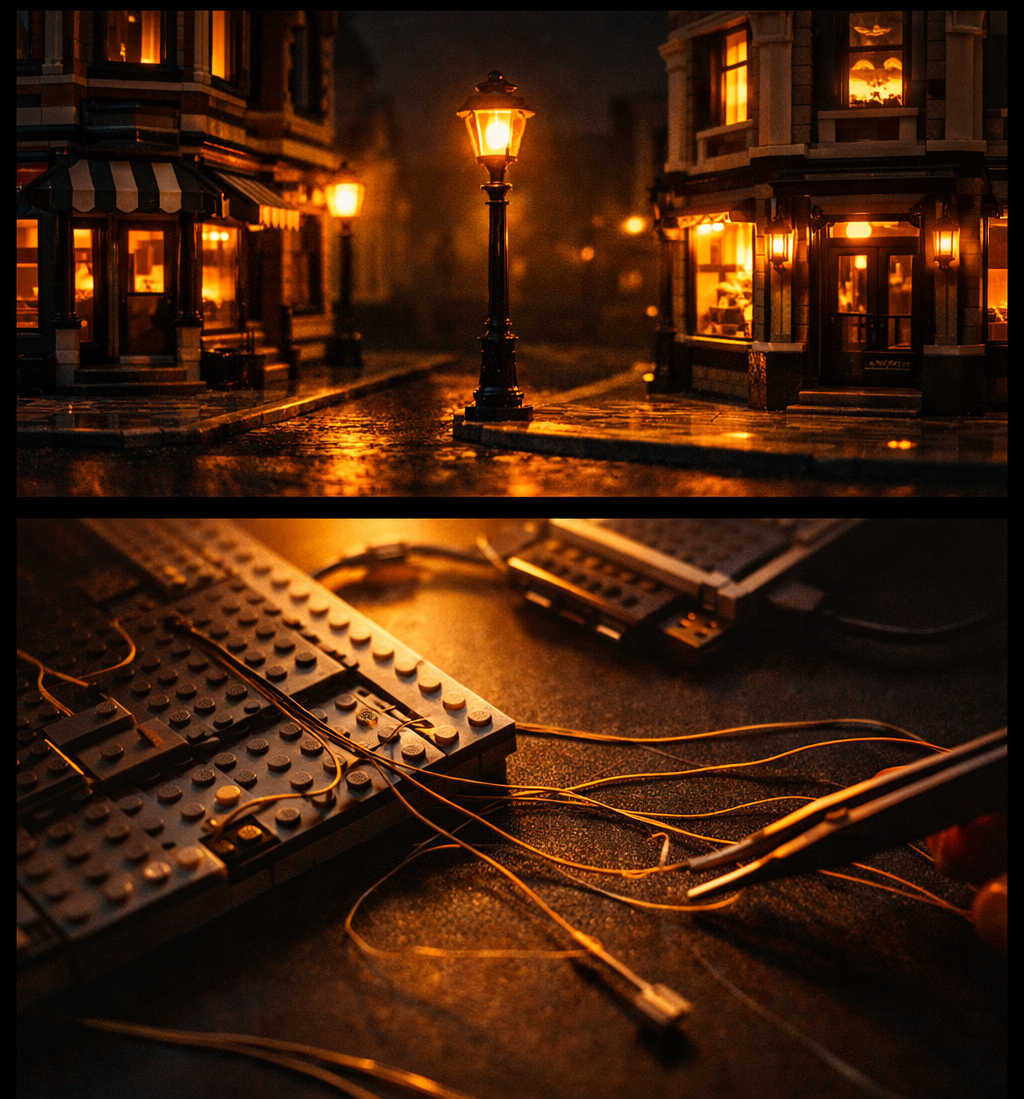
There is a moment every serious city builder encounters sooner or later. You step back from a display that has taken months to assemble, the overhead light casts the same flat glow it always does, and you realise the scene deserves more than that. Proper LED integration does not merely illuminate a Lego city; it transforms it into something that reads differently at different times of day, draws the eye to focal points, and gives the whole layout a sense of life that bricks alone cannot provide.
This guide covers everything you need to get that transformation right: which LED systems suit which city scales, how to manage wiring without compromising your builds structurally, how to place street lighting so it feels urban rather than theatrical, and how to set up a day/night switching arrangement that actually works in practice. Whether you are just starting to think about lighting for a first modular display or looking to retrofit a mature layout, the principles here apply.
Understanding LED Types and Power Systems
Before buying a single component, it helps to understand the three practical tiers of Lego city lighting, because the right choice depends entirely on the scale and permanence of your display.
Battery-Powered Systems for Smaller Displays
For a single modular building or a small vignette display, simple battery-powered LED kits are the most accessible starting point. These typically come with pre-wired LEDs, inline resistors, a small distribution board, and a AA battery pack. The advantage is simplicity: no cable management into a table or power strip, no commitment to a fixed layout. You can move the building freely, which matters enormously during the planning phase of a city build when positions change frequently.
The limitations become apparent quickly. Battery life is finite, and the inconvenience of replacing or recharging cells across multiple buildings in a larger layout grows tedious fast. Battery systems are best treated as a testing phase, useful for working out LED placement in individual structures before committing to a more permanent arrangement.
USB-Powered Systems for Serious City Layouts
For most adult city builders, USB-powered LED systems represent the practical standard. A single USB power bank or mains-connected USB hub can feed multiple buildings and street lamps simultaneously when the layout is organised into zones, which is the approach most lighting guides converge on for good reason. USB power is stable, the cabling is thin and manageable, and the voltage is consistent enough that LEDs behave predictably across an entire display.
The key specification to look for in USB LED kits designed for Lego is the gauge of the wire. Thinner-gauge cables, often marketed specifically for Lego integration, compress more easily between plates and studs and leave less visible bulk at connection points. This makes the difference between a layout where wiring looks considered and one where it looks like an afterthought.
Warm white LEDs are consistently recommended for city themes over cool white, and the reasoning is straightforward once you hold both versions against a building. Cool white reads as clinical and slightly blue, closer to hospital lighting than the warm sodium glow of real street lamps or the amber quality of incandescent window light. Warm white integrates far more naturally with the colours of a Lego modular streetscape and reads as genuinely inhabited rather than staged.
Programmable Controllers for Advanced Displays
At the upper end of the spectrum, programmable LED controllers allow for fades, scene transitions, blinking effects, and animated window cycling. These systems add considerable complexity in setup but can produce genuinely cinematic effects, particularly for day/night mode switching, where the transition between a fully lit daytime city and a warmly glowing evening scene becomes gradual rather than abrupt. If you are building a permanent display with an audience in mind, the investment is well justified. If the layout moves regularly or you are still developing the city plan, a programmable system is probably premature.
Planning Wiring Before Final Assembly
The most important piece of advice for Lego city lighting is unglamorous but non-negotiable: plan the electrical layout before closing your walls. Retrofitting LEDs into a completed building almost always involves either visible wire runs along exterior surfaces or partial disassembly that risks damaging details you spent significant time on.
Routing Wires During the Build
The natural architecture of Lego construction is unexpectedly accommodating for wire management when you work with it rather than against it. Gaps between stud columns, spaces beneath raised baseplates, channels along plate edges, the hollow interiors of thick walls built in System: all of these provide routes that swallow thin LED wires almost invisibly. The technique is to run the cable to its final position as you lay each course of bricks, rather than threading it through a completed structure.
For multi-storey buildings, routing the supply cable vertically through an internal partition wall works well. You build the partition around the wire, leaving it fully enclosed, and bring the wire out at floor level to feed LED strips or individual point lights on each storey. Matching wire colour to the surrounding bricks helps at any point where a short length of cable is visible during normal viewing angles.
Managing Cables Between Buildings
Once wiring exits individual buildings, it needs to travel across the baseplate to a central power hub without becoming a visual distraction. Running cables along the rear edge of the layout is the obvious approach for a display viewed from one side, but for island-style displays accessible from all angles, the under-table route becomes important. A raised display surface with a cable management channel below, feeding up through drilled or planned apertures at each building location, is the solution most builders with permanent large-format displays eventually arrive at. Planning that infrastructure before the layout is populated is considerably easier than retrofitting it. The guide to building a LEGO city on a budget covers table and surface solutions worth considering at the planning stage.
For above-table cable runs, street furniture is your best friend. Cables can travel concealed beneath raised road plates, inside hollow lamp post bases, along the inner faces of garden walls, and under planted areas with foliage bricks covering the route. The goal is that a viewer approaching the layout from any angle cannot trace a cable run with their eye.
Street Lighting: Placement and Spacing
Street lighting in a real city does specific spatial work. It defines roads, marks intersections, makes pedestrian routes legible at night, and signals the presence of commercial activity at storefronts and plazas. Applying those same principles to a Lego city layout produces lighting that feels coherent rather than arbitrary.
Thinking in Urban Zones
The most useful framework for street light placement is to divide the layout into zones by character: high-density commercial streets, residential side streets, civic plazas, and quieter peripheral areas. High-density zones justify closer lamp spacing and brighter coverage. Residential streets benefit from slightly warmer, more widely spaced fittings that suggest the relaxed pace of neighbourhood life. Civic spaces, parks, and plazas work well with feature lighting rather than standard lamp posts: bollards, up-lit trees, decorative lamp clusters near a fountain or monument.
This zonal approach also makes power management easier. Grouping buildings and street lamps by zone onto separate USB branches means you can light specific areas of the city at full brightness for photography or display while leaving others at reduced output, which is practically useful for larger layouts where powering everything simultaneously draws more current than a single hub comfortably handles. The infrastructure decisions that underpin this connect directly to the ideas in designing realistic LEGO city streets, which covers road width and layout patterns.
Focal Points and Contrast
Clustering lights around focal points, then allowing the spaces between them to be relatively dim, produces a far more convincing night scene than uniform illumination. A corner with a bright café window, a lit street lamp, and a glowing phone box immediately reads as the centre of activity. The darker stretch of road leading toward it tells the viewer there is somewhere worth walking to.
In practical terms, this means accepting that some parts of your layout will be significantly less lit than others, and that this is correct rather than a gap to fill. Shadows and relative darkness are not failures of the lighting scheme; they are what makes the lit areas register as meaningful. The LEGO lighting and photography guide explores how this principle applies when you move from display lighting into photography sessions.
Testing Before Committing
Before finalising any street lamp position, power the lamps and look at the scene in a darkened room. The pooling effect of individual lamp posts becomes apparent only in darkness, and it frequently reveals that positions which looked logical on a lit-room display table produce awkward overlapping pools or unexpected dark patches in the actual night scene you are aiming for. Test, adjust, then close up the wiring.
Hiding Wires in Buildings and Street Infrastructure
The mechanics of wire concealment vary between building types, but a few consistent principles cover most situations.
Within Modular Buildings
Creator Expert modulars and custom modular-scale buildings typically have thick exterior walls and partition walls between the ground floor retail space and the upper storeys. These internal spaces are valuable conduit for LED wiring. A cable entering through the underside of the ground floor baseplate, routed vertically through a rear partition wall, and exiting at each floor level through a gap between two plates can feed LEDs on every storey without any visible wire on the exterior.
Window lighting, one of the most effective effects in city displays, works best when the LED sits just inside the window opening rather than further into the room. This concentrates the light on the window aperture itself and produces the warm glow-from-within effect of an occupied building at night. If you are building the interior to display-quality standard, placing LEDs to light the interior details rather than just glow at the window reads as significantly more refined.
Within Road and Pavement Infrastructure
Raised road plates in standard Lego layouts sit above the baseplate on support studs, creating a cavity that is ideal for cable runs. Cables travelling along this channel can exit at any point along the road to feed lamp posts without any above-surface routing. Lamp posts themselves work best with the supply cable routed up through a hollow interior stack rather than wrapped around the exterior shaft, which is achievable with custom lamp post designs built in System rather than using single-piece lamp post elements.
Pavement-level features like phone boxes, letterboxes, and newspaper stands can conceal short connection runs neatly, particularly when the cable colour matches the base colour of those features. The advanced LEGO road building guide covers the construction techniques that make these infrastructure features adaptable to lighting integration.
A Pre-Closure Checklist
Before sealing any wall or floor section permanently, running through a brief checklist prevents the common frustrations: test every LED before closing the structure, leave a short loop of spare cable at any point where a connection might need adjustment later, group cables by zone and label them if the layout is large enough that identification becomes difficult, and plan at least one accessible maintenance point per building where a section can be opened without significant disassembly. This last point is easy to overlook and deeply regretted when an LED fails six months into a display that has grown up around it.
Creating Day and Night Display Modes
The most effective Lego city lighting setups do not simply toggle between all lights on and all lights off. They treat the day scene and the night scene as distinct presentations of the same layout, each designed to show different aspects of the city.
Separate Circuits for Interior and Exterior Lighting
The practical foundation of day/night switching is keeping interior window lighting and exterior street lighting on separate USB branches or physical switches. This gives you four distinct scene states: daytime with no artificial lighting active, the transitional dusk state where interiors are lit but exterior lamps are not yet on, the full evening scene with both active, and a late-night state where street lamps continue but interior lights dim or extinguish. Each of those scenes communicates something different about the city, and having independent control over the two circuits costs very little in planning but delivers considerably more expressive range in display.
For layouts viewed by visitors or set up for photography sessions, the ability to say "here is the city at dusk" and "here is the city at midnight" as two distinct states is genuinely engaging. It also reveals details in the architecture that flat daytime viewing obscures: the depth of a window reveal, the quality of a brick surface that picks up raking light from a street lamp, the relationship between a lit interior and the pavement outside.
Programmable Fades and Transitions
If you are using a programmable controller, the transition between day and night scenes becomes a matter of designing the fade rather than simply switching. A gradual dimming of the overall ambient output, combined with an increasing brightness on warm window LEDs and street lamps, can replicate the quality of a real city moving from late afternoon into evening over the course of a few minutes. This is particularly effective for display events or in a dedicated display room where the lighting can run on a loop.
Animated effects, blinking lights for a neon sign effect, slowly cycling window brightness to suggest movement inside buildings, a distant lighthouse turning if your layout includes a waterfront: these are the applications that make programmable systems worth the added complexity. The LEGO city building for adults beginners guide gives context for how lighting ambition tends to grow alongside the layout itself, which is useful framing when deciding how much system complexity to build in from the start.
Ambient Room Lighting
One aspect of day/night display that is frequently underestimated is the role of the ambient room lighting rather than the LEDs in the city itself. A layout viewed in a room with overhead fluorescent lighting will never read as a night scene regardless of how sophisticated the internal LEDs are, because the ambient light washes out the contrast. Display lighting at the room level, typically a dim ambient with focused downlighting or side lighting on the layout itself, does as much work as the LEDs inside the buildings. Thinking about the viewing environment is as important as thinking about the internal electrical system.
If your layout occupies a dedicated room or alcove, investing in dimmable overhead lighting and a blackout arrangement for the worst ambient sources transforms what the city lighting can actually achieve. The planning your LEGO city layout guide covers display environment decisions alongside the more familiar questions of table size and baseplate arrangement.
Bringing It Together
LED integration rewards builders who plan methodically and build the electrical infrastructure into the model rather than applying it afterward. Start with a zone plan that maps your power hubs and supply routes before a single LED is purchased. Choose warm white throughout for interior and street lighting unless a specific building or feature calls for something different. Route cables during construction, test before closing, and group by zone so that maintenance and scene-switching remain manageable as the layout grows.
The day/night switching capability, even in its simplest form with two separate USB branches, is worth building in from the start because it changes how you and anyone viewing the layout engages with it. A city that can be shown in two distinct lighting states is a city with genuine depth, and that depth is what distinguishes a serious adult display from a collection of bricks on a table.
For builders expanding an existing layout, the creating a LEGO city master plan guide covers the zoning and infrastructure planning that makes a phased approach to lighting integration coherent rather than accumulative chaos. The investment in getting this right, in the planning, the component choices, and the patient routing of cables during construction, pays off every time someone looks at the layout in a darkened room and asks how you did it.
Continue Your Journey
- Planning Your Lego City Layout: Baseplates, Tables, and Display Solutions — The foundational display decisions that shape how lighting can be integrated from the start
- Designing Realistic LEGO City Streets: Width, Patterns, and Traffic Flow — Street infrastructure design that works with, rather than against, LED placement
- Advanced LEGO Road Building: Curves, Hills, and Elevation Changes — Techniques for the road sections that contain your under-surface cable runs
- LEGO Lighting and Photography: A Color-Conscious Approach — Translating your lit display into photographs that do it justice
- Creating a Lego City Master Plan: Scale, Zones, and Growth Strategy — Long-term planning that accounts for lighting infrastructure from the outset
What is the single biggest challenge you have encountered with Lego city lighting? Whether it is cable management, finding the right LED temperature, or getting the day/night balance right, share your experience in the comments.
Want more guides for your LEGO city build? Subscribe to the Bricks & Blocks Creative newsletter for new posts, practical building advice, and the latest LEGO news every week.