
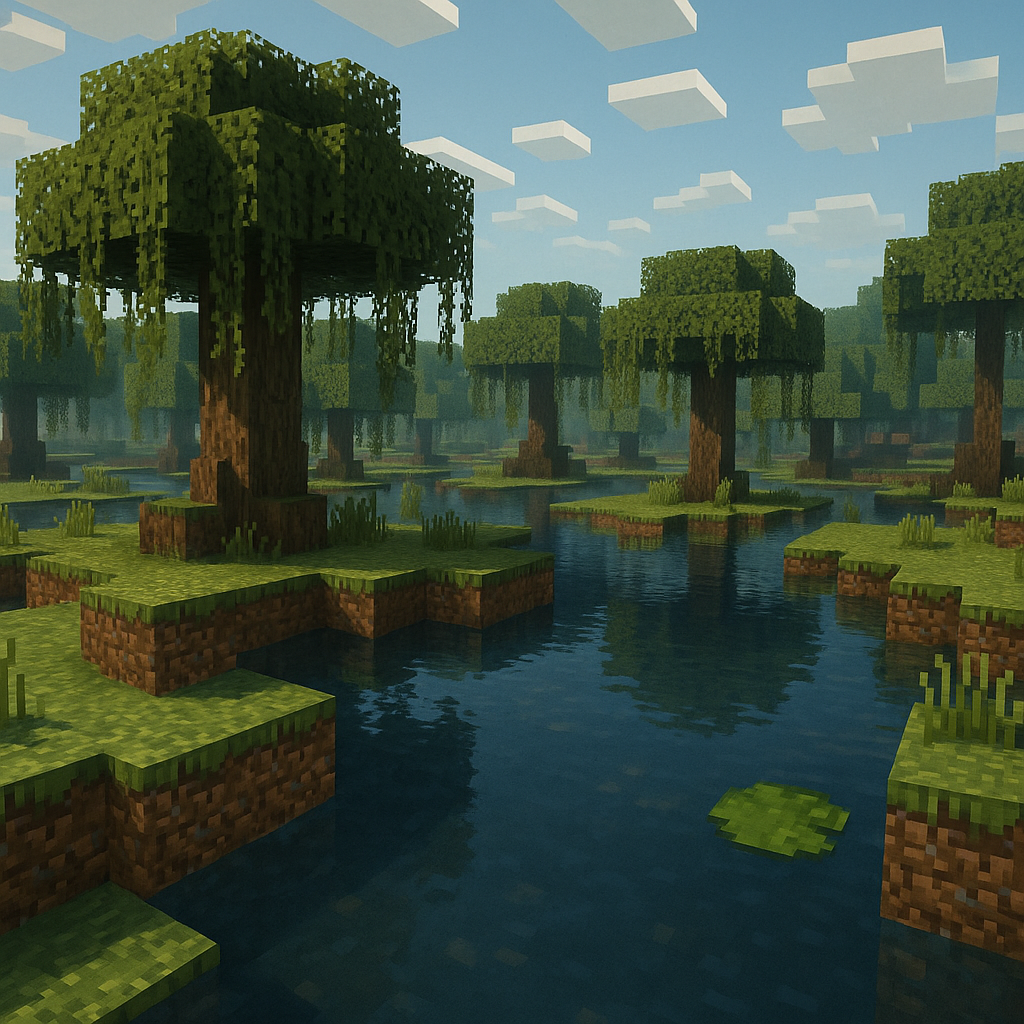
Swamp biomes have long been the overlooked stepchild of Minecraft’s diverse landscapes. Most players see them as obstacles—muddy, waterlogged terrain that complicates traditional building approaches. But for builders who understand how to work with water instead of against it, swamps offer something magical: atmospheric goldmines perfect for creating structures that feel genuinely lived-in and mysterious.
With Halloween approaching, there’s no better time to master swamp building. The natural fog, ambient sounds of dripping water, and eerie lighting create an atmosphere that no other biome can match. Whether you’re constructing a practical stilted house for survival or designing an atmospheric witch’s workshop for creative expression, swamp biomes reward builders who embrace their unique challenges.
This guide explores two distinct approaches to swamp construction. We’ll start with functional stilted houses—elevated structures inspired by real-world Southeast Asian architecture—that solve the practical problem of building in waterlogged terrain. Then we’ll dive into witch’s workshops, embracing the spooky, cluttered aesthetic that makes swamps perfect for Halloween builds. Both approaches require understanding swamp-specific techniques, from elevated foundations to strategic lighting that maximizes atmosphere while preventing mob spawning.
Understanding Swamp Biome Challenges
Before placing your first block, you need to understand what makes swamp building fundamentally different from construction in other biomes. The challenges aren’t insurmountable—they simply require different thinking.
Water Management and Elevation
Swamp biomes feature irregular water tables that defy the usual building logic. Unlike oceans with consistent depths or rivers with predictable flow, swamps create pockets of shallow water interspersed with small land masses. Traditional ground-level foundations become partially submerged, creating awkward transitions and mob spawning issues.
The solution lies in elevation. By building upward from support pillars that extend below the water line, you create stable foundations that work with the terrain rather than fighting it. This approach, borrowed from real-world stilt architecture common in flood-prone regions, turns the swamp’s primary obstacle into an architectural feature. Your builds gain visual interest from the visible support structure while remaining functionally above the waterline.
Think of it as building a deck over a pond rather than trying to drain the pond itself. The water becomes part of your design aesthetic, not something to eliminate. This principle applies whether you’re constructing a simple shelter or an elaborate compound.
Material Considerations
Swamp aesthetics demand specific material choices. The natural palette of dark oak trees, murky water, and overcast skies creates a muted, earthy atmosphere. Building with bright materials like white concrete or light-colored wood creates jarring visual discord that breaks the immersive quality swamps offer.
Dark oak becomes your primary structural material. Its deep brown tones complement the swamp environment naturally, and it’s conveniently abundant in the biome itself. Spruce works as an alternative when you want slightly lighter tones without sacrificing the weathered appearance. For accent elements, stone bricks provide a time-worn look that suggests structures have been standing for years.
The key is embracing materials that look aged and natural. Polished blocks feel out of place—you want textures that suggest weathering and wear. When planning your build, understanding how different materials interact becomes crucial, similar to how Lego builders must consider color blocking when designing complex models. The principle transfers directly to Minecraft: cohesive material palettes create professional-looking results.
Environmental Integration
The most successful swamp builds don’t look dropped into the environment—they look like they’ve grown there. This requires working with existing features rather than clearing everything for a blank canvas. Those drooping vines aren’t obstacles; they’re free decoration that adds character without additional building. The massive dark oak trees provide natural anchor points for structures or can be incorporated directly into your design.
Lighting presents both challenge and opportunity. Swamps generate a unique fog effect that diffuses light sources, creating an ethereal quality absent in other biomes. Strategic lantern placement creates pools of warm light in the gloom, dramatically increasing atmosphere. Soul lanterns push this further, their blue-white glow suggesting otherworldly presence perfect for Halloween builds.
Stilted House Tutorial
Let’s begin with the practical foundation: a stilted house that provides comfortable living space while embracing swamp aesthetics. This design balances functionality with atmosphere, creating a structure that feels naturally at home in its environment.
Foundation and Support Structure
The foundation determines everything that follows. Unlike traditional building where you can place blocks directly on the ground, stilted construction requires planning your vertical support system before worrying about walls or roofs.
Materials you’ll need for the foundation:
- Dark oak logs (approximately 40 for a 9×9 platform)
- Dark oak planks (around 100 for the platform itself)
- Stone bricks (20-30 for cross-bracing accents)
- Temporary scaffolding blocks for measuring
Start by identifying your build location. Look for an area with relatively consistent water depth—you don’t want some pillars extending two blocks while others need six. Mark your corners with temporary blocks, planning a 9×9 or 11×11 footprint depending on your interior space needs. Odd numbers work better for centered doorways and symmetrical interior layouts.
Your support pillars need strategic placement for both structural realism and practical construction. Place a dark oak log pillar at each corner, then add mid-span supports every four blocks along the perimeter. This creates a visually convincing support pattern while providing plenty of attachment points for your floor joists. Each pillar should extend from the lake or river bed to approximately four blocks above the water surface—high enough to be impressive, low enough to maintain connection with the environment.
Stilted House Foundation Pattern
Overhead View – 9×9 Platform with Optimal Pillar Placement
Building Instructions:
- Step 1: Place corner pillars first at all four corners (marked with gold stars)
- Step 2: Add mid-span support pillars every 4 blocks along the perimeter
- Step 3: Extend all pillars from lake/river bed to 4 blocks above water surface
- Step 4: Add stone brick cross-bracing between corner pillars for visual interest
- Step 5: Lay dark oak planks across pillar tops to create complete platform
- Step 6: Consider leaving 1-2 drainage gaps in floor for atmospheric detail
Here’s where many builders make their first mistake: they build pillar after identical pillar, creating a forest of uniform supports that looks artificial. Add visual interest with cross-bracing between pillars using stone brick stairs and slabs. This diagonal support structure suggests engineering while breaking up the vertical lines. Not every pillar needs cross-bracing—strategic placement on corner pillars creates sufficient visual variety.
With pillars established, lay dark oak planks as floor joists connecting pillar tops. Create a complete platform, but consider leaving occasional one-block gaps in the floor pattern. These “drainage gaps” add realism while creating interesting light patterns from beneath. The gaps won’t cause item loss—they’re purely aesthetic—but they dramatically improve the lived-in quality of your structure.
Wall Construction and Design
Walls in stilted houses should feel lighter than ground-based structures. You’re already elevated, so heavy stone fortifications look out of place. Instead, embrace the timber frame aesthetic with dark oak logs as vertical posts and plank infill.
Place log posts at each corner and at midpoints along longer walls. These become your structural members, visually tying the walls to the foundation pillars below. Between posts, fill with dark oak planks, but don’t create solid walls everywhere. Stilted houses benefit from open sections—covered porches, balconies, or windowed areas that maintain visual connection with the swamp surroundings.
Window placement matters more in stilted houses than traditional builds. You’re elevated, giving you excellent sight lines across the swamp. Place windows at seated height (one block up from floor level) for functional views when using crafting tables or furnaces. Add additional windows near the ceiling to maximize natural light penetration, which becomes crucial given the swamp’s naturally dim conditions.
Consider adding a wrap-around balcony or at least a front porch. Extend your floor platform two blocks beyond the wall line on one or more sides, creating an outdoor space that serves both practical and aesthetic purposes. This becomes your fishing platform, your lookout point, and a transitional space between interior and environment. Rail it with dark oak fences, and add lanterns at corner posts.
The roofing approach defines your house’s character. Steep-pitched roofs feel appropriate for swamp aesthetics—they suggest buildings designed to shed water, fitting the damp environment. Use dark oak stairs and slabs to create a roof that overhangs the walls by at least one block on all sides. This overhang provides visual weight while suggesting weather protection.
Don’t settle for simple pyramidal roofs. Add dormers—small windowed projections that break up the roof plane while adding vertical interest and interior headroom. A single centered dormer on the front face creates a focal point for your entire structure. For larger builds, consider multiple smaller dormers along the sides, though avoid excessive detail that overwhelms the design.
Interior Layout and Atmospheric Details
Interior functionality determines how useful your stilted house becomes in survival mode. Start by identifying your essential functions: crafting area, storage, sleeping space, and food preparation. In a 9×9 interior, you have roughly 70 blocks of floor space—more than enough for comfortable survival living.
Place your crafting table and furnaces near windows where natural light supplements your interior lighting. Use barrels instead of chests for storage—they stack visually better and you can place them in corners without accessibility issues. Position your bed on the back wall where it won’t block traffic flow. If you’re building in multiplayer, consider loft sleeping areas accessed by ladders, freeing floor space for communal work areas.
Lighting strategy matters enormously. Swamps have higher spawn rates in darkness, making under-lit interiors dangerous. However, flooding the space with torches destroys atmosphere. Instead, use lanterns sparingly—one lantern every 8-10 blocks provides sufficient light while maintaining mood. Place them hanging from ceiling beams or sitting on tables. Soul lanterns work if you want eerie blue tones, though regular lanterns provide warmer, more welcoming light for living spaces.
Now for the atmospheric finishing that transforms a functional box into a compelling build. Outside, add vines strategically—not covering everything, but trailing down from roof edges and wrapping occasionally around support pillars. Vines grow over time, so place them sparingly initially. Plant lily pads around your stilts, creating natural transition between structure and water. If you’ve built near existing dark oak trees, consider connecting your house to a tree with a rope bridge (use fence and trapdoors), creating an integrated compound.
Small details complete the illusion. Add a fishing dock extending from one side—a simple platform with fence railings and a chest for tackle. Include a small herb garden on your balcony using flower pots with mushrooms or other swamp-appropriate plants. Hang lanterns from chains beneath your platform, their light diffusing through the water below for a magical evening effect.
One common mistake deserves mention: over-decorating kills the clean lines that make stilted houses appealing. Each element should have apparent purpose. Your house should feel like someone actually lives there, not like a museum display. A few books near the crafting area, some food items on the counter, armor on stands near the door—these suggest habitation. Twenty different decoration items scattered randomly suggest clutter.
Witch’s Workshop Tutorial
Where stilted houses embrace clean functionality, witch’s workshops thrive on deliberate chaos. These builds should feel cluttered, mysterious, and slightly dangerous—places where strange experiments happen and even stranger ingredients get stored. The swamp setting amplifies every atmospheric element.
Location and Foundation
Finding the right spot matters more for witch’s workshops than almost any other build type. You want isolation—not complete remoteness, but a sense of deliberate separation from normal civilization. Look for spots slightly off the main swamp body, perhaps on a small island or tucked behind a cluster of dark oak trees. If an existing witch hut spawned in your swamp, consider building nearby, suggesting your workshop is related to (or responsible for) that structure.
Your foundation approach differs from stilted houses. Rather than consistent elevation, witch’s workshops benefit from irregular, partially submerged platforms that create visual unpredictability. Use stone brick and cobblestone as your primary foundation materials—they suggest age and permanence that wood lacks. Build up from the lake floor with irregular shapes, creating multiple terraced levels that connect through stairs and ramps.
Witch’s Workshop Foundation
Irregular Multi-Level Base Layout – Overhead View
Foundation Building Steps:
- Step 1: Start with the basement—build stone brick walls extending into water, allowing slight flooding
- Step 2: Construct main L-shaped workshop platform using mixed stone brick and cobblestone
- Step 3: Add tower foundation as circular/octagonal base, slightly offset from main structure
- Step 4: Create irregular terrace platforms at varying heights (1-3 blocks above main level)
- Step 5: Build entrance steps with intentional asymmetry—avoid perfect centering
- Step 6: Leave gaps between sections to suggest organic growth over time
🏰 Asymmetrical Design
The L-shape with offset tower creates visual interest and suggests haphazard expansion over years.
🌊 Water Integration
Basement partially submerged creates atmospheric flooding effect and underwater storage potential.
📐 Multiple Levels
Varying platform heights (basement, ground, terraces, tower) add vertical complexity without uniform floors.
🌿 Organic Extensions
Outdoor terraces and herb garden suggest functional additions built as needs arose.
Consider including a partially submerged basement level. This serves both practical and atmospheric purposes—it’s perfect for brewing stands and storage while suggesting secret underground work. Use stone bricks for the walls, allowing water to flood the floor slightly. Place soul sand periodically beneath the water surface, creating bubble columns that add movement and sound.
Don’t aim for symmetry. Witch’s workshops should look like they’ve been expanded haphazardly over years, with additions jutting out at odd angles. This organic growth pattern makes the build feel authentic rather than designed.
Main Workshop Structure
The above-ground structure should suggest both habitation and work. Think of it as equal parts cottage and laboratory—somewhere a person could sleep, but where most activities clearly center on strange experiments.
Materials for the main structure:
- Spruce and dark oak logs and planks (mixing wood types suggests repairs and additions)
- Stone brick and cobblestone (showing age through weathered blocks)
- Dark prismarine (sparingly, for magical accent details)
- Stripped logs (suggesting prepared timber for specific purposes)
- Various window types (different sizes imply different functions)
Start with an irregular footprint—perhaps an L-shape or a main rectangle with an offset tower component. The tower element is essential; it provides dramatic vertical interest while creating the silhouette everyone associates with witchy structures. Make it slightly off-center or positioned at a corner rather than centered on the build—asymmetry increases believability.
Your walls should mix materials deliberately. Primary walls use spruce planks, but include sections of dark oak suggesting repairs. Add vertical log beams irregularly, not at consistent intervals. Some walls might include windows while others remain solid, reflecting internal room functions rather than external aesthetic concerns. Include several small, irregular window sizes—tiny potion lab ventilation windows alongside normal viewing windows.
Create multiple stories, but avoid standard floor levels. Instead of two equal floors, build a main level, a half-loft accessed by irregular stairs, and a tower space that requires climbing. This vertical variety prevents the bland regularity that kills atmosphere. Use trapdoors as hatch-style access points between levels rather than full staircases everywhere.
Witch’s Workshop Tower Structure
Side Cross-Section View – Multi-Level Interior Layout
🌊 Basement Level
Height: 4 blocks tall, partially submerged
- Allow water to flood 1-2 blocks deep
- Place cauldrons and brewing stands
- Add soul sand for bubble columns
- Store waterproof materials
⚗️ Main Workshop
Height: 6 blocks tall, most spacious level
- Multiple brewing stands (3-4)
- Crafting and enchanting area
- Ingredient storage (barrels/chests)
- Working space for experiments
🛏️ Loft Level
Height: 3 blocks tall, cozy low ceiling
- Bed for respawn point
- Personal storage chests
- Small reading nook
- Access via ladder or trapdoor stairs
🔮 Tower Section
Height: 20+ blocks, dramatic vertical element
- Base: Connected enchanting room
- Mid: Ritual circle and experiments
- Upper: Observation deck
- Access: Spiral staircase
💡 Vertical Design Tips:
- Avoid uniform floor heights – Vary ceiling heights to create distinct spaces (low lofts feel cozy, high workshops feel expansive)
- Use multiple access methods – Combine ladders, stairs, and trapdoor hatches for variety and authenticity
- Strategic lighting placement – Soul lanterns in tower, regular lanterns in living areas, hide torches behind blocks
- Create sight lines – Open areas between levels (partial floors) let players see multiple stories at once
- Intentional asymmetry – Tower should be off-center, not perfectly aligned with main structure
- Roof variety – Multiple roof angles and heights suggest additions over time
The roof deserves special attention. Rather than one consistent pitch, create multiple roof sections at different angles, suggesting additions over time. One section might be steeply pitched while another has a lower angle. Include at least one dramatic chimney—oversized and slightly crooked. Build it from stone bricks, allowing it to extend well above the roofline. Consider adding a smaller second chimney for visual balance and to suggest multiple heating sources inside.
Workshop Interior and Details
Interior organization in witch’s workshops follows different rules than normal buildings. You want controlled chaos—everything should look cluttered and used, but players should still be able to navigate and interact with functional elements.
The main workshop area becomes your centerpiece. Place multiple brewing stands—at least three, suggesting ongoing experiments. Position them at different heights using upside-down stairs or slabs as tables. Surround them with ingredients in item frames: spider eyes, blaze powder, ghast tears. Add several cauldrons, some filled with water, others empty. Include at least one active brewing stand with potions in progress.
Witch’s Workshop Interior
Main Workshop Floor – Functional Layout & Atmospheric Details
⚗️ Brewing Zone
- 3-4 brewing stands at different heights
- Multiple cauldrons (water-filled)
- Ingredient shelf with potion items
- Soul lanterns for eerie lighting
📦 Storage Area
- Mix of barrels and chests
- Item frames with rare ingredients
- Open storage (visible items)
- Organized chaos aesthetic
📖 Enchanting Corner
- Central enchanting table
- Bookshelves surrounding (15 total)
- Some shelves askew/irregular
- Purple particle ambiance
🔨 Work Area
- Crafting table for quick access
- 2+ furnaces for processing
- Work surface (table/counter)
- Tool accessibility focus
🔮 Ritual Space
- Glowing circle pattern on floor
- Candles or soul fire around edge
- Center crystal/focus point
- Mysterious atmosphere
🛏️ Rest Corner
- Simple bed for respawn
- Personal chest nearby
- Separated from work areas
- Quieter, dimmer lighting
🌟 Atmospheric Details to Add:
- Cobwebs: Place strategically in corners and high places—not everywhere, just enough for aged appearance
- Hanging lanterns: Use soul lanterns on chains for eerie blue glow; regular lanterns for warm spots
- Scattered items: Books on surfaces, empty bottles, random ingredients in item frames suggesting active work
- Skull decorations: Wither skeleton skulls, regular skulls on shelves or walls for mystical aesthetic
- Armor stand figures: Robed figures positioned as if conducting experiments (use carved pumpkins, leather armor)
- Particle effects: Respawn anchors, crying obsidian for purple particles; brewing stands in action
- Mixed lighting: Combine soul fire (blue), regular fire (orange), and lanterns for varied light sources
- Cluttered surfaces: Don’t leave counters bare—add flower pots, buttons, pressure plates as detail elements
Storage should look organic rather than organized. Use barrels and chests scattered throughout rather than in neat rows. Mix in some open storage—a chest with the lid propped open (use a trapdoor above it), shelving made from upside-down stairs with ingredient bottles (potion items in item frames). Include some clutter items: books scattered on surfaces, empty bottles, random crafting ingredients that suggest ongoing work.
Lighting strategy becomes crucial for atmosphere. Forget traditional torches—they’re too cheerful. Soul torches and soul lanterns become your primary light sources, their blue-white glow suggesting otherworldly power. Place them sparingly; you want pools of light separated by shadows. Consider using jack o’lanterns hidden behind other blocks, creating ambient orange glow without visible sources. Respawn anchors and crying obsidian emit purple particle effects perfect for suggesting magical energy, though they require Nether materials.
Swamp Building Lighting Strategy
Balancing Atmosphere with Mob Safety – Complete Guide
🏠 Stilted House Strategy
- Primary goal: Comfortable, safe lighting
- Use warm lanterns for welcoming atmosphere
- Place lights every 8-10 blocks for coverage
- Hang lanterns from eaves and balconies
- Add underwater lighting around pillars
- Path lighting to connected structures
- Interior: one lantern per 10 blocks
🧙♀️ Witch’s Workshop Strategy
- Primary goal: Atmospheric with safe zones
- Mix cool and warm light sources
- Use soul lanterns for eerie ambiance
- Hide lights behind blocks for mystery
- Create intentionally dim corners
- Purple particles from magical blocks
- Strategic darkness as design element
🌊 Underwater Lighting
- Place sea lanterns beneath water surface
- Glowstone blocks under lily pads work too
- Creates ethereal diffused glow effect
- Lights pathways between structures
- Reflects beautifully at night
- Safe mob lighting without visibility
- Combine with fog for magic atmosphere
🎃 Hidden Light Techniques
- Glowstone behind stairs/slabs
- Jack o’lanterns behind trapdoors
- Lanterns behind signs
- Sea lanterns under carpets/greenery
- Torches behind paintings
- Creates ambient glow without source
- Maintains atmosphere while preventing spawns
✅ Lighting Best Practices
- Mix warm and cool light sources for visual interest
- Hide light sources when possible for ambient effect
- Use different light levels in different zones
- Place underwater lights for dramatic reflections
- Vary light source heights (ground, mid, ceiling)
- Test at night to ensure mob safety
- Use soul fire/lanterns in magical/mysterious areas
- Light pathways more brightly than periphery
- Create light pools separated by shadow
- Consider how swamp fog diffuses light
❌ Lighting Mistakes to Avoid
- Don’t line everything with torches (destroys atmosphere)
- Don’t use uniform lighting everywhere (boring)
- Don’t place lights in perfect geometric patterns
- Don’t over-light interiors (loses coziness)
- Don’t ignore mob spawn light levels (dangerous)
- Don’t use only one light type (monotonous)
- Don’t light the entire build uniformly
- Don’t forget to light under platforms (mobs spawn)
- Don’t make all areas equally bright
- Don’t ignore the natural swamp fog effect
The enchanting area warrants its own space—perhaps the tower room or a loft area. Place your enchanting table centrally, surrounded by bookshelves, but add personality: some bookshelves sideways or upside-down (using commands or creative techniques similar to illegal connections in Lego building), suggesting a chaotic approach to magical organization. Scatter additional books around, use lecterns with written books for “grimoires,” and include skull decorations.
Outdoor elements extend your workshop’s character into the surrounding swamp. Create a small herb garden using various swamp plants—mushrooms, lily pads in water-filled cauldrons, and nether wart growing in soul sand patches. Add a ritualistic circle made from sea lanterns or other light-emitting blocks buried beneath slabs, creating a mysterious glowing pattern. Include a small dock or boat launch, suggesting your witch travels the swamp collecting ingredients.
Consider adding a space for a familiar—a small cat or parrot perch near the entrance. Include a feeding station (a bowl made from a cauldron or cooking pot represented by a composter). These small details suggest habitation and routine amid the chaos.
Cobwebs become your friend in witch’s workshops. Place them in corners, across ceiling beams, and anywhere that suggests neglect or age. Don’t overdo it—strategic placement maintains atmosphere without making everything look abandoned. Combine webs with spiders in item frames or spawn eggs in pedestals to suggest these aren’t just random arachnid inhabitants.
For true Halloween atmosphere, add mysterious experiments. Use armor stands to create alchemical “figures”—perhaps a skeleton wearing robes holding a potion, positioned to suggest it’s conducting research. Place unusual items in item frames as ingredients: tropical fish suggesting rare components, nether items implying dangerous experiments, end-game materials representing forbidden knowledge.
Advanced Techniques and Settlement Integration
Individual buildings impress, but connected settlements create genuinely memorable builds. Once you’ve mastered single structures, expanding into swamp compounds reveals the biome’s full potential.
Creating Cohesive Swamp Settlements
The key to successful settlements lies in logical connections between structures. Don’t just build multiple houses—create reasons for them to exist together and systems for moving between them.
Boardwalks and bridges become essential infrastructure. Construct elevated pathways between buildings using dark oak planks and fence railings. Keep walkways narrow—two blocks wide creates intimacy while maintaining functionality. Add lanterns every 8-10 blocks for lighting and visual rhythm. Where paths intersect, create small platform nodes with seating or decorative elements.
Consider building a central gathering space—perhaps a covered market platform or a communal cooking area. This becomes your settlement’s heart, the place where paths naturally converge. Use larger support pillars and wider platforms to suggest importance. Add benches (stairs), tables (upside-down stairs with slabs), and abundant lighting.
Think about practical necessities that create building opportunities. A fishing dock serves the entire settlement, requiring a larger design than individual house docks. Shared storage warehouses justify substantial structures. An elevated guard tower or lighthouse provides navigation while offering bird’s-eye views of your creation. Each functional building adds character while justifying its existence.
Environmental storytelling distinguishes professional builds from amateur work. Create signs of daily life: fishing rods and buckets on docks, farm areas with crops adapted to swamp conditions (pumpkins, mushrooms), and boats tied to various structures. Build some areas that look newer and others showing age or partial abandonment, suggesting settlement growth over time.
Hidden details reward exploration. Tuck a small shrine to a Minecraft “swamp deity” in a remote corner. Create a tiny boat workshop partially hidden by trees. Add a mysterious locked door that leads nowhere, sparking player imagination. These elements create a sense that your settlement has history and secrets.
Lighting Strategy for Maximum Atmosphere
Lighting makes or breaks atmospheric builds. Poor lighting destroys mood while creating dangerous spawn zones. Excellent lighting creates magic while maintaining safety.
The fundamental principle: light sources should rarely be visible. Don’t line everything with torches. Instead, hide light sources behind other blocks, creating ambient glow without obvious sources. Place glowstone behind stair blocks, creating wall sconces. Bury sea lanterns beneath carpets or greenery, producing mysterious ground-level illumination. Use jack o’lanterns behind trapdoors or signs, their faces hidden while their light remains.
Vary your light levels deliberately. Not every area should receive the same illumination. Main pathways need bright, safe lighting—lanterns on posts work perfectly. Peripheral areas can be darker, creating atmospheric pockets that draw the eye. Interior spaces should have cozy lighting—dimmer than outdoor paths but bright enough to prevent spawning.
Color temperature matters more than most builders realize. Regular lanterns produce warm orange-yellow light that feels welcoming and traditional. Soul lanterns create cool blue-white light that suggests mystery and magic. Mix them strategically: warm light in living areas, cool light in experimental or mystical spaces. The contrast between warm and cool zones creates visual interest while subtly guiding players through your build.
Consider water-based lighting effects. Place light sources beneath water surfaces—sea lanterns work perfectly, as do glowstone blocks. The water diffuses the light, creating an ethereal quality impossible to achieve elsewhere. Ring your stilted houses with underwater lighting to create stunning reflections during night building sessions.
For Halloween builds, strategic darkness becomes a tool. Allow some areas to remain genuinely dark—not spawning dark, but dim enough to create unease. A shadowy corner in your witch’s workshop, a darkened path between buildings, an unlit storage area—these create tension that makes lit areas feel safer and more welcoming by contrast.
Material Gathering and Preparation
Before starting ambitious swamp builds, efficient material gathering saves hours of frustration. Plan your collection strategy to maximize efficiency while minimizing tedium.
For Stilted Houses
Wood collection: Dark oak trees produce 4-6 logs each, and you’ll need approximately 200 logs for a complete settlement of three medium houses with connecting bridges. Bring efficiency-enchanted axes and replant saplings immediately. A single swamp biome can sustain extensive building without deforestation if you replant consistently.
Stone materials: Stone brick requires smelting cobblestone then crafting bricks—a time-intensive process. Set up multiple furnaces running simultaneously while you collect wood. Alternatively, raid jungle pyramids or strongholds for finished stone bricks if you’re not opposed to exploration-based collection.
Glass for windows: Beach biomes usually border swamps, providing easy sand access. Bring several stacks of coal or alternative fuel and smelt on-site. Expect to need 64-128 glass blocks for windows in a moderate-sized house.
Time estimate: Gathering materials for a single stilted house requires 1-2 hours in survival mode, assuming you’re working in an established world with basic tools. Double this for first-time builders who’ll need to experiment with designs.
For Witch’s Workshops
Nether materials complicate witch’s workshop builds. Soul sand, soul soil, crying obsidian, and nether bricks all require portal access. Plan a single focused Nether expedition: bring building blocks for quick bridging, fire resistance potions, and plenty of inventory space. Target bastion remnants for the greatest material variety.
Brewing ingredients for functional workshops: spider eyes from spiders, blaze powder from blaze rods (Nether fortress), ghast tears from ghasts. These aren’t building materials but add immense authenticity. Collect while gathering structural materials.
Specialized blocks: Dark prismarine requires ocean monument access or trading with wandering traders. If unavailable, substitute with other dark, mysterious blocks—dark oak buttons, dark oak pressure plates, or even carefully placed black concrete powder can create similar accents.
Time estimate: Material gathering for a witch’s workshop spans 2-3 hours minimum, with Nether access adding another hour. The broader material variety requires more planning than simple stilted houses.
Customization Ideas and Variations
Swamp building offers endless customization possibilities. Once you’ve mastered basic techniques, experiment with these variations to create unique structures.
Stilted House Variations
Transform the basic stilted house into specialized structures through targeted modifications. A fishing lodge emphasizes outdoor space—enlarge balconies dramatically, add multiple dock extensions, include dedicated fish cleaning areas, and display mounted fish trophies (use fish in item frames). Focus outdoor features over interior complexity.
A trading post design creates a commercial structure rather than residential. Build a larger, open-plan interior with counter space for trades, visible storage to showcase goods, and customer waiting areas. Add a bell to announce trading hours and create a dock for “customer” arrivals.
Multi-story apartments stack multiple living units vertically, connected by external or internal staircases. Each level becomes a separate residence, creating density without sprawl. This works brilliantly in multiplayer servers where multiple players want nearby but private spaces.
Interconnected village concepts link multiple medium stilted houses into a cohesive compound. Connect structures at second-story levels with covered bridges, creating an elevated neighborhood. Ground level remains open for boat storage, farming, or simply preserving natural swamp character.
Witch’s Workshop Variations
Apothecary shop designs emphasize commercial potion-making over mysterious experimentation. Create an organized storefront with clearly labeled potion types in item frames, clean shelving systems, and a customer service counter. The back room remains cluttered—where the magic happens—but the front face prioritizes accessibility.
Wizard tower adaptations stretch your workshop vertically into a dramatic multi-story tower. Each floor serves different functions: ground level for storage and supplies, second floor for brewing and potion work, third floor for enchanting and study, tower top for observation or ritualistic work. Connect floors with spiral staircases built from stairs blocks.
Alchemist’s laboratory approaches focus on experimental apparatus over magical mysticism. Emphasize brewing stands, furnaces, and crafting tables as scientific equipment. Use more glass and metal blocks (iron bars, iron trapdoors), fewer organic elements. Create a steampunk aesthetic within the swamp setting.
Potion shops for multiplayer servers convert witch’s workshops into functional businesses. Create clear transaction spaces, secure storage for valuable ingredients, and production areas visible to customers. Add pricing signs and “open/closed” indicators using redstone lamps or other mechanisms.
Halloween-Specific Enhancements
Jack o’lanterns deserve prominent placement in Halloween builds. Use them as hidden light sources behind blocks, line pathways with carved pumpkin faces, or create towering jack o’lantern totems. Consider building a dedicated pumpkin patch nearby with various carved designs on display.
Pumpkin patch integration creates natural seasonal transition areas. Cultivate patches of pumpkins around your builds, creating harvest-ready areas that suggest fall agriculture. Add haybales, brown terracotta for tilled earth, and scarecrows (armor stands with pumpkin heads and ragged clothing).
Spooky sound effects in Minecraft come from environmental sources. Place note blocks beneath pathways to trigger eerie notes when walked upon. Drip leaves create unsettling water dripping sounds. Nether portals emit ambient ghostly noises. Strategically placed sound sources transform atmosphere without visible modifications.
Fog enhancement isn’t directly controllable, but you can maximize its effect through contrast. Build structures that peek above the fog layer, creating mysterious silhouettes. Use tall towers or rooflines that break through the mist, suggesting your settlement is larger than what’s immediately visible.
Building for Success
Swamp biomes transform from frustrating obstacles into atmospheric wonderlands once you understand their unique requirements. The techniques we’ve explored—elevated foundations, environmental integration, strategic lighting, and atmospheric detailing—apply whether you’re building practical survival housing or creating elaborate Halloween showpieces.
The stilted house approach provides a template for functional swamp construction that works in survival mode while maintaining visual appeal. By elevating your structures and embracing the water rather than fighting it, you create builds that feel naturally adapted to their environment. These aren’t buildings dropped into swamps—they’re structures designed specifically for swamp existence.
Witch’s workshops push atmosphere to the extreme, creating spaces that tell stories through intentional clutter and mysterious details. They demonstrate how swamp biomes amplify certain aesthetics impossible to achieve elsewhere. The combination of fog, water, and natural darkness creates perfect conditions for builds that should feel slightly dangerous and thoroughly magical.
Whether you’re preparing for Halloween or simply expanding your building repertoire, swamp construction offers challenges that make you a better builder. The constraints force creativity—you can’t rely on standard building techniques, so you develop new approaches. The atmospheric potential rewards builders who think beyond simple box structures, encouraging environmental integration and attention to detail.
Start with a single stilted house to master the elevation techniques, then expand into workshops and settlements as your confidence grows. Each build teaches lessons applicable to future projects, both in swamps and beyond. The principles of environmental integration, natural material selection, and atmospheric lighting transfer to every Minecraft biome.
Your swamp builds don’t need perfection—they need character. Embrace asymmetry, intentional weathering, and the slightly chaotic energy that makes swamp structures memorable. Let vines grow, allow water to lap at your stilts, and create spaces that feel lived-in rather than pristine. That’s where swamp building transcends simple construction and becomes genuine architectural storytelling.
Continue Your Journey
Master Advanced Building Techniques: Explore comprehensive techniques that apply across all Minecraft biomes, from basic structure design to advanced architectural principles.
Explore the Lego Glossary: Discover how building concepts translate between Minecraft and Lego, with detailed terminology covering techniques applicable to both creative systems.
Seasonal Building Ideas: Find inspiration for holiday-themed builds throughout the year, from Halloween haunts to winter wonderlands.
Biome-Specific Building Guides: Continue your architectural journey with guides for jungle temples, desert settlements, and mountain fortresses that embrace their environments.
Minecraft Architecture Fundamentals: Build your foundation with core architectural principles that inform better building decisions regardless of project scope.
What’s your favorite swamp build? Are you drawn to the practical elegance of stilted houses or the mysterious atmosphere of witch’s workshops? Share your swamp building experiences and Halloween creations in the comments—we feature exceptional community builds on our social channels!
Want to level up your building game? Subscribe to our newsletter for weekly building tutorials, technique deep-dives, and seasonal inspiration delivered straight to your inbox. No spam, just actionable building advice.


