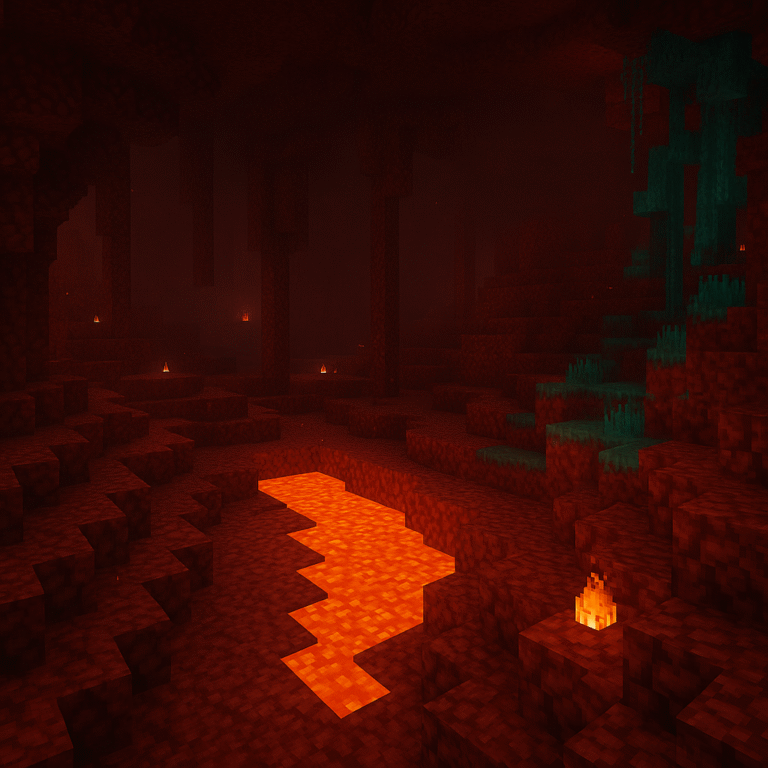
The Nether represents Minecraft’s most hostile environment, a dimension where unprepared players last minutes rather than hours. This fiery realm demands thorough preparation, strategic thinking, and respect for its dangers. Whether you’re venturing in to gather resources, explore fortresses, or prepare for the End, survival requires more than courage—it requires knowledge.
This guide covers everything adult builders need to know before stepping through that portal, from optimal armor configurations to emergency escape protocols. We’ll explore proven strategies that separate successful Nether explorers from those constantly respawning at their base.
Understanding the Nether’s Unique Challenges
Before discussing preparation strategies, it’s important to understand what makes the Nether fundamentally different from Overworld survival. This dimension operates under different rules that catch inexperienced players off guard.
The Nether’s environmental hazards begin with its geography. Massive lava oceans stretch beneath precarious netherrack ledges, while sudden drops appear without warning. Unlike the Overworld where water provides salvation from fire, the Nether offers no such reprieve—water instantly evaporates upon placement. Beds become explosive traps rather than spawn points, and compasses spin uselessly without the magnetic poles they require.
These unique mechanics demand a complete mindset shift from standard survival mode strategies. You’re not simply exploring a dangerous area—you’re operating in an environment actively hostile to your existence.
Nether vs Overworld: At-a-Glance Comparison
| Feature | Overworld | Nether |
|---|---|---|
| 💧Water | Functions normally; extinguishes fire | Instantly evaporates when placed |
| 🛏️Beds | Sets spawn point safely | Explodes when used (massive damage) |
| 🧭Compass | Points to world spawn | Spins randomly; non-functional |
| 🗺️Maps | Show terrain and location | Show gray static; non-functional |
| ⏰Time Cycle | Day/night cycle (20 minutes) | Constant dim lighting; no cycle |
| 🌧️Weather | Rain, snow, thunderstorms | No weather effects |
| 🔥Fire Spread | Burns out naturally over time | Burns indefinitely on netherrack |
| 📏Distance Ratio | Standard 1:1 scale | 1:8 ratio (1 block = 8 Overworld blocks) |
| 🌾Crop Growth | Grows with light and water | Grows on dirt without water (limited crops) |
| 🪓Wood Sources | Abundant trees in most biomes | Only crimson/warped fungi in forests |
| 🐷Passive Mobs | Cows, pigs, chickens, sheep spawn naturally | Only Striders spawn naturally |
| ⚡Respawn Anchor | Explodes when used | Sets spawn point (requires glowstone) |
| 🎣Fishing | Catches fish and treasure | Impossible (no water) |
| 🌊Lava Behavior | Flows slowly; 3 blocks horizontal | Flows faster; 7 blocks horizontal |
| 🏔️Build Height | Y: -64 to 320 (384 blocks) | Y: 0 to 128 (128 blocks) |
| 💎Unique Resources | Diamonds, emeralds, coal, iron | Netherite, quartz, glowstone, soul sand |
Armor Enchantment Strategies
Your armor configuration determines whether you’ll thrive or merely survive in the Nether. The right enchantments transform standard protection into a comprehensive defense system against the dimension’s specific threats.
The Gold Helmet Strategy
Here’s a counterintuitive truth: your helmet should be gold, not netherite. Piglins—aggressive neutral mobs that spawn throughout most Nether biomes—won’t attack players wearing at least one piece of golden armor. This single piece of gold creates a passive zone around you, eliminating one of the Nether’s most persistent threats.
For your gold helmet, prioritize these enchantments:
- Fire Protection IV: Reduces fire damage by 32% at maximum level, stacking with base armor protection
- Unbreaking III: Essential for gold’s notoriously poor durability
- Mending: Allows experience orbs to repair the helmet, compensating for gold’s weakness
This approach lets you focus defensive resources on your remaining armor pieces while maintaining Piglin neutrality.
Core Armor Setup
Your chestplate, leggings, and boots should be netherite for maximum protection. Netherite offers crucial advantages beyond diamond: 10% knockback resistance per piece (40% total with a full set), immunity to lava destruction if you die, and superior durability that outlasts diamond significantly.
Chestplate Enchantments:
- Protection IV (primary defense against all damage types)
- Unbreaking III (durability enhancement)
- Mending (self-repair through experience)
- Thorns III (reflects damage to attackers, particularly effective against melee mobs)
Leggings Enchantments:
- Protection IV
- Unbreaking III
- Mending
- Swift Sneak III (allows faster movement while crouching, useful for navigating dangerous terrain)
Boots Enchantments:
- Feather Falling IV (critical for the Nether’s frequent elevation changes and unexpected falls)
- Soul Speed III (essential for crossing soul sand valleys quickly)
- Protection IV
- Unbreaking III
- Mending
The Protection vs. Fire Protection Debate
Should you mix Protection IV with Fire Protection IV across your armor pieces? The mathematical answer depends on your risk profile. Full Protection IV provides balanced defense against all damage types—useful when facing Wither Skeletons, Blazes, and Ghasts simultaneously. However, mixing in Fire Protection IV pieces creates specialized defense against the Nether’s most common hazard: fire damage.
A balanced approach uses Protection IV on three pieces and Fire Protection IV on one piece besides your gold helmet. This configuration provides 80% coverage with general protection while maintaining enhanced fire resistance.
Fire Resistance Potion Brewing Guide
Fire resistance potions represent your insurance policy against the Nether’s primary threat. These eight-minute buffs (with Redstone extension) completely negate fire and lava damage, turning fatal situations into manageable challenges.
Gathering Brewing Materials
Before your first Nether trip, you’ll need to establish a brewing station in the Overworld. The irony of Nether survival is that effective preparation requires resources from the dimension itself—creating a chicken-and-egg scenario for first-time explorers.
Essential Brewing Components:
- Brewing Stand (crafted from three cobblestone and one Blaze Rod)
- Blaze Powder (fuel for the Brewing Stand, crafted from Blaze Rods)
- Glass Bottles (crafted from glass, filled with water)
- Nether Wart (found in Nether fortresses)
- Magma Cream (crafted from Slime Ball and Blaze Powder)
Your first Nether expedition should prioritize finding a fortress to gather Nether Wart and defeating Blazes for their rods. These initial trips carry higher risk since you lack fire resistance potions—proceed cautiously, build secure pathways, and retreat frequently to establish safe zones.
Brewing Process
The brewing sequence follows Minecraft’s standard potion progression:
- Fill the Brewing Stand with Blaze Powder (bottom-left slot)
- Place three Water Bottles in the bottom slots
- Add Nether Wart to create Awkward Potions (3 minutes)
- Add Magma Cream to create Fire Resistance Potions (3 minutes)
- Optionally add Redstone Dust to extend duration from 3 to 8 minutes (highly recommended)
Each Blaze Rod yields two Blaze Powder, and each powder fuels 20 brewing operations. A single fortress expedition can provide brewing materials for dozens of potions, making this a one-time gathering requirement for most players.
Usage Strategy
Never enter the Nether without at least three fire resistance potions. This redundancy accounts for unexpected deaths (your potion inventory is recoverable with your items) and extended exploration sessions. Experienced players maintain a chest of fire resistance potions near their primary Nether portal for easy restocking.
Consider brewing splash potions of Fire Resistance as well. While they provide slightly shorter duration (6 minutes with Redstone), they offer instant application—useful when you’re already burning and struggling to open your inventory.
Portal Safety and Emergency Escape Planning
Your Nether portal represents both entry point and lifeline. A compromised portal can trap you in the Nether indefinitely, turning a routine resource gathering trip into a desperate survival situation.
Portal Fortification
The moment you step through your portal into the Nether, your first priority is defensive construction. Ghasts—large floating mobs that shoot explosive fireballs—view unprotected portals as attractive targets. A single fireball can extinguish your portal, cutting off your escape route.
Basic Portal Bunker Construction:
Build a protective structure using cobblestone or other blast-resistant blocks. The enclosure should extend at least three blocks in each direction from the portal frame, with walls rising three blocks high. Use stone slabs for the floor—slabs resist Ghast fireballs better than full blocks due to their reduced collision box.
Install iron doors rather than wooden ones. Wooden doors allow Piglins and other mobs to path through your portal, potentially creating invasions in your Overworld base. Iron doors require redstone activation, creating a secure barrier that only you can open.
Keep flint and steel in your hotbar at all times. If a Ghast extinguishes your portal, you’ll need to reignite it quickly—potentially while under fire. Some experienced players keep a spare flint and steel in an ender chest accessible from both dimensions.
Coordinate Documentation
Compasses and maps don’t function in the Nether, making manual coordinate tracking essential. Before entering the Nether, press F3 (Java Edition) or check your coordinates in settings (Bedrock Edition) and record both your Overworld and Nether portal locations.
The Nether’s 1:8 distance ratio with the Overworld creates interesting portal mechanics. Every block traveled in the Nether equals eight blocks in the Overworld. Understanding this ratio helps you plan efficient transportation networks and predict where new portals will emerge.
Record these critical coordinates:
- Overworld portal location (X, Y, Z)
- Nether portal location (X, Y, Z)
- Nearest fortress coordinates
- Resource-rich biome locations
- Safe pathway routes
Consider creating a physical notebook or digital document for your Nether coordinates. Screenshots work, but organized documentation proves more reliable during emergency situations when quick reference becomes critical.
Emergency Escape Protocols
Despite careful preparation, situations arise where immediate escape becomes necessary. Having predetermined emergency protocols prevents panic-driven mistakes.
Ender Pearl Escape: Carry at least two Ender Pearls in your hotbar. These teleportation items allow instant repositioning away from threats or across otherwise impassable gaps. The minor fall damage from Ender Pearl usage is negligible compared to lava death.
Emergency Portal Construction: If your primary portal becomes inaccessible, you can build a new one. This requires ten obsidian blocks—a heavy inventory investment, but worthwhile insurance. Position the new portal at least 128 blocks away from your compromised portal to ensure it links to a different Overworld location rather than your existing portal.
Fire Resistance Clutch: When falling into lava, immediately drink a fire resistance potion. You’ll have precious seconds to orient yourself and swim to safety. This scenario represents the fire resistance potion’s primary value—transforming instant death into a survivable inconvenience.
For those interested in creating impressive structures after mastering survival, consider exploring advanced Nether building techniques once you’re comfortable navigating the dimension safely.
Dealing with Hostile Nether Mobs
The Nether’s mob roster reads like a bestiary of specialized threats, each requiring specific counter-strategies. Generic combat approaches fail against enemies designed to exploit the environment’s hazards.
Nether Mobs: Complete Reference Guide
| Mob | Threat Level | Behavior | Spawn Location | Notable Drops | Counter Strategy |
|---|---|---|---|---|---|
| Ghast | High | Hostile | Open areas in any Nether biome | Ghast Tear (brewing), Gunpowder | Deflect fireballs with melee attack or use bow. Build covered pathways to limit line of sight. |
| Blaze | High | Hostile | Nether Fortresses only | Blaze Rod (essential for brewing/progression) | Use bow or snowballs (Java). Shield blocks fireballs. Fire resistance negates contact damage. |
| Wither Skeleton | High | Hostile | Nether Fortresses, Soul Sand Valleys | Wither Skeleton Skull (2.5% drop), Coal, Stone Sword | Shield blocks attacks and Wither effect. Keep distance with bow. Looting III increases skull drops. |
| Piglin Brute | Extreme | Hostile | Bastion Remnants only | Gold items (limited loot table) | Gold armor doesn’t work. Fight one-on-one using shields. Clear area before looting Bastion chests. |
| Piglin | Medium | Neutral | Crimson Forests, Nether Wastes, Bastions | Barter items (gold ingot trading), Crossbow, Gold Sword | Wear gold armor for neutrality. Don’t open chests near them. Avoid mining gold blocks in vicinity. |
| Zombified Piglin | Medium | Neutral | Nether Wastes, Crimson Forests | Rotten Flesh, Gold Nuggets, Gold Ingots (rare) | Don’t attack unless necessary—entire group aggros. Use terrain to separate individuals. Gold armor optional. |
| Hoglin | Medium | Hostile | Crimson Forests exclusively | Raw Porkchop (best Nether food source), Leather | Use warped fungi to repel. Predictable charge attacks. Farm for sustainable food. Strong knockback—avoid cliffs. |
| Magma Cube | Medium | Hostile | Basalt Deltas, near lava lakes | Magma Cream (fire resistance potion ingredient) | Use 2-block-high spaces to block large cubes. Ranged attacks before multiplication. Fire resistance for contact. |
| Enderman | Medium | Neutral | Warped Forests (common), Soul Sand Valleys | Ender Pearl (essential for End portal) | Avoid eye contact. Build 2-block-high shelter if accidentally aggro’d. Attack legs to stay safe. |
| Strider | Low | Passive | Lava lakes in all biomes | String (when killed—not recommended) | Saddle and control with warped fungus on stick. Use for lava transportation. Don’t kill—they’re useful. |
| Skeleton | Medium | Hostile | Soul Sand Valleys only | Bones, Arrows, Bow (rare) | Shield blocks arrows. Stay mobile. Use terrain for cover. Less dangerous than Wither Skeletons. |
| Zoglin | High | Hostile | Created when Hoglin enters Overworld (doesn’t naturally spawn in Nether) | Rotten Flesh | Attacks all mobs including other Nether creatures. Warped fungi doesn’t repel. Avoid creating them. |
Threat Level Guide
Behavior Types
Piglins: The Neutral Negotiators
Piglins occupy the unique position of being potentially neutral or actively hostile depending on your attire. These gold-obsessed mobs attack on sight unless you wear golden armor—which you should be thanks to our earlier helmet strategy.
However, gold armor only provides passive safety. Certain actions provoke Piglins regardless of your attire:
- Opening chests or barrels near them
- Mining gold blocks in their vicinity
- Attacking any Piglin or Piglin Brute
Piglin Brutes, found exclusively in Bastion Remnants, ignore gold armor entirely and attack on sight. These heavily-armored enemies hit harder than standard Piglins and coordinate attacks with nearby allies. Approach Bastions with extreme caution—Brutes never negotiate.
Counter Strategy: Maintain gold armor at all times. When looting Bastion chests, clear the area of Piglins first or accept that combat is inevitable. Use shields to block Brute attacks and create distance with building blocks, fighting them one-on-one rather than facing multiple simultaneously.
Ghasts: The Artillery Menace
Ghasts represent the Nether’s most dangerous long-range threat. These massive floating creatures shoot explosive fireballs that destroy terrain and ignite fires. Their distinctive crying sounds serve as audio warnings—when you hear a Ghast, identify its location immediately.
Ghast fireballs can be deflected, creating one of Minecraft’s most satisfying combat mechanics. Time your sword swing (or even bare hand punch) to intercept the fireball mid-flight, sending it back toward the Ghast. Successful deflection deals massive damage and often kills Ghasts in one returned shot.
Counter Strategy: Build covered pathways when possible, denying Ghasts clear shots. In open areas, keep your bow ready—ranged attacks remain the most reliable Ghast counter. Deflecting fireballs works well once you’ve mastered the timing, but arrows provide consistent results without the risk of missing your deflection window.
Ghasts drop Ghast Tears—essential brewing ingredients for Regeneration potions—making them worthwhile targets despite the challenge they present.
Blazes: The Fortress Defenders
Blazes spawn exclusively in Nether fortresses, making them unavoidable when gathering fortress resources. These flying enemies shoot triple fireballs in rapid succession and light players on fire on contact.
Despite their fire-based attacks, Blazes have an unusual weakness: snowballs. In Java Edition, snowballs deal damage to Blazes, providing an inexpensive ranged attack option. This quirk doesn’t exist in Bedrock Edition, where conventional arrows remain necessary.
Counter Strategy: Use bow and arrows as your primary Blaze counter. Shields block their fireballs effectively, allowing you to close distance safely. Fire resistance potions negate their contact damage, transforming Blaze encounters from desperate struggles into manageable fights.
Blaze Rods—dropped by Blazes upon death—are essential for brewing and finding the End. You’ll need at least twelve Blaze Rods for comfortable progression (seven for brewing, five for Ender Eyes), making multiple fortress visits standard.
For builders interested in creating functional spaces within the Nether, understanding these mob behaviors becomes crucial. The principles apply whether you’re constructing survival outposts or elaborate interior designs adapted for the hostile dimension.
Wither Skeletons: The Stone Sword Exception
Wither Skeletons spawn in Nether fortresses and soul sand valleys, wielding stone swords that apply the Wither effect—a devastating damage-over-time debuff that bypasses armor. These tall skeletons (three blocks high, allowing them to fit through standard doorways unlike Endermen) present serious threats to unprepared players.
The Wither effect turns standard combat into a war of attrition. Each hit applies Wither II for ten seconds, draining health steadily regardless of your armor quality. Multiple hits refresh the duration, making sustained combat extremely dangerous.
Counter Strategy: Shields block Wither Skeleton attacks completely, negating the Wither effect. Use bow attacks from safe distances when possible. If forced into melee combat, shield-bash strategies work well—block their attack, strike once, repeat.
Wither Skeletons drop Wither Skeleton Skulls (2.5% drop rate, increased by Looting enchantment)—required for summoning the Wither boss. Skull farming represents a long-term project rather than a single-expedition goal.
Magma Cubes: The Bouncing Hazards
Magma Cubes function similarly to Overworld Slimes but deal fire damage on contact and jump higher. These bouncing mobs spawn in Basalt Deltas and near lava lakes, coming in three sizes: large, medium, and small.
When killed, large Magma Cubes split into four medium cubes, which split into four small cubes. This multiplication creates scenarios where killing one Magma Cube spawns sixteen total enemies (albeit progressively weaker ones).
Counter Strategy: Use terrain to your advantage. Building two-block-high spaces allows you to attack Magma Cubes while preventing them from reaching you. Ranged attacks eliminate them before multiplication becomes overwhelming.
Small Magma Cubes drop Magma Cream, making them valuable resource sources despite their annoyance factor.
Hoglins: The Aggressive Herbivores
Hoglins spawn in Crimson Forests, representing the Nether’s only non-fire-themed threat. These hostile mobs attack on sight, dealing significant knockback that can launch players off cliffs or into lava.
Unlike most Nether mobs, Hoglins fear warped fungi and respawn anchors. Placing these items creates safe zones where Hoglins won’t enter, allowing you to traverse Crimson Forests safely.
Counter Strategy: Carry warped fungi when exploring Crimson Forests. Plant it near your position to create temporary safe zones. Hoglins have predictable AI—they charge in straight lines, making them easy to dodge and counter-attack.
Hoglins drop pork chops, providing the Nether’s most reliable food source. Establishing a Hoglin farm (using warped fungi barriers) creates sustainable food production within the dimension.
Food and Resource Management
Sustainable Nether exploration requires addressing resource depletion, particularly food. The Nether offers limited food options, making proper planning essential for extended sessions.
Nether Food Sources
The Nether isn’t as barren as it initially appears. Several food sources exist within the dimension, though none rival Overworld farming’s efficiency.
Hoglin Meat: Hoglins drop raw pork chops, which can be cooked over lava or with a furnace. Each cooked pork chop restores 8 hunger points and 12.8 saturation—excellent food values matching Overworld options. Crimson Forests provide reliable Hoglin spawning, making them primary hunting grounds.
Mushroom Stew: Brown and red mushrooms grow throughout the Nether, particularly in warped and crimson forests. Combine both mushroom types with a bowl to create mushroom stew, which restores 6 hunger points. While less efficient than meat, mushrooms provide renewable vegetarian options for players avoiding Hoglin hunting.
Transplanted Crops: Advanced players establish farming outposts within the Nether, transporting dirt blocks and planting crops. Wheat, carrots, potatoes, and even cocoa beans (on jungle logs) grow normally in the Nether despite the hostile environment. This approach requires significant infrastructure investment but creates truly sustainable food sources.
Sweet berry bushes represent particularly effective Nether crops. They grow on dirt blocks, don’t require water, and produce renewable food supplies. Establishing a small berry farm near your portal provides easy food access for all future expeditions.
Resource Planning Checklist
Before each Nether expedition, verify you’re carrying these essential resources:
Building Blocks (Multiple Stacks): Cobblestone remains the builder’s best friend in the Nether. Use it to create bridges over lava, block Ghast shots, construct emergency shelters, and mark safe pathways. Bring at least three stacks (192 blocks) for extended exploration.
Wood and Crafting Materials: The Nether contains wood only in warped and crimson forests—specialized biomes you might not encounter immediately. Bring wood logs for crafting tables, sticks, and torches. Soul sand and soul soil can create soul torches (which provide unique aesthetics but identical light levels), but regular torches remain more versatile.
Backup Equipment: Store spare tools, weapons, and armor in an ender chest near your portal. Death in the Nether often means your gear falls into lava, making recovery impossible. Backup equipment lets you re-enter immediately for coordinate verification or item recovery attempts.
Buckets (Empty): While water evaporates, empty buckets serve other purposes. Pick up lava to clear pathways or fill dangerous pools near your portal. Create temporary lava barriers against mob threats. Buckets provide flexible utility in an environment where few tools function as expected.
For those planning elaborate Nether construction projects, these resource management principles scale from survival necessities to building project logistics.
Death Recovery Strategies
Death in the Nether represents a more serious setback than Overworld death. Your items might fall into lava (permanent destruction), drop in unreachable locations, or despawn before you complete the recovery trip. Proper death recovery planning minimizes these losses.
The Recovery Compass
Minecraft’s Recovery Compass points toward your last death location, functioning as a corpse-finding tool. Crafted from a standard compass and eight Echo Shards (found in Ancient Cities), this specialized compass only works in the dimension where you died.
The Recovery Compass’s dimensional restriction creates interesting logistics. If you die in the Nether, your compass points correctly only while you’re in the Nether. Checking it in the Overworld provides no useful information. This mechanic prevents easy coordinate transfers between dimensions but maintains the compass’s utility for corpse runs.
Recovery Compass Strategy: Keep a Recovery Compass in an ender chest accessible from both dimensions. After dying, immediately craft or retrieve the compass before returning to the Nether. The compass guides you directly to your death site—assuming your items haven’t fallen into lava or despawned.
Item Despawn Mechanics
Items despawn five minutes after being dropped, but with an important caveat: this timer only runs when the chunk containing the items is loaded. If you die in an area you haven’t explored (meaning the chunks aren’t loaded in your absence), the timer pauses until you return.
This mechanic provides crucial recovery time. If you die far from your portal during exploration, your items remain indefinitely until you return to the area. However, if you die near your portal or along a commonly-traveled pathway, the five-minute timer runs continuously—recovery becomes urgent.
Time Management: After death, assess your situation before rushing back. If you died in unexplored territory, you have effectively unlimited time. Gather replacement gear, brew potions, and prepare thoroughly. If you died near your portal, move quickly—every second counts.
Strategic Gear Caching
Experienced Nether explorers establish gear caches at regular intervals throughout their pathway networks. These caches—simple chests containing spare armor, tools, weapons, and potions—transform catastrophic deaths into minor inconveniences.
Cache Placement: Position caches every 500 blocks along major pathways. Include full armor sets, weapons, food, building blocks, and at least two fire resistance potions. Mark cache locations on your coordinate list and with prominent visual markers (colored concrete or wool structures visible from a distance).
This approach mirrors the essential building tools philosophy applied to survival: proper organization and resource access prevent emergencies from becoming disasters.
Advanced Survival Considerations
Once you’ve mastered basic Nether survival, additional considerations emerge for players pursuing long-term projects or extensive resource gathering.
Elytra Navigation
Elytra flight transforms Nether navigation, allowing rapid travel across the dimension’s vast distances. However, the Nether’s terrain—filled with sudden ceilings, lava lakes, and unexpected obstacles—creates unique elytra challenges.
Flying in the Nether requires constant vigilance. Maintain moderate speeds and stay alert for terrain changes. Use firework rockets conservatively, as the need for sudden altitude changes exceeds Overworld flight patterns.
Establishing Permanent Bases
Long-term Nether presence benefits from establishing permanent bases rather than relying solely on Overworld supply runs. These bases should include:
- Secure sleeping quarters (respawn anchor, charged with glowstone)
- Enchanting table for on-site repairs and improvements
- Brewing station for potion production
- Storage for resources and supplies
- Farms for sustainable food and materials
Respawn anchors function as Nether spawn points, charged with glowstone (each block provides one respawn). Maintaining a charged respawn anchor eliminates the time cost of returning from Overworld spawn after death.
Strider Transportation
Striders—passive mobs that walk on lava—provide unique transportation across the Nether’s lava oceans. Saddled Striders (controlled with warped fungus on a stick) move quickly across lava surfaces, creating safe passage through otherwise impassable areas.
Establishing Strider stables near major lava crossings simplifies repeated trips. Keep extra saddles and warped fungus in nearby chests for convenient access.
Conclusion: From Survival to Mastery
Nether survival mastery doesn’t happen overnight. Each expedition teaches new lessons about the dimension’s dangers and opportunities. Start with short, focused trips—gathering specific resources before returning to the Overworld. As your confidence grows, extend your exploration range and tackle more ambitious projects.
Remember that even experienced players die in the Nether. The dimension demands respect regardless of your skill level. Proper preparation, cautious exploration, and quick thinking transform the Nether from an impossible challenge into a navigable (if still dangerous) environment.
Your progression from tentative first steps to confident exploration parallels the journey many players take with Minecraft’s fundamentals—initial uncertainty yielding to practiced competence through experience and learning.
The Nether’s resources—Blaze Rods, Nether Wart, Quartz, Ancient Debris, Ghast Tears, and more—justify mastering its challenges. These materials unlock advanced gameplay, powerful enchantments, and progression toward the End. Survival skills you develop here translate into confidence throughout Minecraft’s various dimensions and challenges.
What strategies have you found most effective for Nether survival? Share your experiences in the comments below.