
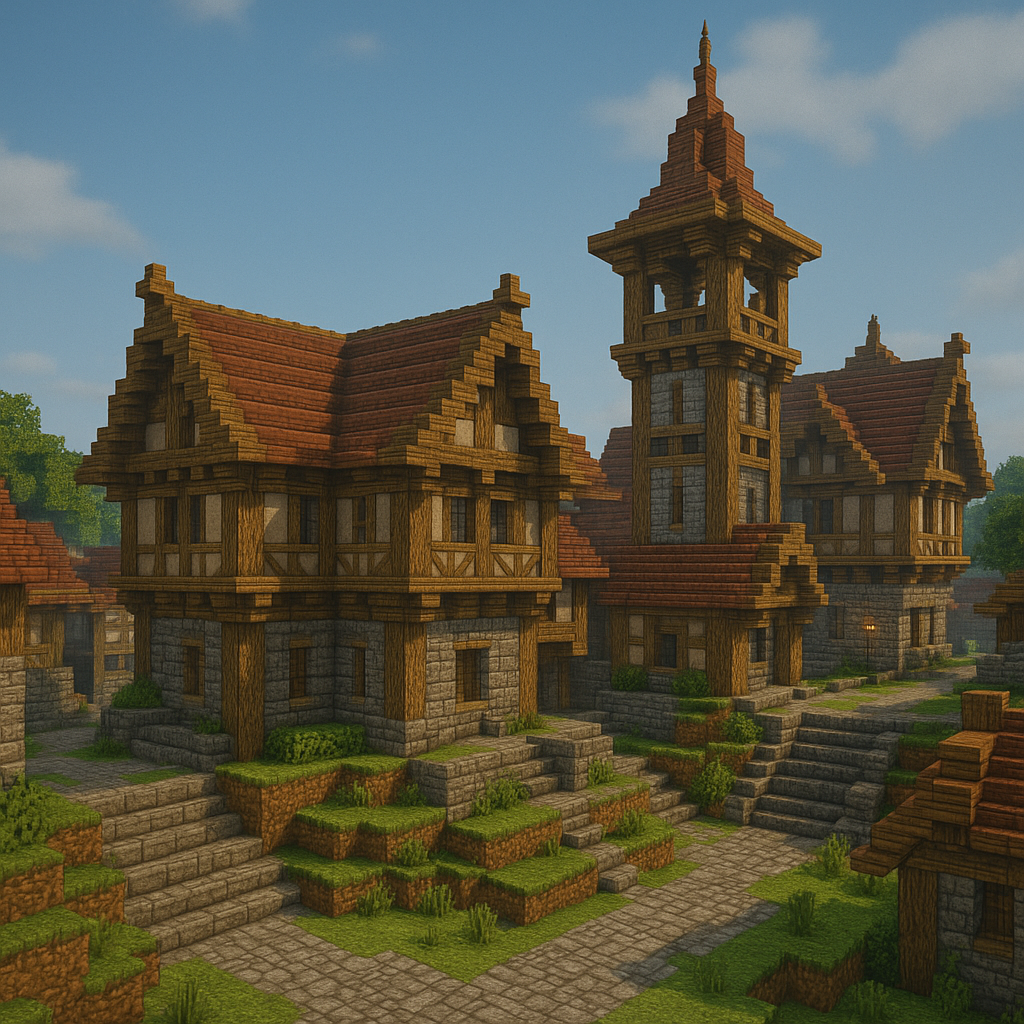
Creating an authentic medieval castle interior in Minecraft requires more than just placing a few torches and wooden benches. True historical accuracy comes from understanding how medieval people actually lived, what furniture they used, and how spaces served multiple purposes throughout the day. Whether you’re building a grand castle for your survival world or recreating historical architecture in creative mode, authentic period details transform empty stone halls into believable living spaces.
This guide explores historically accurate furniture design, castle-appropriate lived-in elements, tapestries and period decorations, and the layout principles that governed both great halls and private chambers. By combining historical research with practical Minecraft building techniques, you’ll create interiors that feel genuinely medieval rather than generically fantasy.
Historical Accuracy in Furniture
Medieval castle furniture prioritized function over form, with most pieces serving multiple purposes throughout the day. Understanding authentic furniture types and their uses helps create castle interiors that feel historically grounded rather than anachronistic.
Core Furniture Materials
Wood dominated medieval furniture construction, with oak being the preferred choice for its durability and availability. Pine and fir appeared in less formal spaces or regions where these woods grew abundantly. The heavy, solid construction you see in museum pieces reflects both the available tools and the need for furniture to withstand constant use and movement.
Iron fixtures reinforced corners, hinges, and decorative elements on higher-quality pieces. These metal accents weren’t purely aesthetic—they prevented splitting on heavy chests and added structural support to chairs and tables. When building in Minecraft, incorporate iron bars, trapdoors, and pressure plates to suggest these reinforcements.
Medieval Furniture by Status Level
Interactive guide to historically accurate castle furnishings in Minecraft
| Furniture Type | Common Rooms | Moderate Status | High Status | Primary Blocks |
|---|---|---|---|---|
| Benches | Simple backless benches (sideways stairs) | Longer benches with occasional backs | Padded benches with decorative elements | Oak stairs, spruce slabs, carpets |
| Stools | Basic three-legged stools | Slightly taller working stools | Rarely used (chairs preferred) | Fences, pressure plates, trapdoors |
| Armchairs | Not present | Simple chair with back (stair blocks) | Elaborate high-backed throne-style chairs | Stairs, trapdoors, slabs, banners |
| Trestle Tables | Basic plank-on-trestle design | Larger, more stable trestle tables | Permanent tables preferred | Oak slabs, fences, trapdoors |
| Permanent Tables | Not present (trestles only) | Small fixed tables for private rooms | Large permanent tables, high table on dais | Oak planks, dark oak slabs, smooth stone |
| Side Tables | Not present | Simple bedside or work tables | Decorative tables with valuable objects | Pressure plates on fences, end rods |
| Basic Chests | Simple wooden chests | Multiple chests, some locked | Ornate chests with iron reinforcement | Chests, barrels, trapdoors, iron bars |
| Storage Trunks | Not present | Medium traveling trunks | Large ornate trunks with complex locks | Double chests, custom trapdoor designs |
| Shelving | Simple wall-mounted planks | Organized shelf systems | Rarely used (chests preferred) | Oak slabs, trapdoors, item frames |
| Straw Mattresses | Hay bales with carpet covering | Not appropriate | Not appropriate | Hay bales, brown/gray carpets |
| Simple Beds | Not present | Basic wooden frame beds | Too simple for high status | Beds, oak trapdoors, wool blocks |
| Curtained Beds | Not present | Not present | Elaborate four-poster beds with full curtains | Beds, fence posts, banners, carpets |
| Wall Tapestries | Not present | Occasional small banners | Extensive tapestry coverage | Banners (various patterns), item frames |
| Hearths/Fireplaces | Central floor braziers | Wall-mounted or corner hearths | Elaborate fireplaces with chimneys | Netherrack, stone brick, iron bars, fire |
| Display Shelves | Not present | Simple item display | Elaborate display of valuable items | Item frames, armor stands, end rods |
| Chandeliers | Not present | Not present | Iron and torch chandeliers | Iron bars, chains, torches, lanterns |
Essential Furniture Types
Trestle Tables formed the backbone of medieval dining. These consisted of simple planks laid across removable trestles, allowing servants to quickly clear floor space after meals. In Minecraft, create these using oak slabs supported by fences or trapdoors arranged in an X-pattern. The temporary nature of these tables explains why great halls often appear sparse in historical sources—furniture was literally taken apart and stored daily.
Benches and Stools provided seating for most castle inhabitants. Simple backless benches lined tables during meals, while three-legged stools offered portable seating throughout the day. Use stair blocks sideways or create custom bench designs with slabs and fences. Reserve chairs with backs for only the highest-status locations, as these were genuine status symbols.
Chests served as the universal storage solution, functioning simultaneously as luggage, seating, tables, and even beds for some servants. Large wooden chests with iron reinforcements stored everything from clothing to documents to treasure. Minecraft’s chest blocks work perfectly for this purpose, though consider crafting custom designs using trapdoors and slabs for variety.
Beds in wealthy chambers featured substantial wooden frames with tall posts supporting curtains. Bolsters and furs provided warmth in drafty stone rooms. Most inhabitants slept on simpler platforms or even straw mattresses on the floor near hearths. Create period-appropriate beds using a combination of wool blocks for mattresses, trapdoors for frames, and banners suspended from fences for curtains.
Armchairs with high backs represented significant wealth and status. These appeared primarily in private chambers of lords and ladies, or on the dais in great halls. The chair’s height and construction made a deliberate statement about the occupant’s importance. Use stair blocks combined with trapdoors and slabs to create these impressive pieces for your most important spaces.
This understanding of authentic furniture connects directly to effective interior design principles, where historically-informed choices create more believable medieval spaces.
Castle-Appropriate Lived-In Elements
Medieval castles weren’t static museum displays—they were working buildings where dozens or hundreds of people lived, worked, and conducted business daily. Adding authentic lived-in details transforms empty stone rooms into spaces that feel genuinely inhabited.
Heating and Warmth Solutions
The omnipresent challenge of heating massive stone structures shaped medieval life profoundly. Central hearths dominated great halls, providing both heat and light while serving as the focus for evening activities. Smaller rooms featured wall-mounted fireplaces when the architecture allowed, though many spaces simply remained cold.
Create realistic hearths using netherrack with fire, surrounded by stone brick or andesite blocks. Add iron bars as fireplace screens and use stone slabs as hearth edges. Position seating close to heat sources—this wasn’t just aesthetic preference but survival necessity in drafty castles.
Straw mattresses scattered near hearths in great halls accommodated lower-ranking household members. These disappeared during the day as servants rolled them up and stored them, reappearing each evening. Use hay bales covered with carpets to suggest these sleeping areas, perhaps with a rolled-up example in a corner to show the storage solution.
Practical Storage Solutions
Chests appeared everywhere because medieval people owned fewer possessions and needed to secure what they had. Important documents, valuable textiles, and personal belongings all resided in locked chests that owners could theoretically take with them during moves. Place chests abundantly—against walls, under windows, at the foot of beds, even stacked in corners.
Don’t limit yourself to Minecraft’s standard chest block. Create variety using barrels, trapdoors arranged as chest lids, or custom designs incorporating different wood types. Add occasional locked chests using item frames with keys to suggest valuable storage.
Textile Elements for Warmth
Thick curtains served crucial insulation functions, hanging in doorways and around beds to trap heat and provide privacy in spaces with little of either. Wealthy chambers featured elaborate bed curtains suspended from ceiling-mounted rods or bed posts, creating a room-within-a-room effect.
Use banners suspended from fence posts to create curtain effects. Position them in doorways, around bed areas, and even partitioning large spaces. Choose colors appropriate to your castle’s wealth—wealthy spaces featured rich reds, blues, and purples, while more modest areas used undyed or simply patterned textiles.
Wall Treatments
Whitewashed or plastered walls provided a canvas for decoration while making rooms lighter and more pleasant. Wealthy castle owners commissioned painted murals, geometric patterns, or decorative borders in important rooms. Most walls featured simpler treatments or remained bare stone, particularly in service areas.
In Minecraft, mix your stone types thoughtfully. Use smooth stone or quartz blocks to suggest plastered walls in important chambers. Add painting blocks or create murals using colored concrete or terracotta for high-status rooms. Leave rougher stone textures in service areas and defensive spaces where decoration would be inappropriate.
Floor Coverings
Woven floor mats and animal skins added both warmth and status to important rooms. Rushes strewn across floors were common in great halls, changed periodically to manage the inevitable mess of medieval life. The wealthy walked on fine textiles, while servants’ feet touched bare stone.
Use carpets selectively for high-status areas, suggesting woven mats or animal hides. Scatter them rather than wall-to-wall coverage—full carpet coverage is a modern concept. In great halls, leave most of the floor bare or use occasional carpet strips to suggest rush-covered paths between key areas.
These lived-in details complement the bedroom design principles that create believable sleeping chambers, whether modest or grand.
Tapestries and Period Decorations
Tapestries represented the ultimate status symbol in medieval castles, combining practical insulation with artistic display and wealth demonstration. Understanding their historical context and visual characteristics helps create appropriate decorative schemes.
Historical Tapestry Functions
Beyond their obvious decorative purpose, tapestries served critical practical functions. Their thick woven construction provided essential insulation against stone walls that radiated cold even in moderate weather. During winter months, the difference between a tapestried chamber and bare stone could be genuinely significant.
Tapestries also declared status and affiliation. Displaying family coats of arms, documenting important battles or events, or featuring expensive imagery like hunting scenes announced the owner’s wealth and position. Traveling nobles even brought tapestries with them, hanging them temporarily in borrowed chambers to personalize otherwise generic rooms.
Common Tapestry Themes
Hunting Scenes dominated many collections, depicting aristocratic pursuits with elaborate detail. The famous Unicorn Tapestries exemplify this genre, showing hunters, dogs, and mythical creatures in complex woodland settings. These weren’t merely decorative—they reinforced the owner’s claim to hunting rights and aristocratic status.
Mythical and Religious Imagery appeared frequently, from unicorns to biblical narratives. The “Lady and the Unicorn” series represents this category magnificently, using symbolic imagery and rich colors to convey complex meanings. Religious scenes demonstrated piety while also showcasing expensive materials and skilled artisanship.
Heraldic Displays turned entire walls into declarations of family history and alliances. Coats of arms, family crests, and genealogical diagrams appeared in tapestry form, particularly in great halls where they reinforced the lord’s authority and family connections.
Floral and Geometric Patterns provided less expensive alternatives to figured tapestries while still adding color and warmth. These appeared more frequently in private chambers or less formal spaces.
Creating Tapestries in Minecraft
Banners offer the perfect medium for castle tapestries. Design patterns using the loom to create historically appropriate imagery. Focus on heraldic designs, simplified hunting scenes, or geometric patterns rather than attempting photorealistic images.
Consider scale when placing banners. True medieval tapestries were enormous—often covering entire walls from near floor to ceiling. Hang multiple banners together to suggest larger tapestries, or use them as smaller wall hangings in more modest chambers. Layer banners at slightly different depths to add visual interest and suggest the texture of woven material.
Color Choices Matter: Rich reds, deep blues, and royal purples dominated expensive tapestries, as these dyes were costly and difficult to produce. Greens, yellows, and undyed naturals appeared in more modest examples. Use dye combinations that reflect your space’s status level.
Position tapestries strategically on exterior walls where insulation would matter most, or behind high tables and in sleeping chambers. Avoid hanging them in areas that would see smoke damage from hearths or food preparation—medieval owners protected valuable textiles carefully.
Additional Wall Decorations
Painted Murals adorned the plastered walls of wealthy private chambers and important halls. These featured similar themes to tapestries but with more permanent installation. Use colored concrete or terracotta blocks to create simplified mural effects in key locations.
Decorative Ironwork appeared as torch holders, door hardware, and architectural details. Incorporate iron bars, chains, and trapdoors as functional decoration throughout your castle. These elements bridge the gap between pure ornamentation and practical fixtures.
Weapons Displays featured prominently in great halls and guardrooms, both as ready armament and status display. Hang swords, shields, and armor using item frames or armor stands arranged in attractive patterns.
These decorative elements work alongside architectural design choices to create cohesive medieval aesthetics throughout your build.
Great Hall and Private Chamber Design
Understanding how medieval people organized and used different castle spaces reveals why certain layouts became standard. The great hall and private solar represent two contrasting approaches to space usage—one public and multipurpose, the other private and specialized.
Great Hall Layout Principles
The great hall functioned as the castle’s social, administrative, and ceremonial center. During a typical day, this single space hosted meals, legal proceedings, entertainment, business meetings, and evening sleeping arrangements for many household members. This multipurpose nature shaped its layout profoundly.
The High Table and Dais formed the hall’s focal point. Positioned at one end, often on a raised platform, the high table seated the lord, his family, and honored guests. The elevation served symbolic purposes—reinforcing social hierarchy by literally placing the powerful above everyone else. The lord faced down the hall, observing all activities and demonstrating his authority through position.
Create your dais using a step or platform built from stone bricks, with the high table perpendicular to the hall’s length. Use stair blocks as chairs for the lord’s seat, reserving the center position for the highest-ranking individual. Simple benches suffice for other high table positions, as even honored guests sat without chair backs.
Lower Tables and Benches filled the hall in parallel rows running perpendicular to the high table. During meals, household members and retainers sat along these tables according to status, with the most important positioned closest to the dais. The arrangement changed throughout the day as tables were dismantled and moved aside for other activities.
Use trestle-style tables that visually read as temporary structures. Arrange them in parallel lines leaving a central aisle leading to the high table—this wasn’t just practical for serving, but a ceremonial path for important arrivals and formal processions.
The Central Hearth provided heat, light, and cooking capacity. Positioned centrally in the hall’s length, it allowed maximum warmth distribution while creating a natural gathering point. Some later castles moved hearths to walls as chimney technology improved, but the central location remained common throughout the medieval period.
Build your hearth generously sized—these were substantial features, not modest campfires. Use stone brick or andesite as a hearth surround, with iron bars or slabs creating a safety barrier. Position benches and seats nearby, as evening socializing centered on the fire’s warmth.
Wall Treatments and Decoration varied by wealth and period. The most elaborate halls featured painted walls or extensive tapestry coverage, while more modest examples showed bare stone or simple whitewash. Windows remained small by modern standards—large glazed windows came later and appeared only in the wealthiest buildings.
For high-status halls, use smooth stone or quartz blocks to suggest plastered walls, then add banner tapestries and painting blocks. Include smaller windows using glass panes rather than large expanses, perhaps with iron bar reinforcement suggesting medieval glazing patterns.
The Service End opposite the high table led to kitchens, storage, and service areas. Screens or partial walls sometimes separated this area, though many halls remained completely open. Doorways here saw constant traffic during meals as servers brought food from kitchens.
Design this area with multiple doorways leading to adjacent kitchen spaces or storage areas. Consider adding a wooden screen using fences and trapdoors to partially separate the service zone while maintaining hall unity.
These great hall principles connect to broader building fundamentals that create cohesive medieval structures.
Great Hall vs Solar Chamber
Understanding the fundamental differences in medieval castle spaces through layout, function, and design
Great Hall
Public & Multipurpose
- High table on raised dais
- Parallel trestle tables
- Central hearth for heat/light
- Service entrance to kitchens
- Minimal permanent furniture
Solar Chamber
Private & Specialized
- Curtained four-poster bed
- Wall-mounted fireplace/chimney
- Permanent furniture placement
- Multiple storage chests
- Small work/dining table
Private Chamber Design
The solar—private chambers for the lord’s family—represented a dramatic contrast to the great hall’s public nature. These spaces prioritized privacy, comfort, and personal identity in ways public areas never could.
Chamber Size and Scale remained modest even in wealthy castles. Medieval concepts of comfort focused on warmth and security rather than spaciousness. Smaller rooms conserved heat better and felt more defensible—important considerations in uncertain times.
Create solar chambers considerably smaller than your great hall. Use dimensions that feel intimate rather than grand—perhaps 5×7 or 6×8 blocks rather than expansive spaces. The psychological effect of enclosure contributed to these rooms’ appeal as private retreats.
The Bed as Centerpiece dominated solar layouts both physically and symbolically. Substantial wooden frames with tall posts supported elaborate curtains creating a private sleeping alcove. The bed’s size, curtaining quality, and placement against the best-protected wall all signaled the occupant’s status.
Position your bed against an interior wall away from windows for historical accuracy. Use fences or walls as posts extending above the bed frame, then suspend banners to create curtaining. Make the bed substantial—roughly 2×3 blocks minimum—to reflect medieval proportions.
Furniture Arrangement included chests for storage (often at the bed’s foot), a table and chairs for private dining or work, and possibly additional seating near a fireplace. Unlike the great hall’s temporary furniture, solar pieces remained permanently positioned.
Place chests strategically along walls, with the most prominent at the bed’s foot. Add a small table using slabs or pressure plates on fences, with actual chair blocks or stair blocks for seating. This furniture density should exceed the sparse great hall while remaining functional and uncluttered.
Window Treatment and Lighting received more attention than in public spaces. Small glazed windows admitted light while maintaining warmth—glass represented significant expense and appeared most commonly in private chambers. Shutters provided additional insulation and security.
Create small, mullioned windows using glass panes separated by wooden trapdoors or iron bars. Position them to provide natural light without sacrificing wall space needed for tapestries and furniture. Add trapdoor shutters that visually read as closeable.
Tapestries and Personal Decoration appeared more prominently in solars than anywhere else. These spaces expressed personal taste and identity in ways public rooms could not. Family-significant tapestries, religious imagery, and personal treasures created intimate environments reflecting the occupants.
Cover more wall surface with banners in solar designs, choosing patterns that suggest personal significance. Add painting blocks, item frames with meaningful objects, and other decorative elements that create individual character. These chambers should feel distinctly different from your great hall’s more formal decoration.
Fireplace Design provided crucial warmth in small, stone-enclosed spaces. Wall-mounted fireplaces with chimneys appeared in the most advanced castles, while simpler braziers or small hearths sufficed in others. The fireplace location often determined furniture arrangement.
Build a recessed fireplace using stone brick, with a chimney extending upward through the wall. Alternatively, create a corner hearth design with iron bar screening. Position seating and the bed’s curtain opening to take advantage of heat while avoiding direct smoke exposure.
These private chamber designs complement the bedroom-specific techniques that create comfortable personal spaces throughout your castle.
Bringing It All Together
Authentic medieval castle interiors balance historical accuracy with Minecraft’s building constraints, creating spaces that feel genuinely period-appropriate while remaining functional within the game’s systems. The key lies in understanding the reasoning behind medieval design choices rather than simply copying visual elements.
Remember that medieval interiors prioritized multiple functions over single purposes. Rooms transformed throughout the day—great halls shifted from dining to sleeping spaces, solars served as bedrooms, offices, and private dining rooms, and service areas hummed with constant activity. Your builds should suggest this flexibility through furniture choices and spatial arrangements.
Material choices matter enormously for period authenticity. Oak dominated furniture construction, stone formed structural elements, and textiles added warmth and status. Limited your palette deliberately rather than using every available Minecraft block—historical builders worked with constrained resources, and that limitation created visual coherence.
Scale elements appropriately for medieval sensibilities. Rooms ran smaller than modern equivalents, windows stayed modest, and vertical space often exceeded floor area. This isn’t just historical accuracy—it creates more defensible, warmer, and psychologically comfortable spaces that feel distinctly medieval.
Layer decorative elements according to status and function. Great halls received formal, heraldic decoration reinforcing authority. Private solars featured personal, intimate details reflecting occupants’ identities. Service areas remained largely undecorated, focusing purely on function. This hierarchy creates believable social structures within your castle.
Whether you’re building a single tower chamber or an entire castle complex, these authentic period design principles transform empty stone boxes into historically-grounded medieval spaces. The difference between generic fantasy castle interiors and genuinely medieval ones lies not in complexity but in understanding how real people lived, worked, and organized their spaces centuries ago.
For builders interested in expanding beyond interiors, explore real-life architectural principles that inform historically accurate castle exteriors, or investigate steampunk industrial building for an interesting contrast to medieval design approaches.
What medieval interior element do you find most challenging to recreate authentically in Minecraft? Share your castle building experiences and questions in the comments below.


