Most ocean monument content ends the moment the last guardian drops. Kill the elder guardians, scoop up the sponges and gold blocks, maybe grab a few prismarine stacks, then leave the drained shell to rot at the bottom of the ocean. That is a waste of one of the most structurally interesting builds Minecraft hands you for free.
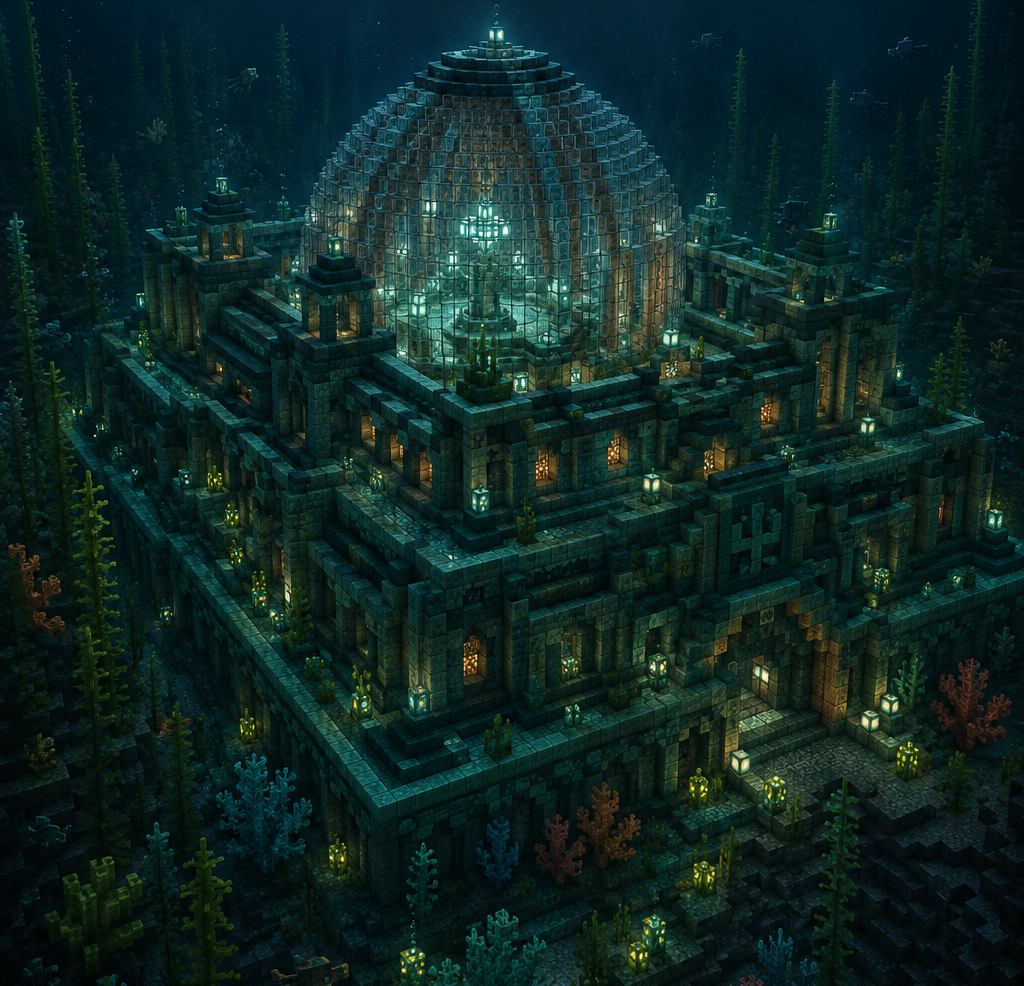
A cleared monument is a maze of load-bearing prismarine, dark prismarine accent work and sea lantern grids, already sitting in a biome most players never build in properly. Treat it as a retrofit problem rather than a combat afterthought and you have the bones of a genuinely liveable underwater palace: a shell that already understands scale, symmetry and depth, just organised for guardians instead of people.
This is a renovation guide, not a raid guide. It assumes your monument is already cleared and drained, and it focuses entirely on what happens after that: what to keep, what to gut, how to make the maze breathable, and how to make it look like somewhere you would actually want to spend time.
🏛️ From Raid Site to Residence: Assessing Your Shell
Before you touch a single block, walk the whole structure and decide what is structural and what is decoration. Monuments are built almost entirely from three materials: prismarine, prismarine bricks and dark prismarine, plus sea lanterns dropped into the ceiling at intervals.
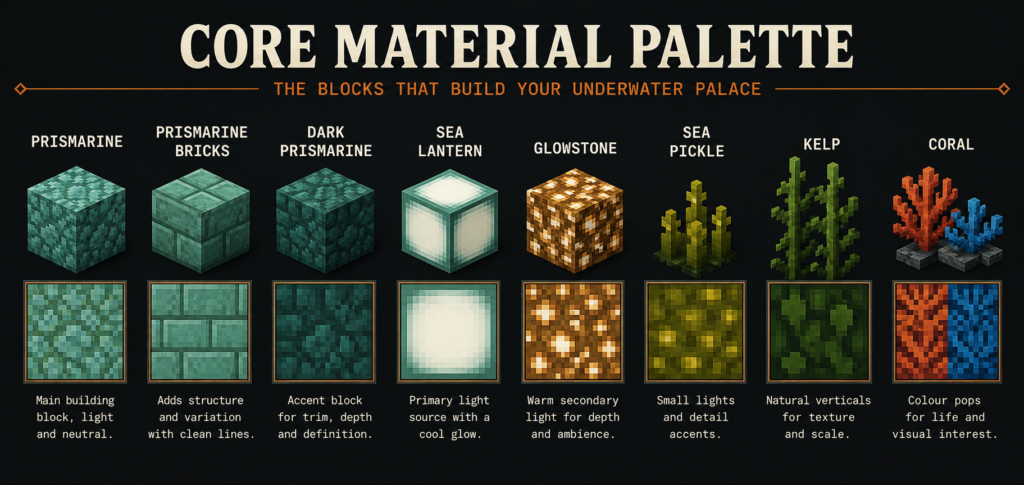
That palette is doing a lot of work for you already. Dark prismarine reads as a trim or feature colour against the lighter base stone, so before you rip anything out, note where it already falls. Half the interior design decisions in a monument conversion are just deciding whether to keep or fight the existing dark prismarine placement.
The rooms themselves fall into two categories worth separating early. The outer wings tend to be small, boxy, repetitive chambers, easy to consolidate into fewer, larger rooms. The central and top sections usually contain the largest open volumes in the whole structure, and those are your best candidates for a great hall, a atrium, or the single big statement room the rest of the build supports.
Mark those two categories out mentally, or even with temporary wool blocks, before you start swinging a pickaxe. For a broader look at how monuments compare to other underwater structures worth adapting, our guide to underwater domes and sea fortresses is a useful companion piece if you want to pull in elements beyond the monument footprint itself.
Don’t strip everything back to a blank prismarine box. Keeping some of the original maze logic, a few narrow connecting corridors, an oddly placed alcove, gives the finished build a sense of history, like a residence built into a ruin rather than a house that happens to be underwater.
Sort your build materials before you start the actual retrofit rather than mid-project. A conversion of this size eats through prismarine variants, glass, sponges and light sources fast, and running out of dark prismarine halfway through a feature wall is the kind of thing that stalls momentum for weeks. Aqua Affinity on your helmet and a Respiration enchant will save you more time over a multi-session build than almost any other prep step, since block breaking speed underwater without it is genuinely painful for detail work. If you’re not already running an ender chest or a dedicated supply shulker for the build, set one up before you start moving prismarine around, since ferrying materials back to a surface base for every top-up will kill the pace of the project.
🔨 Structural Retrofit: Opening Up the Maze
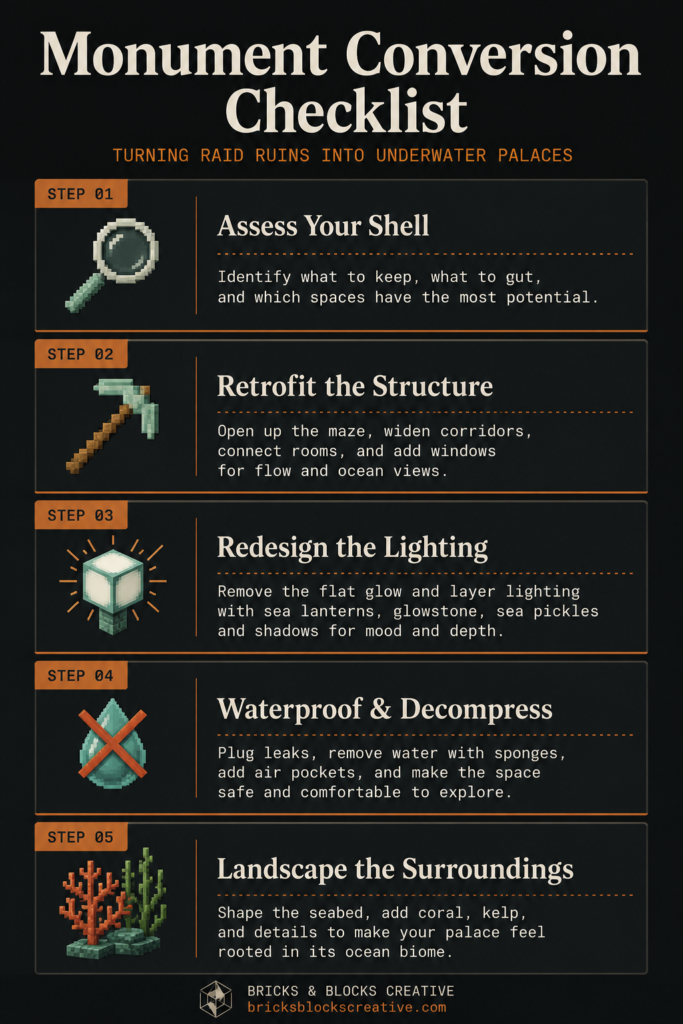
Monuments are hostile to human-scale movement by design. Corridors are narrow, ceilings are low in the wings, and rooms rarely connect the way you would want a home to flow. The retrofit work is mostly subtraction: widen corridors from the default one or two blocks up to three or four where you want a main circulation route, and knock through walls between adjacent small rooms to create fewer, more purposeful spaces.
Work room by room rather than block by block. Decide what each space is for first, a bedroom wing, a library, a conservatory, then remove exactly what’s blocking that function. Cutting windows is the other major structural move, and it does more for a monument conversion than almost anything else on this list. The stock structure has none, so every window you add is new information for the player: light source, sightline, sense of scale against the open ocean outside. Vertical slot windows along corridors and larger panelled openings in feature rooms both read well against prismarine’s flat colour.
If you want the retrofit to hold up under close inspection, plan your circulation like an actual building: one or two primary routes that a visitor would naturally follow, secondary routes for service or utility spaces, and dead ends reserved for private rooms. Our guide to server-friendly interior design covers how to keep large interior conversions like this one performant if you’re building on a multiplayer world rather than solo.
💡 Lighting Redesign: Ambiance Over Utility
The stock sea lantern placement in a monument exists to stop guardian spawns, not to look good, and it shows. Left as-is, converted monuments tend to suffer from what’s often called the flat glow problem: every room lit identically, no shadow, no focal point, no sense of time or mood.
Pull most of the original sea lanterns and treat lighting as a design layer instead of a utility. Concentrate sea lanterns in feature rooms where you want a bright, almost throne-room intensity, then drop the ambient light level everywhere else using glowstone recessed into ceilings or walls, sea pickles clustered at floor or shelf level, and the occasional single sea lantern used as a deliberate spotlight rather than a grid. Sea pickles are worth leaning on more than most builders do. Their lower light output and small footprint make them ideal for corridor and alcove lighting where a full sea lantern would blow out the mood you’re going for.
Vary light temperature and placement by room function: brighter and more even in social spaces, dimmer and more directional in private ones. If lighting design is a weak spot for you generally, our full breakdown on creating mood and atmosphere with Minecraft lighting goes deeper into layering techniques that apply just as well here as in a surface build.
🫧 Air Pockets and Waterproofing: Making It Livable
A palace you can’t breathe in is just a nicely decorated dive site, so waterproofing is where the “liveable” part of this build actually happens. Sponges remain the only bulk, non-renewable-free way to clear water from a room, and you’ll want a small stock of dry sponges on hand for every space you plan to keep dry. Place a sponge, let it soak up to the water it can hold, then either dry it in a furnace for reuse or keep working through spare sponges if you looted enough from the raid.
Doors and trapdoors are your seal once a room is dry. Both block water from re-entering a space even when placed in a wall or floor that borders open water, which makes them the standard entry point for dry rooms carved out of a flooded structure. Iron doors are worth the investment for any room you want permanently sealed, since they won’t open on their own and keep the air pocket stable without you having to manage redstone.
For anything you’re not fully drying, waterlogging works in your favour rather than against it. Non-solid blocks like stairs, slabs, fence gates and signs can hold a water source without flooding a room, so you can waterlog architectural details deliberately, a waterlogged staircase leading into a submerged garden room, for instance, rather than fighting to keep water out of spaces that are meant to stay wet. If your palace design leans into a mix of wet and dry zones, our guide to water features across every biome has useful ideas for turning water you can’t easily remove into a deliberate feature instead of a problem.
🌿 Aesthetic Layering: Domes, Coral, and Kelp
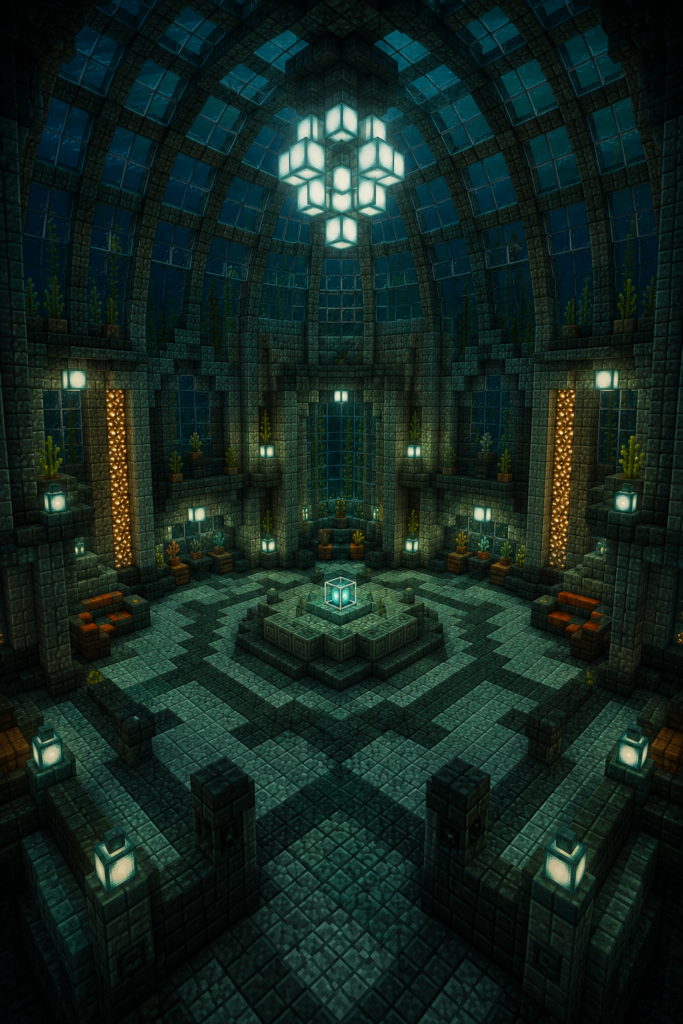
Once the shell is dry, lit and structurally sound, the exterior is what sells the “underwater palace” idea from a distance. Glass domes over key rooms, particularly a great hall or top-level atrium, let you keep the water visible as a backdrop while the room itself stays dry, and they read immediately as a landmark against the flat expanse of ocean floor around a typical monument.
Exterior landscaping matters as much as interior design here. Kelp forests planted around the base soften the hard geometric lines of the prismarine shell, while coral blocks and coral fans add colour variation against a structure that’s otherwise entirely blue-green. Sea pickles scattered across coral clusters double as ambient exterior lighting, which helps the whole build read as intentional after dark rather than just dark stone against dark water.
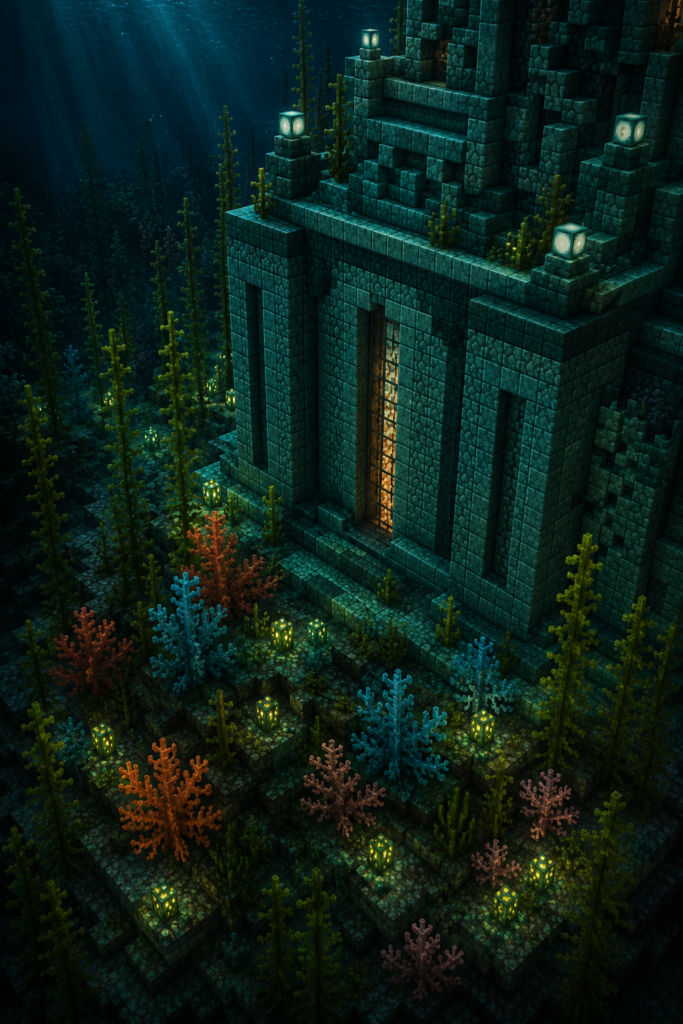
Resist the urge to over-decorate every surface. A monument conversion’s strongest visual asset is its scale and its stark geometric prismarine base, so the most effective builds tend to layer coral and kelp selectively around entrances, windows and the base of domes rather than covering the entire exterior.
🦑 Coexisting with an Active Guardian Farm
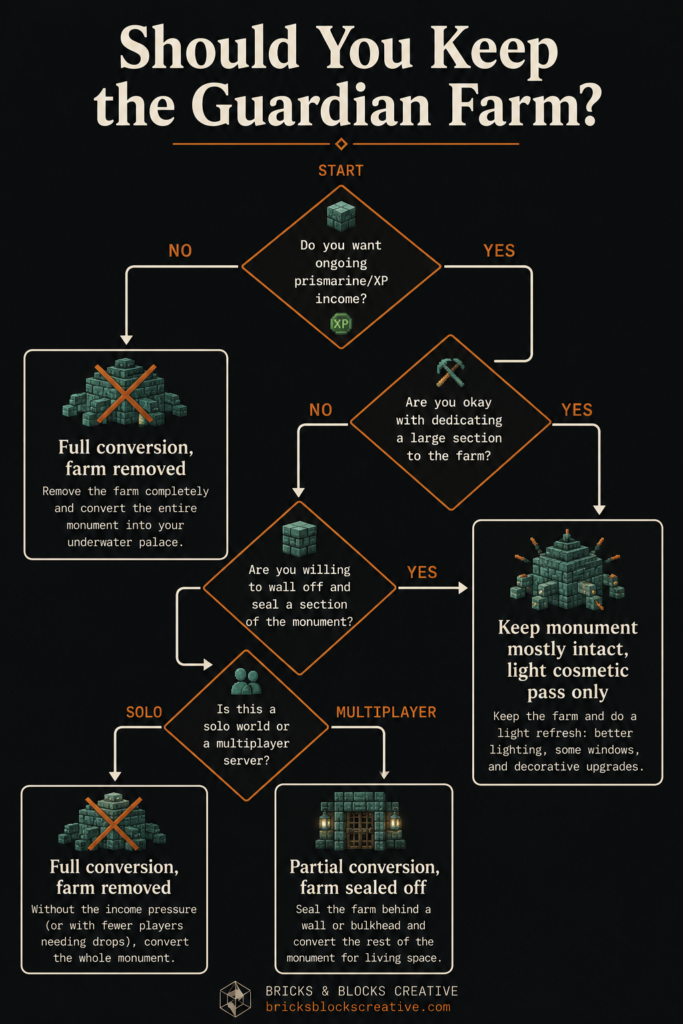
Not every builder wants to fully decommission the elder guardian spawns, and you don’t have to. If you’re running a guardian farm for prismarine, sea lanterns and experience, the cleanest approach is to physically separate the farm from the liveable sections rather than trying to build a palace around an active spawn chamber. Wall off the farm’s spawning platform completely, route the drop and collection systems through a sealed shaft, and keep the connecting corridor between farm and palace short and clearly utilitarian rather than blending it into the rest of the build.
A conduit is worth placing near your palace regardless of whether you keep the farm running. Built from prismarine and nautilus shells and activated inside a specific frame shape, it grants underwater breathing, night vision and increased underwater mining speed within its radius, which makes both ongoing construction work and casual movement around the exterior significantly easier. Positioning it centrally, ideally visible from your main hall through one of the glass dome windows, turns a purely functional block into another feature of the build.
Living in the Deep
A converted ocean monument works because it starts from a structure with real bones: thick walls, genuine scale, and a colour palette that does most of the aesthetic heavy lifting before you place a single decorative block. The job isn’t to erase what a monument is, it’s to edit it, keeping the parts that give the build history and character while fixing the parts that only ever made sense for guardians.
Which part of a monument conversion are you tackling first, the structural gut job or the lighting pass? Let us know in the comments, and if you’re planning a full biome-wide underwater base rather than a single monument, our guide to underwater domes and sea fortresses is the next logical read.