
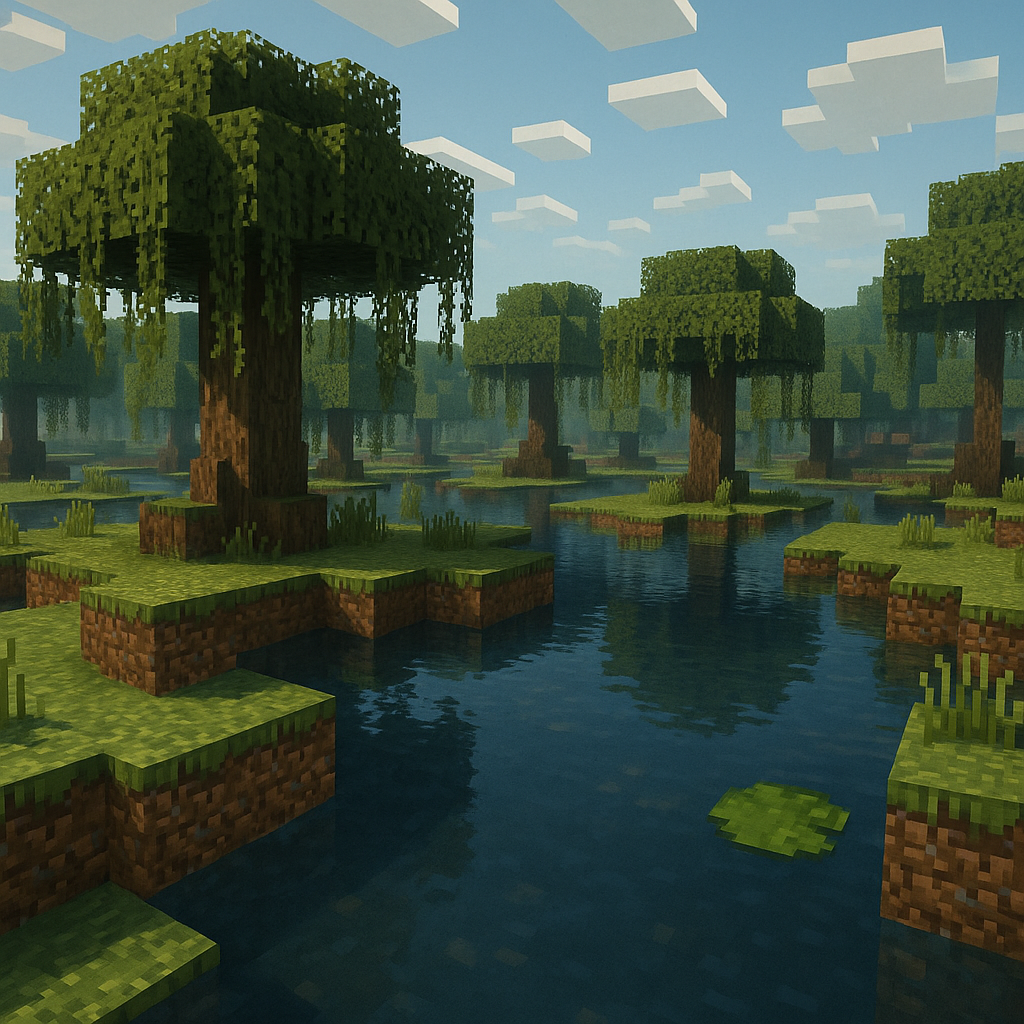
Recreating Minecraft’s diverse biomes in physical LEGO form presents a unique design challenge that bridges digital and physical building. Whether you’re crafting a compact diorama for your desk or planning an expansive multi-biome display, understanding scale, modularity, and biome-specific characteristics transforms a simple build into an immersive Minecraft landscape.
Adult builders who’ve mastered both LEGO texture techniques and Minecraft biome fundamentals will find that translating blocky digital terrain into studded reality requires careful planning and creative problem-solving.
Choosing Your Block Scale
The foundation of any successful LEGO Minecraft biome build starts with deciding how large each Minecraft block will be in physical form. This single decision cascades through every aspect of your build, affecting everything from overall size to level of detail you can achieve.
Minifig-Scale Builds (3×3×3 Studs)
For minifig-scale dioramas that place standard LEGO minifigures alongside Minecraft-inspired mobs and structures, most experienced builders use a 3×3×3-stud cube to represent each Minecraft block. This “accurate” conversion offers several advantages:
- Keeps proportions believable when Steve stands next to a Creeper or explores a cave system
- Allows for detailed features like ladders, doors, and workbenches at appropriate sizes
- Creates substantial-feeling builds with clear structural presence
- Translates to approximately 48 studs square for a 16×16 block biome section
However, this approach quickly becomes space-intensive, requiring significant display area for even modest builds.
Display-First Compressed Scales (2×2 or 1×2)
Display-first builds often compress to 2×2 or even 1×2 “half blocks” when the priority shifts from playability to showcasing multiple biomes in limited space. Adult collectors working with LEGO city building principles frequently adopt these compressed scales because they can fit plains, desert, forest, and ocean biomes on a single large baseplate without requiring an entire room.
Key considerations for compressed scales:
- Reduced detail capacity forces you to suggest features rather than accurately represent them
- A 1×2 scale might depict a tree as a simple brown column with green top rather than individual branches
- Multiple biomes fit in manageable display spaces
- Better suited for terrain features than detailed structures
Micro-Scale Approaches
Micro-scale builders take compression even further, simplifying entire biomes to textured color fields where individual Minecraft blocks become single LEGO studs or even color transitions. This scale excels for world maps or large terrain overviews but sacrifices all individual structure detail. You can’t build a recognizable village house at micro scale, but you can create a stunning continent-spanning landscape that captures Minecraft’s generation patterns.
Chunking and Modular Layout
Minecraft’s world generation works in 16×16 block chunks, and savvy LEGO builders adopt this same modular thinking for practical reasons. Designing your biome as standardized modules—whether 16×16, 32×32, or even 8×8 depending on your chosen scale—creates flexibility that fixed builds can’t match.
Benefits of Modular Construction
- Build biomes incrementally over time rather than committing to massive projects
- Rearrange sections into different configurations as your collection grows
- Each module tells part of the larger world story while remaining display-worthy independently
- Simplifies transport and storage in standard containers
- Reduces risk when moving displays (individual modules vs. entire interconnected landscapes)
Modular construction means you can build a plains biome module this week, add a desert module next month, then rearrange them into different configurations. Perhaps your ocean biome connects better to the forest when rotated 90 degrees, or your desert oasis fits more naturally between mountains and plains than you initially planned. Many builders following LEGO city master planning strategies apply this same approach to their Minecraft landscapes.
Connection Methods
The connection points between modules deserve careful attention:
- Technic Pin Systems: Firm connections using pins or brick-built connection systems for secure locking
- Edge-to-Edge Placement: Simple alignment relying on gravity and careful positioning
- Baseplate Integration: Multiple baseplates locked together with connecting plates underneath
- Custom Coupling: SNOT-based connection systems that hide within terrain features
Your best method depends on whether you plan frequent reconfiguration or establishing a permanent display.
Vertical Scale and Terrain Variation
Minecraft’s characteristic stepped terrain—those iconic blocky hills and squared-off cliffs—translates naturally to LEGO’s brick-based construction, but straight conversion often appears flat and uninteresting when viewed from across a room. Effective LEGO Minecraft terrain exaggerates vertical variation slightly to create visual drama without breaking the blocky aesthetic that defines both mediums.
Amplifying Elevation Changes
Raised platforms built with stacked plates or bricks let you show elevation changes clearly:
- A mountain biome module might use three or four plate-height steps to represent a hillside
- Digital single-block height changes become multi-plate physical transitions
- Amplification helps viewers recognize terrain features from viewing distance
- Maintains the fundamentally cubic nature of both LEGO and Minecraft
Underground Features and Layering
Rather than simply modeling surface terrain, consider using vertical space to show cave systems, mineshafts, or Nether portals below your biome surfaces:
- Transparent building techniques allow lifting top sections to reveal caves beneath
- Cut-away sections along module edges permanently expose underground layers
- Show stone strata, ore veins, and underground structures that would normally remain hidden
- Create hollow spaces within terrain hills to hide LED wiring and battery packs
Nether-themed builds especially benefit from vertical drama. The Nether’s massive lava lakes, towering basalt columns, and floating islands practically demand height variation. Using brick-built support pillars you can create floating island sections that hover above the main base level, connected by carefully positioned bridges that evoke Minecraft’s precarious Nether navigation.
Biome Identity Through Color Blocking
Strong color blocking separates good LEGO Minecraft biomes from great ones. Each biome should announce its identity instantly through a dominant base color palette, complemented by one or two accent colors that reinforce the environment’s character.
Core Biome Color Palettes
- Plains: Overwhelmingly green foundation with grass plates in various shades, occasional brown for dirt patches
- Desert: Tan and yellow dominance with strategic red-brown accents for hardened clay features (see desert building guide)
- Swamp: Darker greens, browns, and blues capturing murky water and dense vegetation (swamp techniques)
- Snow Biomes: White dominance with gray stone accents and strategic ice-blue highlights
- Forest: Multiple green tones from bright lime to dark forest green, brown tree trunks
- Nether: Stark contrast between bright reds, dark purples, orange lava, and black netherrack
Understanding LEGO’s color palette and how different colors pair becomes crucial at this stage. Not all greens read the same from viewing distance—some appear yellow-green while others trend toward blue-green. Testing color combinations in proper lighting before committing to large purchases saves both money and disappointment. Builders focusing on landscape and terrain colors specifically often develop custom palettes that represent each Minecraft biome’s unique character.
Biome-Specific Detail Layers
Biome-specific details layered over your color foundation complete the identity:
- Snow biomes: Powdered snow-white accents scattered across landscapes suggesting accumulation
- Nether biomes: Warped teal-blue contrasting against crimson red-brown (Nether materials guide)
- Mushroom islands: Unusual purples and reds with gray mycelium base colors
- Savanna: Orange-brown accent colors mixed with yellowed grass tones
- Jungle: Intense bright greens with brown cocoa pod accents
Biome Transitions and Boundaries
Real Minecraft world generation rarely features sharp boundaries between biomes—instead, you find transition zones where desert gradually gives way to savanna, or plains blend into forest over several chunks. Effective LEGO builds replicate these gradual shifts to create natural-feeling landscapes.
Transition Techniques
- Buffer Modules: Narrow 8-stud sections of mixed terrain between main biomes
- Shared Features: Rivers, paths, or cliff faces connecting different environments
- Gradual Color Shifts: Progressive vegetation changes across module boundaries
- Hybrid Modules: Deliberately split designs (half forest, half plains) with gradual transitions
A simple transition technique places a narrow buffer module between main biomes. Your desert-to-plains transition might be 8 studs of mixed tan-and-green terrain where grass begins appearing between sand patches, with the occasional acacia tree suggesting the environmental change. These transition zones feel more authentic than abrupt color shifts and provide visual interest by breaking up large expanses of uniform terrain.
Micro Scale vs Minifig Scale for Multiple Biomes
The scale you choose fundamentally affects what you can accomplish with limited space and budget.
Micro-Scale Advantages
- Genuinely vast landscapes spanning dozens of different environments fit in manageable spaces
- Entire continents represented on a single 32×32 baseplate
- Visual impact from color patterns and recognizable biome configurations
- Mobs simplified to single-color silhouettes or iconic shapes
- Excellent for world overview displays showing complete terrain generation
- Builders experienced with microscale LEGO techniques produce stunning results
Minifig-Scale Advantages
- Sacrifice breadth for depth, focusing on fewer biomes with richer stories
- Detailed treehouse villages with custom trees featuring individual branch structures
- Recognizable interior spaces within structures
- Ground-level scenes with campfires, crafting areas, and interactive elements
- Functions as playable scenes as well as display pieces
- Better showcases advanced LEGO building techniques
Many experienced builders maintain collections at both scales—micro-scale overview maps showing their entire Minecraft world’s geography, alongside detailed minifig-scale builds of favorite locations. This two-tier approach satisfies both the desire to visualize large-scale world planning and the craving for detailed building challenges.
Planning Multi-Biome Dioramas
Creating a cohesive multi-biome diorama requires planning beyond individual biome characteristics. You need to consider viewing angles, the narrative flow from one section to another, and how lighting will affect your color-blocked sections.
Layout Considerations
- Single-Viewpoint Displays: Linear arrangement against a wall, can use forced perspective with smaller background scales
- Island-Style Displays: Accessible from multiple sides, requires consistent detail on every surface
- Narrative Flow: Logical placement (villages near forests for lumber, oases between desert and mountains)
- Story Integration: Understanding Minecraft landscape building principles creates more convincing arrangements
Technical Planning
- Base Stability: Multiple baseplates locked together or mounted to rigid backing boards
- Lighting Integration: Plan wire routing early rather than retrofitting later
- Hidden Spaces: Hollow terrain sections for LED wiring and battery packs
- Weight Distribution: Balance for transport and display without structural failure
Start by sketching your biome layout. Will viewers see all biomes from a single viewing angle (a linear display against a wall), or will the diorama be accessible from multiple sides (island-style display)? Single-viewpoint displays can use forced perspective techniques where background biomes use slightly smaller scales to suggest distance.
Biome-Specific Building Challenges
Each Minecraft biome presents unique translation challenges when moving from pixels to plastic bricks. Understanding these specific challenges helps you plan solutions before starting construction.
Desert Biomes
- Struggle capturing sandstone’s smooth appearance using LEGO’s studded bricks
- SNOT techniques create smooth surfaces for temples and pyramids
- Careful color mixing suggests wind-weathered patterns in sand
- Terracotta structures require creative texture solutions
Ocean Biomes
- Transparent blue plates are obvious choice but layering creates depth
- Dark blue at bottom with progressively lighter blues toward surface
- Scatter transparent clear plates as “wave peaks” for texture
- Consider mixed transparency levels for water depth illusion
Nether Builds
- Capture hostile, alien atmosphere through stark color contrasts
- Bright reds against dark purples, orange lava against black netherrack
- Requires careful color selection and testing
- Floating island sections need robust hidden internal support structures
Snowy Biomes
- Strategic white element placement suggests snow accumulation without covering interesting features
- Place white plates on horizontal surfaces (tree branches, roof slopes, flat ground)
- Leave vertical surfaces dark for realistic snow settling patterns
- Taiga and tundra builds benefit from selective approach
Integration with Existing LEGO Content
Official LEGO Minecraft sets provide excellent starting points for biome building, though they typically use their own unique scale (roughly 2×2×2 studs per Minecraft block).
Parts Harvesting Strategies
- Harvest official sets for Minecraft-specific elements (mobs, tools, vegetation)
- Rebuild terrain sections at your preferred scale
- LEGO City sets provide modern color-blocked plates for large terrain sections
- Creator sets include organic elements (trees, rocks) that adapt well to Minecraft aesthetic
- Architecture sets demonstrate micro-scale techniques applicable to landscape building
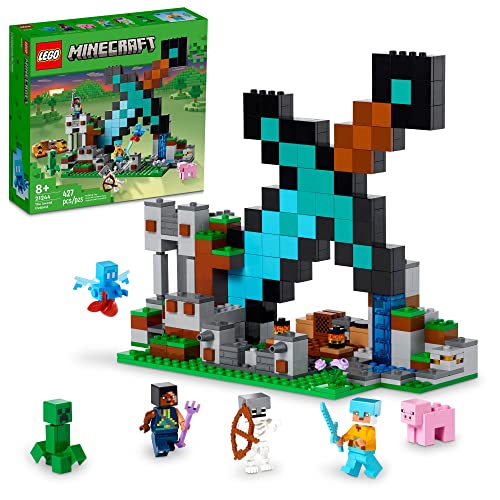
Some builders maintain separate “parts pools” specifically for their Minecraft building projects—bulk quantities of green plates for plains, tan for deserts, gray for mountains. This dedicated inventory approach, similar to LEGO city building strategies, means you can start new biome modules without cannibalizing existing displays or waiting for new pieces.
Display and Documentation
Once your LEGO Minecraft biomes are complete, thoughtful display maximizes their impact.
Display Best Practices
- Elevation helps—table or shelf placement at eye level for detail appreciation
- Background elements like printed landscape backdrops enhance without competing
- Simple painted walls can provide context without overwhelming the build
- Protective cases or barriers prevent accidental damage in high-traffic areas
Lighting Techniques
- Simple desk lamps positioned to minimize glare bring out color blocking and shadow detail
- LED strips integrated into builds illuminate caves and create lava effects
- Interior lighting adds depth to structures with windows
- Colored LEDs can enhance specific biome atmospheres
Photography and Sharing
Documentation through photography preserves your builds and lets you share them with the broader adult building communities. Following LEGO photography principles shows your biome builds at their best:
- Clean backgrounds that don’t distract from the build
- Good lighting from multiple angles to eliminate harsh shadows
- Interesting camera angles showing both overview and detail shots
- Individual module photography plus combination shots
Scaling Up: Long-Term Biome Projects
Building a comprehensive LEGO Minecraft world isn’t a weekend project—it’s an evolving long-term creation that grows over months or years. Establishing a consistent scale, modular approach, and clear planning system early prevents frustration later when you’re integrating new sections with existing ones.
Documentation and Planning
- Keep detailed notes on color choices, scale decisions, and module dimensions
- Digital tools like Stud.io for pre-planning and virtual catalogs
- Spreadsheets tracking completed, in-progress, and wishlist biomes
- Photo documentation of connection methods and color formulas
Budget and Parts Management
- Purchase bricks in bulk when deals appear (mass quantities of green plates on sale)
- Build parts library from BrickLink sellers for specific colors
- Following LEGO city budget strategies applies equally to Minecraft projects
- Separate “parts pools” for each major biome color scheme
Advanced Techniques and Future Development
As your skills grow, experiment with advanced techniques that push beyond basic block-for-block translation.
Advanced Building Approaches
- Angle builds creating dynamic terrain that breaks from pure orthogonal construction
- Integrated landscaping using organic shapes within blocky framework
- Complex SNOT work for smooth surfaces and unusual orientations
- Playability features: removable sections revealing underground spaces
- Modular buildings that reconfigure within the landscape
- Interactive elements like working water features
Incorporating advanced LEGO building techniques like angle builds, integrated landscaping, and complex SNOT work creates biome builds that feel more dynamic than simple stepped terrain. Builders who’ve mastered both Minecraft building fundamentals and LEGO standard building techniques find the most success creating builds that honor both mediums.
Community Engagement
- Share innovations and techniques with other builders
- Participate in online communities and forums
- Document your process for others learning the craft
- Stay open to different building philosophies and approaches
The LEGO Minecraft building community continues evolving with new techniques, scales, and approaches emerging regularly. Engaging with other builders, sharing your own innovations, and staying open to different building philosophies keeps your own work fresh and inspiring.
What’s your preferred scale for LEGO Minecraft biome building, and which biome presents the most interesting building challenge?


