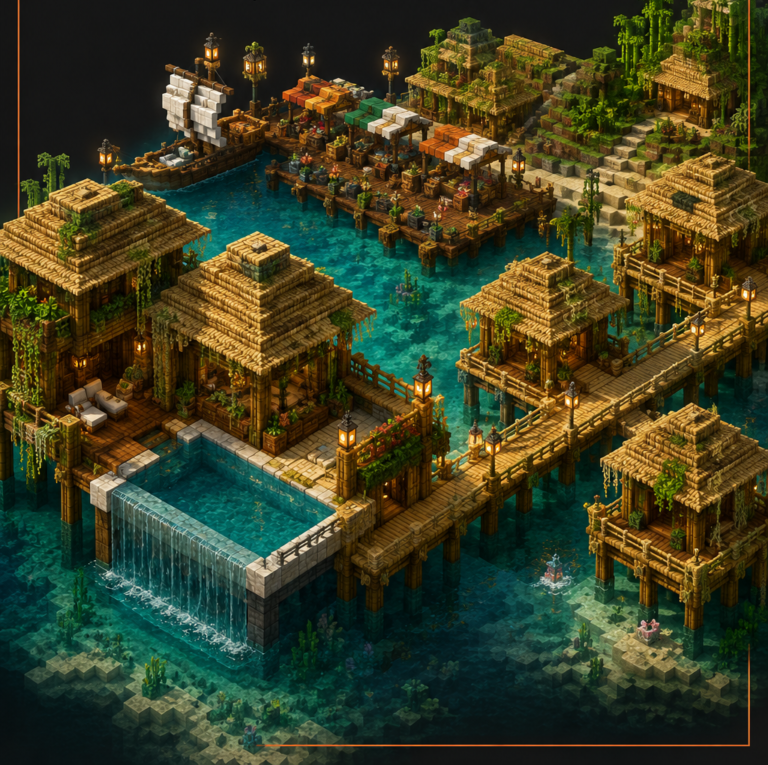
You’ve spent months perfecting your latest MOC, carefully selecting each element from your organized LEGO storage system, and employing advanced building techniques to achieve exactly the right aesthetic. The color balance is perfect, every detail precisely planned—but when you photograph your creation, the colors look completely wrong. Sound familiar?
The frustration of poor lighting destroying months of careful color planning is one of the biggest challenges facing serious adult builders today. Your photos should showcase the same precision and attention to detail that went into your build, not misrepresent the colors you’ve thoughtfully selected from the complete LEGO color palette.
In this comprehensive guide, we’ll explore three critical areas: understanding how lighting affects color perception, setting up professional documentation photography, and integrating LED lighting without color distortion. By the end, you’ll have the knowledge to create photographs that truly honor your building choices.
Understanding Color and Light in LEGO Photography
The Science of Color Perception
Every LEGO element you carefully choose appears different under various light sources, and understanding this phenomenon is crucial for accurate documentation. The concept of color temperature, measured in Kelvin (K), determines whether light appears warm (2700K-3000K), neutral (4000K-4500K), or cool (5500K-6500K). This isn’t just technical jargon—it directly affects how your carefully planned color schemes appear in photographs.
Common Light Sources and Their Effects:
- Household LED bulbs (2700K-3000K): Create warm yellow cast, make blues appear green and whites look cream-colored
- Fluorescent office lighting (4000K-4200K): Creates sterile appearance, washes out warm colors like red and orange
- Natural daylight (5600K-6500K): The gold standard for color accuracy, varies by time and weather
- Cheap “daylight” LEDs: Often have poor color rendering despite correct temperature ratings
The problem compounds when photographers use cheap LED strips advertised as “daylight balanced” that actually emit light with poor color rendering properties. A light source might claim to be 5600K but still make your carefully chosen bley (gray) elements look sickly green or your vibrant reds appear muddy brown.
LEGO-Specific Color Challenges
LEGO elements present unique photographic challenges that standard product photography doesn’t address. Understanding these specific issues helps you anticipate and solve problems before they ruin your documentation shots.
Translucent Element Challenges:
- Trans-clear windows can cast strong blue tints under certain lighting
- Colored transparent pieces become dominant color influences in photographs
- Light transmission through elements affects overall build appearance
- Stacking translucent pieces compounds color shift effects
Metallic and Pearl Finish Issues:
- Pearl gold elements photograph as yellow under warm lighting, silver under cool lighting
- Metallic surfaces reflect surrounding light sources, changing apparent color
- Special finishes designed for specific lighting conditions may look wrong in photos
- Chrome and metallic elements can create unwanted reflections and hot spots
The notorious challenge of mixed grays—what the community calls the bley problem—becomes even more pronounced in photography. Light bluish gray, dark bluish gray, and true gray elements that look harmonious in person can appear jarringly different in photographs if your lighting creates color casts.
Dark colors present their own set of problems, often disappearing into shadows and losing detail, while light colors can easily blow out to pure white if your exposure isn’t carefully controlled. Understanding these challenges is the first step toward overcoming them.
Essential Photography Setup for Color Accuracy
Building Your Lighting Kit
Professional LEGO photography doesn’t require a fortune in equipment, but it does demand specific attention to light quality over quantity. Understanding what to look for in lighting equipment saves money and ensures better results from day one.
Essential Light Source Specifications:
- Color temperature: 5600K for baseline accuracy (variable 3200K-5600K preferred)
- Color Rendering Index (CRI): Minimum 90, ideally 95+ for accurate color reproduction
- Adjustability: Dimming capabilities and directional control for different scenarios
- Consistency: Stable color temperature that doesn’t shift as the light warms up
Equipment Options by Budget:
- Budget ($50-100): High-quality desk lamps with daylight-balanced CFL or LED bulbs
- Intermediate ($150-300): LED panels like the Lume Cube with variable color temperature
- Professional ($300+): Multiple panel setups with wireless control and color accuracy certification
LED panels offer the most versatile solution for LEGO photography. Unlike ring lights, which can create harsh reflections on glossy surfaces, or softboxes, which might be overkill for smaller builds, LED panels provide even, controllable illumination.
The investment in proper lighting pays dividends beyond just photography. Good lighting helps you evaluate color choices during the building process, ensuring your MOC design decisions look consistent under various viewing conditions.
Camera and Settings for Accurate Documentation
While smartphone cameras have improved dramatically, serious color documentation benefits from the manual controls available in DSLR or mirrorless cameras. The key isn’t megapixel count or fancy features—it’s precise control over the elements that affect color accuracy.
Essential Camera Settings for LEGO Photography:
- White Balance: Manual/Custom setting using white LEGO brick as reference
- ISO: 100-200 to minimize noise and maintain color accuracy
- Aperture: f/8-f/11 for sufficient depth of field across your build
- File Format: RAW for maximum post-processing flexibility
- Exposure: Manual control to balance light and dark element detail
The White LEGO Brick Technique:
- Place a white LEGO brick (part 3001 works perfectly) in your lighting setup
- Use your camera’s custom white balance feature to reference the brick or a white balance card to do it manually
- This eliminates auto white balance guesswork and color shifts
- Repeat this process whenever you change lighting setups
Exposure settings for LEGO photography require balancing detail preservation with color accuracy. The goal is maintaining detail in both light and dark elements—a challenge that often requires bracketed exposures for complex builds.
Shooting in RAW format provides the flexibility to fine-tune white balance and exposure in post-processing without degrading image quality. This becomes essential when documenting builds that incorporate multiple specialized LEGO elements with different reflective properties.
The Three-Point Lighting Setup
Professional photography relies on three-point lighting for good reason: it provides dimensional control that single-source lighting cannot achieve. For LEGO photography, this translates to key light, fill light, and background separation—each serving a specific purpose in accurate documentation.
Your key light should be positioned at roughly 45 degrees from your build, providing the primary illumination and creating shadows that give dimension to your construction. This light should be your strongest and most color-accurate source. Position it slightly above your build to avoid casting shadows from upper elements onto lower details.
Fill light addresses the harsh shadows created by your key light, particularly important for LEGO builds where details can disappear into dark crevices between elements. This secondary light should be softer and positioned opposite your key light, typically at about 30-50% the intensity of your main light.
Background lighting serves two purposes: separating your build from the backdrop and providing subtle illumination that prevents the background from going completely black. A simple desk lamp pointed at your background (not your build) often suffices, though colored gels can add mood without affecting your build’s color accuracy.
This setup can be achieved with household items: desk lamps for key and background lighting, white poster board as a reflector for fill lighting, and careful positioning of your build relative to available window light.
LED Integration Without Color Distortion
Choosing LEDs for Internal Lighting
Internal lighting transforms LEGO builds from static displays into dynamic showcases, but poor LED selection can destroy the color accuracy you’ve worked to achieve in your external photography setup. Understanding the trade-offs between different LED types helps you make informed decisions.
LED Color Temperature Options:
- Warm White (3000K): Perfect for architectural interiors, creates cozy atmosphere, challenges mixed lighting photography
- Neutral White (4000K): Best compromise for most applications, natural feel with manageable color matching
- Cool White (5600K+): Matches photography lighting perfectly, but can feel sterile in interior spaces
- RGB Strips: Ultimate flexibility, but avoid “Christmas tree effect” in documentation shots
Power and Installation Considerations:
- Battery-powered: Clean installation, no visible wires, limited runtime for long photo sessions
- Wired solutions: Consistent power, permanent installation, requires wire management planning
- USB-powered: Good middle ground, easy to control, moderate wire management needs
The temptation to create dramatic colored lighting often results in builds that look impressive in dark rooms but completely unnatural in documentation photography. When using RGB strips, stick to white settings that match your photography setup, saving colored modes for specific dramatic effect shots.
Plan your LED installation during the advanced building phases of your MOC, not as an afterthought. This ensures clean wire routing and maintains the aesthetic integrity of your build.
Balancing Internal and External Lighting
The key to successful mixed lighting lies in understanding that your camera sees light differently than your eyes do. While our vision naturally adapts to mixed color temperatures, cameras faithfully record exactly what they detect—including color casts that create unnatural-looking results.
For builds with extensive internal lighting, consider the photography setup during the planning stages. Design wire routes that won’t interfere with your preferred photography angles, and choose LED positions that enhance rather than compete with your external lighting setup.
Diffusion materials inside LEGO builds can transform harsh LED points into soft, even illumination that photographs beautifully. Simple techniques like placing LEDs behind translucent white elements or using tissue paper (carefully, considering fire safety) can eliminate hot spots and create professional-looking interior lighting.
Post-processing techniques can help balance mixed lighting scenarios, but starting with well-matched color temperatures saves significant editing time and produces more natural results. Consider maintaining separate LED setups: one optimized for display viewing and another matched to your photography lighting.
Advanced Techniques
Professional architectural photographers use sophisticated lighting techniques that translate well to LEGO photography. Accent lighting can highlight specific elements of your build without overwhelming the overall composition—think of LED strips highlighting the underside of a spaceship or subtle backlighting that separates foreground elements from the background.
Time-of-day simulation becomes possible with careful LED programming and photography planning. Morning light (warm external lighting with cool LED interiors), noon light (neutral throughout), and evening light (warm throughout) can tell different stories with the same build.
For cityscape MOCs, varying the intensity and color temperature of different building LEDs creates realistic depth and interest while maintaining photography-friendly color balance. Some buildings might use warm white LEDs, others neutral, creating the varied lighting you’d see in a real city while keeping everything within a photographable range.
The most advanced technique involves synchronized lighting control, where internal LEDs can be adjusted to complement external photography lighting for different shots. This might involve programmable LED controllers that let you quickly switch between “display mode” and “photography mode” lighting setups.
Common Mistakes and How to Fix Them
The “Instagram Effect” Trap
Social media’s emphasis on dramatic, oversaturated imagery has created unrealistic expectations for LEGO photography. While eye-catching photos get likes, they don’t serve the documentation purpose that serious builders require. Oversaturated photos make it impossible to accurately assess color choices, building techniques, or construction details.
The difference between artistic interpretation and accurate documentation is important to understand. Artistic shots might use dramatic lighting, extreme color grading, or creative angles to create mood and visual impact. Documentation photography prioritizes accuracy, showing your build as it truly appears under neutral lighting conditions.
This doesn’t mean documentation photos must be boring. Proper lighting and composition can create compelling images that remain color-accurate. The goal is allowing viewers to see your build as if they were examining it in person under ideal lighting conditions.
Consider maintaining two photography approaches: technical documentation that prioritizes accuracy, and artistic interpretation that focuses on visual impact. Each serves a different purpose in showcasing your work.
Technical Pitfalls to Avoid
Understanding common technical mistakes helps you avoid hours of frustration and ensures your documentation accurately represents your building choices. These issues are easily preventable once you know what to watch for.
Lighting-Related Problems:
- Mixed color temperatures: Window light + tungsten bulbs, or fluorescent + LED combinations create color casts
- Poor quality “daylight” LEDs: Cheap strips with incorrect color rendering make accurate documentation impossible
- Inconsistent lighting: Color temperature shifts as bulbs warm up, creating different results throughout photo session
Exposure Issues:
- Overexposure of light elements: White, light gray, and yellow pieces lose detail and surface texture
- Underexposure of dark builds: Construction techniques and color variations disappear into shadow
- Blown highlights: Eliminates ability to see clutch power details and connection methods
- Blocked shadows: Makes it impossible to analyze building techniques in darker areas
Color Contamination:
- Reflective color spill: Bright red, blue, or green elements reflect onto nearby white pieces
- Background interference: Colored backgrounds affecting overall color balance
- Metallic element reflections: Chrome and metallic pieces reflecting unwanted light sources
The solution to most of these problems lies in consistent, well-planned lighting setups and careful attention to camera settings. Taking time to properly set up your photography environment saves significant time in post-processing and ensures accurate color representation.
Taking Your LEGO Photography to the Next Level
Mastering color-conscious LEGO photography requires patience, practice, and attention to technical details that might seem overwhelming at first. Start with simple builds and basic three-point lighting setups before advancing to complex internal LED installations and mixed lighting scenarios.
The investment in proper lighting and photography techniques pays dividends beyond just better photos. Understanding how light affects color helps during the building process itself, allowing you to make better decisions about element selection and color placement as you work on your MOCs.
Consider documenting your builds throughout the construction process, not just upon completion. Progress photos using consistent lighting setups create valuable references for future builds and help you analyze which techniques work best for different types of constructions.
Your builds deserve photographs that showcase the same level of precision and attention to detail that went into their construction. With proper lighting techniques and color-conscious photography approaches, you can create documentation that truly honors your creative vision.
What’s your biggest photography challenge with your builds? Share your experiences and questions in the comments below—the adult building community thrives on sharing knowledge and helping each other improve our craft.
Ready to expand your building skills beyond photography? Explore our essential building tools guide or dive deeper into advanced LEGO building techniques that will enhance your next MOC project.