

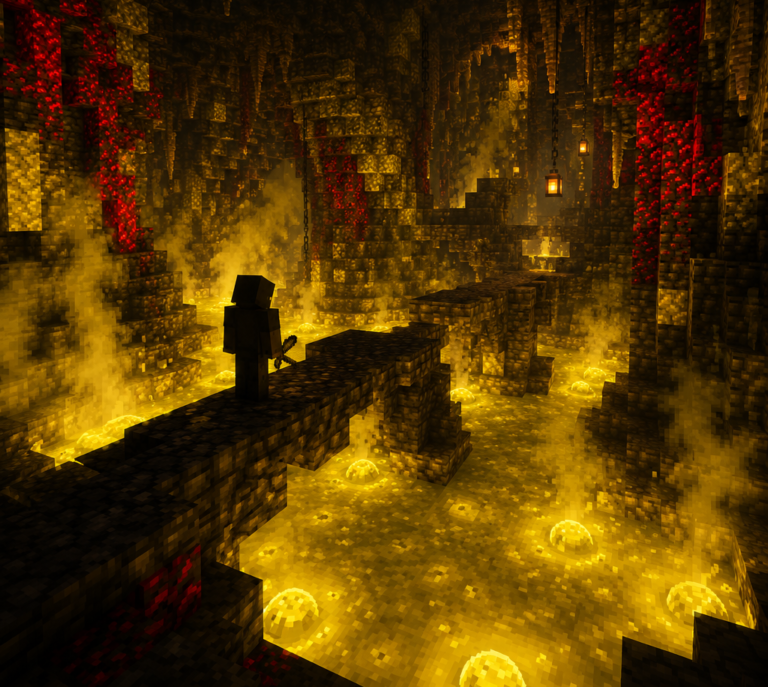
The evolution of Minecraft from its signature blocky aesthetic to photorealistic environments represents one of gaming’s most fascinating visual transformations. What started as a simple sandbox with pixelated textures has become a platform where adult builders create contemporary architecture that rivals professional 3D rendering software. The secret behind these stunning creations? High-resolution texture packs paired with sophisticated shader systems that transform basic blocks into glossy planks, reflective glass, and deeply textured stone.
For those of us who’ve moved beyond survival basics and into serious architectural work, realistic texture packs have become essential tools. Whether you’re designing a luxury penthouse, crafting industrial steampunk structures, or recreating real-world buildings in blocky form, the right texture pack makes the difference between a decent build and a portfolio-worthy masterpiece. The challenge isn’t finding realistic packs—it’s navigating performance issues, compatibility problems, and the overwhelming number of options available in 2025.
This comprehensive guide cuts through the noise to showcase the texture packs that actually deliver on their promises. We’ll explore what makes a pack truly “realistic,” recommend specific options for different building styles, solve common technical problems, and show you how to pair textures with shaders for maximum visual impact. Whether you’re running a gaming rig or working with modest hardware, you’ll find options that balance beauty with performance.
Understanding Realistic Texture Packs
Before diving into specific recommendations, it’s worth understanding what transforms a texture pack from “nice” to “photorealistic.” The technology behind modern Minecraft textures has evolved significantly, creating systems that rival professional game engines in complexity.
Resolution and Detail Levels
Texture resolution defines how much detail each block surface contains. Vanilla Minecraft uses 16×16 pixel textures—adequate for the game’s original aesthetic but limiting for realistic builds. Modern packs range from 64x (four times vanilla resolution) to 2048x or higher, with each jump in resolution adding exponentially more detail and visual complexity.
The relationship between resolution and realism isn’t strictly linear. A well-designed 128x pack often looks better than a poorly executed 512x pack because texture quality matters more than raw pixel count. The best packs balance resolution with artistic coherence, ensuring that enhanced detail serves the overall aesthetic rather than overwhelming it.
For most builders, 128x to 256x represents the sweet spot where detail enhancement remains noticeable without crushing system performance. These resolutions provide glossy wood grain, realistic stone textures, and believable material surfaces while maintaining playable frame rates on mid-range hardware.
Physically Based Rendering Explained
PBR (Physically Based Rendering) technology represents the most significant advancement in Minecraft texture realism. Unlike traditional texture packs that simply replace block images, PBR packs include multiple texture maps that define how surfaces interact with light. These maps control properties like reflectivity, roughness, metallic quality, and even microscopic surface detail.
When combined with compatible shaders, PBR textures enable realistic lighting effects that transform how builds appear. Glass becomes truly transparent with proper refraction, water reflects surrounding architecture, and metallic blocks catch light like real materials. This technology particularly benefits modern interior design, where lighting and material interaction create atmosphere and visual interest.
The caveat? PBR requires both a compatible texture pack and appropriate shaders to function. Without shaders, PBR packs often look underwhelming or even worse than standard high-resolution packs. This dependency makes shader selection crucial—a topic we’ll address in depth later.
Coverage Considerations
One frequently overlooked aspect of realistic texture packs involves coverage completeness. Many packs beautifully retexture vanilla blocks but fall short when encountering modded content. If you’re working with mods like Create, Chisel, or any of the popular building expansion mods, texture coverage becomes critical for maintaining visual consistency.
The best modern packs either provide comprehensive vanilla coverage or explicitly target mod compatibility. Some creators focus entirely on modded blocks, creating specialized packs that make industrial builds or technical creations visually cohesive. Understanding a pack’s coverage scope prevents the jarring experience of mixing photorealistic wood planks with default-textured mod blocks.
For those following along with our previous discussions about advanced building mods or creating massive structures, texture coverage extends beyond vanilla blocks into the realm of construction tools and specialty materials.
Top Realistic Texture Packs for 2025
The realistic texture pack landscape offers dozens of options, but certain packs have established themselves as industry standards through consistent quality, active development, and strong community support. Here are the standout choices for adult builders pursuing photorealistic results.
ModernArk: The Contemporary Building Standard
Resolution: 128x-256x options
Pack Size: ~350MB (128x)
Best For: Modern architecture, contemporary interiors, minimalist designs
Performance: Medium demand
Price: Free with optional Patreon support
ModernArk has become synonymous with contemporary Minecraft building, particularly for creators focused on sleek, modern aesthetics. The pack excels at rendering the clean lines and smooth surfaces essential for modern architecture, making it the go-to choice for luxury homes, corporate buildings, and urban environments.
What sets ModernArk apart is its attention to contemporary materials. Concrete renders with subtle texture variation that mimics poured concrete finishes. Glass achieves proper transparency without the cartoonish quality of vanilla textures. Wood planks display refined grain patterns suitable for modern furniture and accent walls. When working on projects inspired by real-world contemporary design—like those discussed in our guide to recreating real architecture—ModernArk provides the material authenticity needed for believable results.
The pack particularly shines in interior spaces where lighting and material interaction create ambiance. Modern kitchen designs, minimalist living areas, and professional office spaces all benefit from ModernArk’s sophisticated material rendering. The 128x version maintains excellent performance while delivering visual quality that satisfies most builders. Those with powerful systems can upgrade to 256x for even more detail in close-up interior work.
Prime’s HD Textures: High-Detail Specialist
Resolution: 128x-256x options
Pack Size: ~400MB (256x)
Best For: Wood-focused builds, detailed stone work, architectural close-ups
Performance: Medium to demanding
Price: Free
Prime’s HD Textures occupies a unique position among realistic packs by prioritizing material authenticity over stylistic coherence. Each block receives individual attention, with wood varieties displaying distinct grain patterns and stone types showcasing geological authenticity. This approach makes Prime’s ideal for builders who need specific materials to look correct rather than generically “realistic.”
Wood planks in Prime’s HD represent the pack’s signature achievement. Each wood species features unique grain direction, color variation, and surface texture that distinguishes oak from spruce, birch from jungle wood. For builders creating detailed furniture, custom cabinetry, or wood-focused architectural elements, this level of specificity proves invaluable. The glossy finish option particularly benefits modern interior design where polished wood surfaces create visual interest.
Deep stone textures constitute another Prime’s strength. Cobblestone displays individual stone shapes with proper depth and shadow. Smooth stone achieves the slightly reflective quality of polished rock. Brick patterns maintain mortar line consistency while adding realistic color variation. These qualities make Prime’s HD an excellent choice for builds requiring believable structural materials—castles, industrial structures, or projects like our mountain base designs.
The enhanced lighting compatibility means Prime’s HD works beautifully with most shader packs, though the 256x version demands significant VRAM. Budget builders should stick with the 128x option, which maintains most visual benefits while improving performance considerably.
S&K Photo Realism: Ultra-Realistic Shader Synergy
Resolution: 512x-1024x options
Pack Size: ~2GB (512x)
Best For: Showcase builds, exterior architecture, photorealistic renders
Performance: Very demanding
Price: Paid (approximately $10-15)
S&K Photo Realism pushes Minecraft’s visual capabilities to their absolute limits. This isn’t a pack for everyday building or survival gameplay—it’s a specialized tool for creating near-photorealistic images and videos of completed structures. The ultra-high resolution textures contain such detail that individual build elements become photographic in quality when properly lit and rendered.
The dependency on high-end shaders isn’t a limitation but rather an integral part of S&K’s design philosophy. The pack includes extensive PBR maps that define surface properties at microscopic levels. When combined with path-traced shaders like SEUS PTGI, the results approach architectural visualization quality. Reflections in glossy surfaces, subtle color variations in stone, and weathering effects on wood all contribute to unprecedented realism.
Where S&K excels most dramatically is in exterior architectural rendering. Large-scale builds benefit from the texture detail that remains sharp even when viewing structures from distance. Modern homes with extensive glass elements particularly showcase S&K’s capabilities—proper window reflections, realistic lighting transmission, and believable material interaction transform builds from game constructions into virtual architecture.
The performance requirements cannot be overstated. S&K Photo Realism with compatible shaders requires a high-end GPU with substantial VRAM, preferably 8GB or more. Frame rates typically drop to 30-60 FPS even on strong systems. Most builders use S&K specifically for final documentation, taking screenshots and recordings after completing builds with more performance-friendly packs.
Create PBR: Essential for Modded Builders
Resolution: 128x
Pack Size: ~150MB
Best For: Modded builds, industrial design, mechanical aesthetics
Performance: Light to medium
Price: Free
For builders working with the Create mod or other technical/industrial mods, Create PBR solves the perennial problem of texture inconsistency. While many realistic packs beautifully render vanilla blocks, they leave modded elements looking jarringly out of place. Create PBR specifically targets mod blocks, applying PBR technology to mechanical components, industrial materials, and technical equipment.
The pack transforms Create mod machinery from functional but bland to visually impressive. Cogwheels display metallic sheen and mechanical wear. Copper components properly oxidize with realistic patina development. Industrial blocks achieve the hefty, substantial appearance appropriate for factories and mechanical installations. This consistency proves crucial for builders creating elaborate steampunk industrial complexes or technical showcases.
Beyond Create, the pack includes support for popular building mods like Chisel and Supplementaries, extending texture consistency across expanded building palettes. This coverage makes Create PBR valuable even for builders not heavily focused on mechanical builds but who use mods to expand available architectural elements.
The relatively modest 128x resolution keeps performance manageable while PBR capabilities ensure visual quality remains high with appropriate shaders. For modded builders, Create PBR often becomes a permanent addition, layered with other packs to achieve comprehensive texture coverage across both vanilla and modded content.
Nautilus 3D: Balanced Realism for Interiors
Resolution: 64x-128x options
Pack Size: ~200MB (128x)
Best For: Interior design, furniture detailing, residential builds
Performance: Light to medium
Price: Free
Nautilus 3D takes a different approach to realism by adding subtle 3D elements and enhanced detail to blocks while preserving Minecraft’s fundamental aesthetic. Rather than pursuing photorealism at any cost, Nautilus aims for “believable enhancement”—making blocks look more realistic without abandoning the game’s signature style. This balance appeals to builders who want improved visuals without the jarring disconnect sometimes created by ultra-realistic packs.
The pack’s strength lies in interior applications where furniture, decorative elements, and living spaces benefit from enhanced detail. Bookshelves display individual book spines. Paintings gain subtle texture and frame depth. Storage furniture appears more dimensional. These improvements transform interior spaces from functional arrangements into detailed living environments.
When creating detailed interior designs or specific rooms like kitchens and bedrooms, Nautilus 3D provides enhanced visual interest without overwhelming the space. The moderate resolution means even modest systems maintain good performance, making it practical for everyday building rather than just final renders.
The vanilla-like quality also means Nautilus pairs well with a wider range of shaders than ultra-realistic packs. Builders uncomfortable with photorealistic aesthetics often find Nautilus hits the perfect middle ground—enhanced without feeling foreign.
Clarity: Performance-Friendly Realistic Option
Resolution: 64x
Pack Size: ~80MB
Best For: Performance-conscious builders, everyday use, multiplayer servers
Performance: Light
Price: Free
Clarity proves that realistic texture enhancement doesn’t require massive resolution bumps or crushing performance requirements. At 64x—only four times vanilla resolution—Clarity achieves surprising realism through intelligent texture design rather than brute-force detail. This efficiency makes it ideal for builders who need improved visuals without sacrificing playability.
The pack maintains Minecraft’s recognizable aesthetic while adding subtle realism to materials. Stone gains believable texture without becoming photographic. Wood displays grain patterns without overwhelming the eye. Glass achieves proper transparency without complicated reflection systems. These enhancements improve visual quality across both small and large builds without demanding specific shader compatibility.
For builders working on long-term survival worlds, multiplayer servers, or modest hardware, Clarity provides realistic enhancement that remains usable during active construction. Unlike ultra-high-resolution packs suitable mainly for final documentation, Clarity works well as an everyday texture solution. The performance headroom also allows comfortable shader use, enabling lighting improvements without frame rate collapse.
The moderate file size means faster downloads and easier sharing—relevant considerations for multiplayer communities or builders who frequently switch between packs. While Clarity won’t produce the jaw-dropping realism of 512x photorealistic packs, it delivers consistent quality that makes long building sessions more visually engaging.
Quick Comparison: Choosing Your Pack
Not sure which texture pack fits your needs? Use this comparison to find your best match:
For Everyday Building:
- Best choice: Clarity or Nautilus 3D
- Why: Light performance impact, usable during active construction
- Ideal for: Long building sessions, survival worlds, multiplayer servers
For Modern Architecture:
- Best choice: ModernArk
- Why: Specialized contemporary materials, clean aesthetic
- Ideal for: Luxury homes, corporate buildings, minimalist design
For Maximum Realism:
- Best choice: S&K Photo Realism or Prime’s HD (256x)
- Why: Ultra-high detail, photographic quality
- Ideal for: Final screenshots, showcase builds, portfolio work
For Modded Builds:
- Best choice: Create PBR (layered with general pack)
- Why: Comprehensive mod block coverage
- Ideal for: Industrial designs, technical builds, Create mod projects
For Balanced Quality:
- Best choice: Prime’s HD (128x) or Epic Adventures
- Why: Good detail without extreme performance cost
- Ideal for: Most building scenarios, versatile applications
Hardware Compatibility Quick Guide:
| Your GPU VRAM | Recommended Pack | Max Resolution | Shader Options |
|---|---|---|---|
| 4GB or less | Clarity, Nautilus 3D | 64x-128x | BSL (low), Complementary (low) |
| 6GB | ModernArk, Prime’s HD | 128x-256x | BSL (medium), Complementary (medium) |
| 8GB | Any 256x pack | 256x | Most shaders (medium-high) |
| 10GB+ | S&K Photo Realism | 512x+ | SEUS PTGI, any shader (high) |
Epic Adventures: Vibrant Realism
Resolution: 128x
Pack Size: ~300MB
Best For: Fantasy builds, adventure maps, thematic projects
Performance: Medium
Price: Free with optional Patreon support
Epic Adventures occupies an interesting niche by combining realistic texture quality with enhanced color vibrancy and fantasy-appropriate styling. Rather than pursuing stark photorealism, the pack amplifies Minecraft’s adventurous spirit through detailed but slightly stylized textures. This approach particularly benefits themed builds where pure realism might feel inappropriate.
The enhanced color palette makes Epic Adventures ideal for fantasy construction—magical towers, enchanted forests, mystical dungeons, and adventure-focused builds all benefit from the pack’s more vibrant but still detailed aesthetic. Materials maintain realistic texture without the muted, strictly naturalistic color grading of photorealistic packs.
For builders working on thematic projects or creating adventure experiences, Epic Adventures provides visual enhancement that supports rather than conflicts with fantastical elements. The pack proves that “realistic” doesn’t always mean “photographic”—sometimes authenticity to a build’s conceptual style matters more than strict material accuracy.
Pairing Texture Packs with Shaders
Realistic texture packs rarely achieve their full potential without complementary shader systems. The relationship between textures and shaders resembles that between paint and lighting in traditional art—both elements must work together to create the intended effect. Understanding shader fundamentals and optimization becomes essential for builders pursuing photorealistic results.
Why Shaders Matter for Realism
Shaders fundamentally change how Minecraft renders light, shadow, and color. While texture packs replace block surface images, shaders modify the rendering engine itself, adding effects like dynamic shadows, realistic water, atmospheric fog, and advanced lighting calculations. These effects transform static textures into living materials that respond believably to environmental conditions.
The impact becomes particularly dramatic with PBR texture packs. Without shaders, PBR maps remain unused—the game simply displays the base color texture. With appropriate shaders, those maps activate, defining how surfaces reflect light, display roughness, and interact with their environment. A glossy wood plank stops being a flat image and becomes a reflective surface with depth and character.
For modern interior design—where lighting defines ambiance and material interaction creates visual interest—shaders prove essential. Window light streams realistically across rooms. Artificial lighting creates proper fall-off and shadow. Reflective surfaces like polished concrete or glass properly mirror their surroundings. These effects elevate builds from impressive arrangements to architectural experiences.
Top Shader Recommendations
SEUS (Sonic Ether’s Unbelievable Shaders)
- Best for: Maximum realism and photographic quality
- Performance: Very demanding (PTGI) to moderate (Renewed)
- Key features: Ray-traced lighting, advanced water rendering, atmospheric effects
- Hardware needs: RTX GPU recommended for PTGI; mid-range GPU acceptable for Renewed
- Pairs well with: S&K Photo Realism, Prime’s HD Textures (256x)
SEUS remains the gold standard for photorealistic rendering. The PTGI (Path Traced Global Illumination) version adds ray-traced lighting that approaches film-quality realism but demands cutting-edge hardware. For most builders, SEUS Renewed or SEUS PTGI E12 provides the best balance between visual quality and performance.
BSL Shaders
- Best for: Balanced realism with good performance
- Performance: Light to medium demand
- Key features: Beautiful lighting, realistic shadows, customizable settings
- Hardware needs: Works well on mid-range GPUs (GTX 1060/RX 580 or better)
- Pairs well with: ModernArk, Clarity, Nautilus 3D
BSL offers excellent realism with better performance than SEUS PTGI. The pack provides beautiful lighting, convincing shadows, and strong atmosphere without requiring top-tier GPU hardware. BSL pairs particularly well with mid-range realistic texture packs, creating impressive results on systems that struggle with ultra-demanding combinations.
Complementary Shaders
- Best for: Customizable realism for various hardware levels
- Performance: Adjustable from light to demanding
- Key features: Extensive settings menu, good vanilla compatibility, regular updates
- Hardware needs: Scalable from budget to high-end GPUs
- Pairs well with: Any texture pack; extremely versatile
Complementary has gained significant popularity for its balanced approach and extensive customization options. The shader provides realistic lighting and effects while allowing detailed performance tuning. This flexibility makes Complementary ideal for builders who need to optimize settings for specific hardware or particular building scenarios.
For builders following along with architectural projects from our guides on modern design fundamentals or architectural principles, shader choice significantly impacts how completed builds photograph and present.
Settings Optimization for Performance
Shader settings offer extensive customization but understanding which options most impact performance versus visual quality helps optimize configurations. Shadow resolution typically represents the single largest performance factor—higher values create sharper shadows but exponentially increase GPU workload. Most builders find 2048x shadow resolution provides acceptable quality while maintaining playable frame rates.
Reflection quality and water effects similarly impact performance substantially. If building primarily interior spaces or land-based structures, disabling expensive water reflections saves significant GPU resources without affecting build appearance. Conversely, coastal or island builders need quality water rendering, making other compromises worthwhile.
Ambient occlusion quality affects how corners and surface intersections display shadow detail. While lower settings create less dramatic shadows, the performance benefit often outweighs visual loss except in close-up interior photography. For active building, moderate ambient occlusion with higher settings for final screenshots provides practical balance.
Quick Performance Optimization Checklist
Use these settings adjustments to maximize performance while maintaining visual quality:
Critical Performance Settings:
- Shadow Resolution: Set to 2048x (balance) or 1024x (performance priority)
- Render Distance: Reduce to 12-16 chunks for building; 8-10 for interiors
- RAM Allocation: Increase to 6-8GB in launcher settings
- Texture Resolution: Match to VRAM (4GB = 128x max, 8GB = 256x max)
Secondary Optimizations:
- Disable expensive water effects if not building near water
- Lower ambient occlusion quality for active building
- Turn off distant terrain shading
- Reduce particle effects and entity shadows
- Use performance-oriented shader presets when available
Testing Protocol:
- Test combinations in creative mode before survival commitment
- Monitor GPU temperature and VRAM usage
- Take baseline FPS measurements without shaders
- Adjust one setting at a time to isolate performance impacts
- Save working configurations for different project types
Common Problems and Solutions
The surge in realistic texture pack popularity has revealed consistent technical and usability issues that affect most builders at some point. Understanding these challenges and their solutions prevents frustration and wasted time troubleshooting.
Performance Problems and Optimization
High-resolution texture packs demand substantial VRAM—the dedicated video memory on graphics cards. A 512x texture pack can easily consume 4-8GB of VRAM, leaving little headroom for shader effects or system overhead. When VRAM limits are exceeded, performance collapses catastrophically, often resulting in stuttering, frame freezes, or crashes.
VRAM Guidelines by Texture Resolution:
- 4GB VRAM: Maximum 128x textures (64x safer with demanding shaders)
- 6GB VRAM: Comfortable with 128x; can handle 256x without heavy shaders
- 8GB VRAM: 256x textures with most shaders work well
- 10GB+ VRAM: 512x textures possible with optimized shader settings
- 12GB+ VRAM: Full 512x-1024x textures with SEUS PTGI
RAM allocation also affects performance significantly. Minecraft’s default 2GB allocation proves wholly inadequate for realistic texture packs. Most builders need 6-8GB allocated for smooth operation with high-resolution textures and shaders. The allocation setting lives in launcher profiles—increasing this value often solves mysterious performance problems immediately.
Recommended RAM Allocation:
- Vanilla + basic packs: 4GB sufficient
- 128x textures + moderate shaders: 6GB recommended
- 256x textures + demanding shaders: 8GB optimal
- 512x+ textures or heavy modpacks: 10-12GB ideal
- Ultra settings with mods: 12GB+ for stability
Chunk loading distance interacts with texture and shader performance multiplicatively. Each visible chunk requires texture rendering and shader processing. Reducing render distance from 32 to 16 chunks can double frame rates while maintaining acceptable visual range for most building scenarios. For interior work, even 8-12 chunk distances provide adequate visibility.
Visual Inconsistency Issues
Missing texture coverage creates jarring visual discontinuity when photorealistic blocks sit adjacent to vanilla-textured blocks. This problem particularly affects modded builders but can occur even in vanilla when texture packs incompletely cover all block variants. Stone brick walls might render beautifully while stone brick stairs remain default-textured, creating obvious inconsistency.
Layering multiple texture packs often solves coverage gaps. Most packs allow stacking, where the game loads textures from the top pack first, falling back to lower packs for missing textures. A builder might layer a mod-specific pack over a general realistic pack over vanilla textures, creating comprehensive coverage across all blocks.
The Minecraft resource pack system loads packs from top to bottom in the resource pack menu. Packs higher in the list override textures from lower packs when both contain the same block. This priority system allows strategic layering—placing specialized packs above general packs ensures specialized textures display where needed while general packs cover remaining blocks.
Style consistency poses another visual challenge when mixing packs. Different creators approach realism differently—one pack’s photographic stone might clash aesthetically with another pack’s painted wood. Testing pack combinations in creative mode before committing to long-term use prevents frustrating later discoveries that carefully planned builds look visually incoherent.
Usability and Building Challenges
Ultra-realistic textures sometimes make block identification difficult during active construction. When every stone variant looks genuinely like different rock types, quickly distinguishing andesite from diorite while building becomes challenging. This confusion slows construction and increases mistakes—particularly problematic for complex builds requiring precise block placement.
Maintaining a vanilla or low-resolution backup pack solves this dilemma. Builders can construct with clearer textures, then switch to realistic packs for final documentation and screenshots. While this approach requires pack switching, it prevents the productivity loss of building with textures optimized for viewing rather than working.
Some builders use selective pack application, creating custom packs that only include realistic textures for blocks they want enhanced. This approach takes more setup work—manually selecting textures and building custom resource packs—but provides ideal balance between building usability and realistic final appearance. Tools like specialized building software can help manage these custom pack configurations.
Color-coding and labeling systems help navigate realistic texture confusion. Keeping reference images of blocks in various texture packs allows quick visual confirmation during builds. Some builders maintain cheat sheets showing how specific materials appear in their chosen packs, reducing the mental load of block identification.
Troubleshooting Quick Reference
Problem: Game crashes when loading texture pack
- Solution: Reduce texture resolution (try 128x instead of 256x)
- Solution: Increase RAM allocation to 6-8GB in launcher
- Solution: Update graphics drivers to latest version
- Solution: Remove conflicting resource packs
Problem: Terrible frame rates (below 30 FPS)
- Solution: Lower shader quality settings (especially shadow resolution)
- Solution: Reduce render distance to 12-16 chunks
- Solution: Disable water reflections and expensive effects
- Solution: Check GPU temperature (may be thermal throttling)
- Solution: Consider lower resolution texture pack
Problem: Some blocks look vanilla while others are realistic
- Solution: Check texture pack covers all blocks you’re using
- Solution: Layer multiple packs (mod pack over general pack)
- Solution: Update texture pack to latest version
- Solution: Verify resource pack load order in settings
Problem: Textures look blurry or low quality
- Solution: Enable “Mipmap” in video settings (set to 4)
- Solution: Increase “Anisotropic Filtering” in shader settings
- Solution: Verify you downloaded correct resolution version
- Solution: Check that shaders are actually enabled and loading
Problem: Can’t distinguish blocks while building
- Solution: Keep vanilla/low-res backup pack for construction
- Solution: Create reference sheet of common blocks in your pack
- Solution: Use F3+H to show advanced tooltips with block IDs
- Solution: Build in creative with extra blocks for comparison
Problem: Realistic pack looks “off” or uncanny
- Solution: Ensure shaders are properly configured for pack
- Solution: Adjust shader color saturation and brightness
- Solution: Try different shader pack for better compatibility
- Solution: Consider less photorealistic pack (Nautilus, Epic Adventures)
Design Tips for Realistic Building
Successfully leveraging realistic texture packs requires adapting building techniques to emphasize texture strengths while minimizing weaknesses. Certain design approaches dramatically enhance photorealistic results while others create visual problems absent in vanilla textures.
Material Selection for Photorealistic Interiors
Realistic texture packs excel at rendering materials with natural variation and surface properties. Wood, stone, concrete, and glass particularly benefit from high-resolution treatment. Builds emphasizing these materials naturally showcase texture pack capabilities while maintaining visual coherence.
Materials That Shine with Realistic Textures:
- Wood varieties: Display authentic grain patterns, especially oak, dark oak, and spruce
- Polished stone: Achieves subtle reflectivity and natural color variation
- Concrete blocks: Show proper texture while maintaining clean modern aesthetic
- Glass and glass panes: Enable realistic transparency and light transmission
- Metal blocks: Copper, iron, and gold display appropriate metallic properties
- Brick varieties: Showcase individual brick texture and mortar detail
Materials to Use Cautiously:
- Terracotta patterns: Often inconsistently rendered across realistic packs
- Concrete powder: May lack the detail refinement of hardened concrete
- Some decorative blocks: Check pack coverage before committing to design
- Modded materials: Verify texture pack support before extensive use
Contemporary interiors mixing concrete, dark wood, and large glass panels create dramatic effects with realistic textures. The contrast between smooth concrete surfaces, detailed wood grain, and transparent glass generates visual interest that vanilla textures cannot achieve. When designing spaces following principles from our interior design guide, material selection becomes even more critical with realistic packs.
Color blocking in realistic builds requires different consideration than vanilla construction. Realistic textures often include color variation within single block types, creating more visual interest but potentially complicating planned color schemes. Testing color combinations with intended texture packs ensures finished builds achieve desired aesthetic effects.
Lighting Techniques with Enhanced Textures
Realistic lighting becomes paramount when using photorealistic texture packs and shaders. The same lighting that appears adequate with vanilla textures often proves insufficient when materials properly reflect and absorb light. Modern builds require thoughtful lighting design that considers material properties and spatial flow.
Large windows and natural light showcase realistic glass and create dramatic interior lighting effects. Positioning windows to capture sunrise or sunset light transforms ordinary rooms into architecturally significant spaces. The enhanced light transmission through realistic glass produces authentic interior ambiance that elevates build quality substantially.
Artificial lighting requires increased density and strategic placement with realistic textures. A single torch that adequately lit a vanilla room leaves realistic spaces too dark, particularly in corners and along walls. Hidden lighting sources—lamps behind furniture, lights concealed in ceilings, ambient lighting from various sources—create the layered illumination that makes realistic interiors feel inhabited.
Shadow depth and corner darkness become more pronounced with realistic rendering. While this increased contrast adds realism, it sometimes creates spaces that feel gloomy despite adequate lighting in vanilla. Compensating requires both additional light sources and strategic placement that illuminates shadows without destroying atmospheric darkness.
Scale and Proportion Considerations
Realistic textures emphasize scale relationships more dramatically than vanilla blocks. A 16×16 pixel texture obscures many proportion issues through abstraction, but photorealistic brick or stone makes scale discrepancies immediately obvious. Furniture that appeared acceptably sized with vanilla textures might look toy-like with realistic materials revealing actual proportions.
Modern architecture particularly demands careful proportion work with realistic textures. Contemporary design relies on clean lines and precise relationships—elements that realistic rendering emphasizes rather than obscures. Builds attempting modernist aesthetics benefit from extra attention to window sizing, ceiling heights, and furniture proportions.
Detail density increases in importance with realistic packs. Vanilla builds survive with relatively sparse detail because blocky textures maintain visual interest through form rather than surface. Realistic textures expose lack of detail—smooth walls that worked acceptably with vanilla may appear barren and unfinished when rendered with photographic textures.
The solution involves increased architectural detail—subtle variations in wall planes, texture mixing within surfaces, strategic use of accent materials, and thoughtful decoration placement. These details create visual interest that complements realistic material rendering rather than competing with abstracted block forms.
Conclusion
Realistic texture packs have transformed Minecraft from a charming blocky sandbox into a legitimate platform for serious architectural visualization. The packs profiled here—from ModernArk’s contemporary polish to S&K’s photorealistic extremes—demonstrate the breadth of options available for adult builders pursuing different aesthetic goals. Success with realistic textures requires more than pack installation: it demands understanding the interplay between textures, shaders, and system performance while adapting building techniques to emphasize material realism.
The key takeaway involves matching tools to goals. Everyday building benefits from performance-conscious options like Clarity or Nautilus 3D that maintain visual quality without crushing frame rates. Showcase builds and final documentation justify ultra-high-resolution packs like S&K Photo Realism despite demanding hardware requirements. Modded builders need specialized solutions like Create PBR that maintain consistency across expanded block palettes. No single pack serves every situation—successful builders maintain libraries of texture packs matched to specific projects and purposes.
Performance optimization enables sustainable use of realistic textures. Proper VRAM management, adequate RAM allocation, strategic render distance settings, and thoughtful shader selection transform texture packs from occasional special-use tools into practical everyday resources. Understanding these technical factors prevents the frustration of abandoned builds and wasted effort troubleshooting avoidable problems.
The evolution of Minecraft texture technology continues accelerating. New packs emerge regularly, existing options receive updates adding coverage and refining quality, and shader technology advances with each release cycle. Staying current with these developments—following pack creators, testing new releases, and engaging with the building community—ensures access to cutting-edge tools as they become available.
Your texture pack journey ultimately reflects your building philosophy and aesthetic priorities. Some builders prioritize maximum realism regardless of performance cost. Others value balanced enhancement that preserves playability. Many situationally adjust, switching between packs based on project needs and documentation requirements. All approaches remain valid—what matters is finding combinations that enable your creative vision while maintaining workflow comfort.
Continue Your Journey
Ready to put these realistic textures to work? Explore these related guides to enhance your building expertise:
Master Minecraft Interior Design – Learn specialized techniques for creating stunning indoor spaces that showcase realistic texture capabilities. Covers furniture arrangement, lighting design, and material selection for modern interiors.
Essential Building Tools and Software – Discover planning and design software that helps visualize builds before construction. Includes texture pack testing workflows and performance optimization utilities.
Building Massive Minecraft Structures – Scale up your building with strategies for large-scale construction that maintains detail and visual interest across extensive builds.
Steampunk Industrial Building Guide – Apply realistic textures to industrial aesthetics with this comprehensive guide to mechanical and steampunk construction techniques.
Installing Minecraft Mods Safely – Expand your building palette with mods while maintaining texture pack compatibility and system stability.
What realistic texture pack has transformed your building style? Share your favorite combinations and the projects where realistic textures made the biggest difference. Let us know in the comments below!
Want exclusive building guides, texture pack reviews, and advanced techniques delivered to your inbox? Subscribe to our newsletter for weekly insights into adult-focused Minecraft and Lego building.



vey beautiful