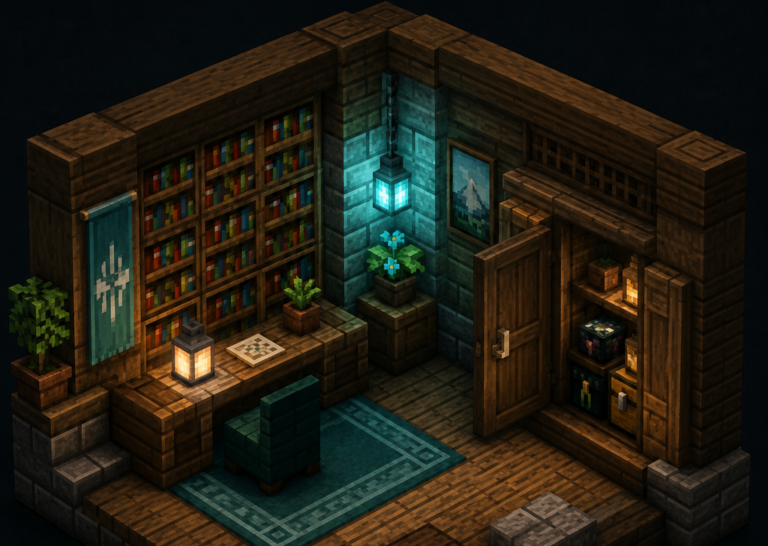
Most builders spend weeks perfecting their exterior facades, sourcing the right blocks, and nailing proportions — then throw down a grid of sea lanterns and call it done. If that sounds familiar, you’re not alone. Interior lighting is one of the most underestimated skills in Minecraft building, and it’s also one of the highest-impact changes you can make to a space that already looks good on the outside.
Thoughtful lighting does three things at once: it keeps your build mob-safe, it makes your interior feel intentional and designed, and it tells the player where to look. The difference between a room that feels lived-in and one that feels like a placeholder is almost always the light. This guide walks through everything from the foundations of layered lighting to seasonal swaps, so you can bring the same level of craft to your interiors that you already bring to your builds.
Think in Layers: The Foundation of Good Interior Lighting
Professional lighting designers — the kind who work on film sets and architectural interiors — work in three distinct layers. This framework translates directly to Minecraft, and once you start thinking this way, you’ll never go back to flat overhead lighting.
Minecraft Interiors Guide
The Three-Layer Lighting System
Ambient Lighting: Your Baseline Brightness
Ambient lighting is the foundation layer. Its job is straightforward: keep the space mob-safe and functional. The temptation is to overdo it here, spacing light sources so evenly that the room looks like a hospital corridor. Instead, treat ambient lighting as your floor, not your ceiling.
For most builds, keep ambient light just bright enough to prevent spawning, then let the next two layers carry the atmosphere. Cosy survival bases benefit from this restraint most — the contrast between a subtly lit room and a bright fireplace is what makes the fireplace feel warm. Your best ambient light sources for hidden installation:
- Sea lanterns behind trapdoors — high light level, clean look, easy to conceal
- Glowstone strips behind upside-down stairs — lets light leak through the gaps without exposing the source
- Froglights embedded in beams or ceilings — warm or cool tones depending on the froglight type
- Shroomlights tucked under floors — high light output, earthy texture works in organic builds
Task Lighting: Illuminating What Matters
Task lighting sits on top of your ambient layer and targets the areas where you actually interact with the build. Crafting corners, storage walls, enchanting setups, and kitchen workbenches all benefit from a dedicated light source positioned close to the interactive block itself. This does more than just illuminate a functional area — it signals visual hierarchy. A well-lit chest wall communicates “this is where things happen,” which makes even a simple storage room feel purposeful.
A few pairings that work particularly well in kitchen designs and beyond:
- End rods beside workbenches — slim profile reads as a desk or floor lamp
- Sea pickles on countertops — clusters feel like under-cabinet lighting in kitchens
- Lanterns above furnaces and beds — height and proximity signal intentional placement
- Candles on chest surfaces — low light, high visual interest, works as both task and accent
Accent Lighting: Mood, Focus, and Drama
This is where a room transforms from functional to genuinely atmospheric. Accent lighting highlights specific features — a stone fireplace, a bookcase wall, a feature plant, a piece of hanging art — by making them brighter than their surroundings. The contrast does the heavy lifting. Light the object, let the area around it stay slightly dimmer, and the eye travels exactly where you want it to.
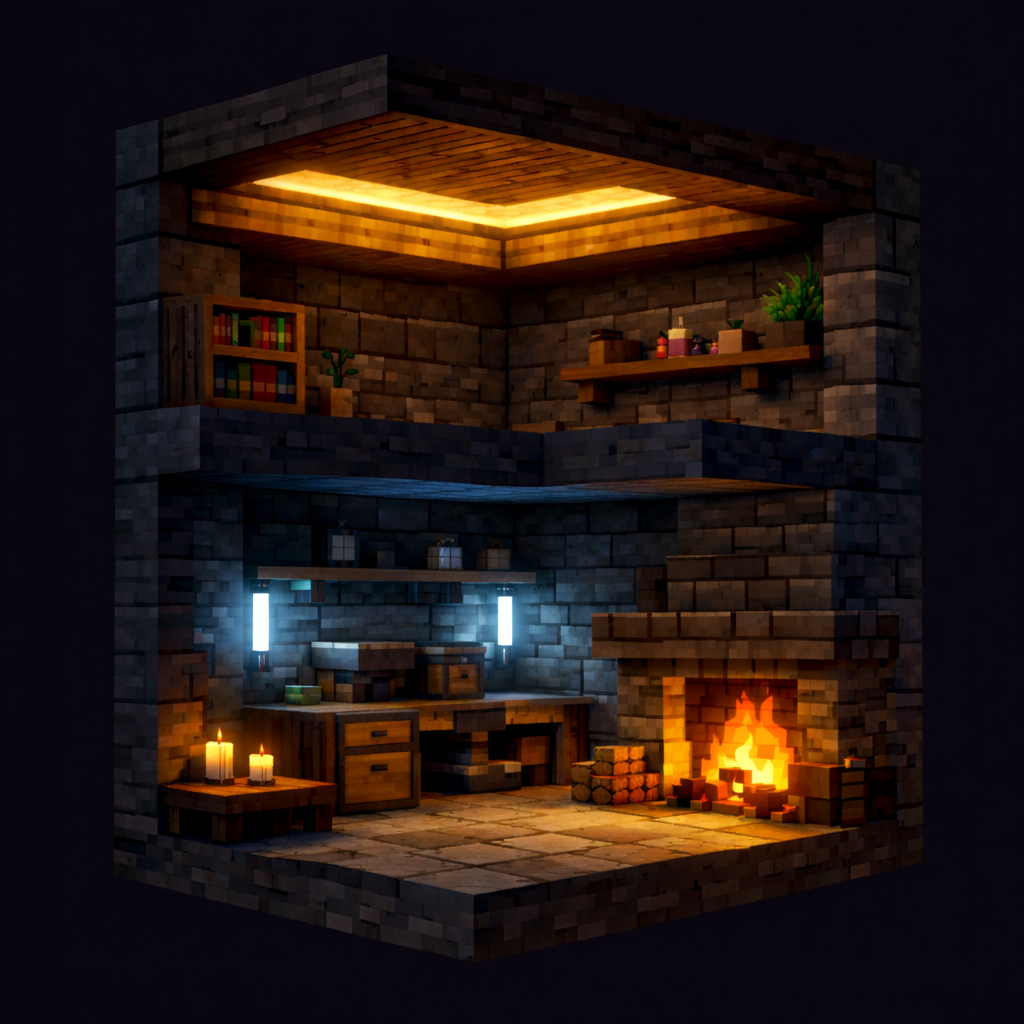
Candle clusters on a mantlepiece, lanterns draping from exposed beams, and hidden light sources tucked behind leaf blocks to illuminate a small garden corner are all accent techniques. A simple example that works in almost any living space: recessed glowstone in the ceiling for ambient, lanterns on side tables for task lighting, and a lit fireplace with candle clusters on the mantle for accent. Three layers, working together, producing something that actually feels designed.
For a deeper look at how these principles apply room by room, the Minecraft interior design guide is a solid place to start.
Hidden Lighting: Keeping Interiors Clean and Mob-Safe
One of the most common complaints about Minecraft interiors is that mob-proofing forces you to cover everything in visible light blocks. It doesn’t. Hidden lighting is a skill set of its own, and mastering it means you can have a fully dark-feeling room at the visual level while keeping it completely spawn-safe at the mechanical level.
Minecraft Lighting Reference
Light Level Chart for Builders
All key light sources ranked by emission level — with mob-safety threshold marked
Under Floors and Behind Surfaces
Placing glowstone, sea lanterns, shroomlights, or froglights one layer beneath your floor and covering them with carpets or moss carpet is the most reliable hidden lighting method in the game. Light passes through carpet without the source being visible, and you can use coloured carpet above different light sources to tint the glow — creating lit rugs, runway effects, or subtle colour variation across a floor.
Behind walls, the same logic applies. Recessing a light source into the wall and covering it with a trapdoor, iron bars, or a sign turns it into a decorative panel that happens to emit light. Stairs placed upside-down in front of a hidden block create a gap that lets light leak through while the face reads as solid. These techniques are especially effective in minimalist Minecraft interiors where visible light clutter breaks the clean lines of the design.
Ceiling and Beam Concealment
Double-layer ceilings are one of the most versatile building tools available. Build an upper layer, tuck your light sources inside, and create downlighting gaps using trapdoors, fence posts, glass panes, or open stairs. The result is soft, directional light that appears to come from the ceiling itself rather than from an obvious block.
Redstone lamps concealed behind trapdoors are worth the extra investment because they’re switchable. Wire them to a lever or a daylight sensor and your room gains functional mood control — bright for active use, dimmed for atmosphere. This kind of mechanical detail rewards the builders who take the time to implement it, and it adds a layer of interactivity that purely decorative builds often lack. If you’re interested in pushing redstone further, the redstone engineering guide covers the underlying mechanics in detail.
Using Objects as Light Covers
Some of the most elegant hidden lighting solutions use everyday decorative objects as covers. The trick is choosing items that blend naturally into the scene rather than reading as obvious light-hiders. Objects that work especially well:
- Cauldrons over a floor light — adds texture and a functional-looking detail
- Composters on lit blocks — organic texture suits farmhouses and natural builds
- Flower pots on full blocks — conceals the source while adding a decorative element
- Scaffolding floors — light passes through cleanly, suits industrial or workshop spaces
- Glow-berry vines alongside standard vines — adds ambient glow in organic and forest builds
- Candles and lanterns within bookshelves or plant walls — decorative elements pulling double duty
Combining hidden sources with visible decorative lights within bookcase walls or plant displays means your decor is also doing structural work — a principle that separates tidy, considered builds from cluttered ones.
Seasonal and Time-Based Lighting
One of the most satisfying things you can do with a survival base you return to regularly is give it a lighting system that changes with the in-game cycle and shifts across seasons. This is more achievable than it sounds, and it dramatically increases the sense that a base is a living space rather than a static build.
The Daily Rhythm
Daylight sensors wired to redstone lamps are the backbone of any time-responsive lighting system. Position them so indoor corridor lights, window-flanking fixtures, and outdoor path lanterns activate automatically at dusk and switch off at dawn. Combined with well-placed windows or skylights on east and west walls — so natural light washes through at sunrise and sunset — you get a build that genuinely responds to the game’s day-night cycle rather than sitting at a fixed brightness regardless of what time it is.
The Minecraft mountain base guide goes into practical detail on integrating natural and artificial light for large-scale builds where this matters most.
Seasonal Mood Shifts
Seasonal redecorating doesn’t require rebuilding your lighting infrastructure from scratch. The key is to maintain a neutral, functional hidden lighting grid as your constant — the embedded froglights and concealed glowstone that keep the space mob-safe year-round — and swap only your visible fixtures and coloured elements to signal seasonal change.
For a winter or taiga aesthetic, warm light sources dominate: lanterns, campfires, candles, and lava glimpsed behind tinted glass. Keep lighting concentrated around the fireplace, reading nooks, and beds for a golden, intimate atmosphere. This pairs naturally with taiga building techniques where the cold exterior makes warmth inside feel earned.
For a summer or Mediterranean mood, shift to cooler tones — sea lanterns, soul lanterns, and white or light-toned surfaces create an airy, bright atmosphere. The Mediterranean architecture guide offers good reference for how material and light choices reinforce each other in that aesthetic.
Here’s a quick seasonal swap reference to keep things consistent across your base:
- Spring/Summer — sea lanterns, soul lanterns, white froglights, open skylights; cool and airy palette
- Autumn — orange candles, jack-o’-lanterns, campfire light, warm froglights; cosy and golden
- Winter — icy blue glass, soul lanterns, cool-toned froglights, lava behind tinted glass for contrast
- Taiga/Nordic — lanterns, campfires, warm glowstone, fire in hearths; maximum warmth and enclosure
Mood Lighting by Room Type
Different rooms carry different expectations, and your lighting should reinforce what each space is for. Matching light to function is one of the subtler craft skills in interior building, and it’s the thing that makes well-built spaces feel coherent rather than assembled. As a quick reference before diving into each room type:
| Room Type | Lighting Goal | Key Sources |
|---|---|---|
| Bedroom | Warm, low, peripheral | Candles, chained lanterns, floor carpet lights |
| Kitchen/Workshop | Bright, functional, task-focused | Sea pickles, end rods, overhead sea lanterns |
| Enchanting/Portal | High contrast, coloured, dramatic | End rods, soul lanterns, lava behind tinted glass |
| Social/Hall | Layered, multi-height, lively | Campfires, beam lanterns, table candles |
| Modern/High-tech | Clean, symmetrical, deliberate | End rods, froglights, redstone lamps |
Bedrooms and Relaxation Spaces
Bedrooms call for low-level warm lighting that keeps the space mob-safe without feeling bright or clinical. Push light to the walls and corners — candles on bedside surfaces, lanterns on chains, hidden floor lights under carpets to eliminate dark spots — and let the centre of the room stay relatively calm. Harsh overhead lighting in a bedroom reads as unintentional.
The goal is a space that feels like somewhere you’d actually want to rest, which means keeping the central visual field uncluttered and letting warm peripheral light do the work. This approach connects directly to the principles covered in the Minecraft bedroom design guide.
Kitchens, Workshops, and Storage Rooms
These are functional spaces, and their lighting should say so. Strong ambient light combined with targeted task lighting over every interactive surface — furnaces, crafting tables, chest walls — prioritises clarity and efficiency. Under-cabinet lighting using sea pickles, end rods, or froglights placed behind trapdoors gives a modern, considered look while serving a practical purpose.
There’s a useful tension here: purely functional spaces often benefit from the cleanest, most intentional lighting design because they can’t rely on decorative complexity to carry visual interest.
Enchanting Rooms, Portals, and Magical Spaces
High contrast and deliberate colour are your primary tools here. Keep most of the room relatively dark, then use bright pools and rings of light around focal elements — the enchanting table, the end portal frame, the brewing station — to draw the eye and create a sense of ritual space. End rods make convincing floating light sources. Soul lanterns and blue stained glass produce genuinely eerie tones. Lava positioned behind tinted glass adds dramatic flicker without the fire spread risk.
The Nether building guide explores how these high-drama lighting techniques apply in dimensional spaces where the environmental light itself is part of the challenge.
Social Areas: Halls, Taverns, and Living Rooms
Social spaces benefit from multiple small light sources at varying heights rather than one or two dominant fixtures. Lanterns on beams, candles on tables, campfire or fireplace glow, and wall-mounted torches all contribute to the busy, layered atmosphere that makes a tavern or great hall feel active and inhabited.
The principle here is vertical variation — light at floor level, table level, wall level, and ceiling level creates depth that a single overhead source simply can’t produce. This is especially important in medieval castle interiors, where getting the lighting right is what separates a convincing great hall from an oversized empty room.
Modern and High-Tech Builds
Modern builds call for clean lines, symmetry, and lighting that reads as deliberate rather than incidental. End rods, froglights, redstone lamps, and coloured glass “LED strip” effects along floor edges, ceiling channels, and stair runs all work within this aesthetic.
The critical principle for modern interiors is that visible light sources should feel like design choices, not mob-proofing afterthoughts. That means your structural hidden lighting layer is doing most of the safety work, while your visible fixtures are placed with the same intentionality you’d apply to advanced Minecraft furniture.
Bricks Blocks Creative — Minecraft Tools
Interior Lighting Calculator
Enter your room dimensions to find out how many light sources you need to stay mob-safe
needed (ceiling)
between sources
in blocks
Putting It All Together
The builders whose interiors stop people mid-tour aren’t using exotic blocks or complicated redstone — they’re applying consistent principles. Three layers: ambient for safety, task for function, accent for drama. Hidden infrastructure that keeps the space clean. Visible fixtures that feel chosen rather than placed. And a lighting scheme that responds to what each room is actually for.
Start with one room you’ve already built and apply the layered approach from scratch. Hide your ambient sources, add task lighting at interactive blocks, and place two or three accent lights on your best features. The change is usually striking enough that you’ll never approach a new interior the same way again.
Which room in your current build has the worst lighting? Share it in the comments — and let’s talk about what would fix it.
Continue Your Journey
- Minecraft Interior Design: The Complete Guide — the pillar article for the interiors cluster, covering every room from kitchen to bedroom
- Minecraft Kitchen Design — practical techniques for the most lighting-intensive room in any build
- Minecraft Bedroom Design — how to create relaxing, atmospheric sleeping spaces
- Minecraft Living Room Design — layering light and furniture for social spaces that feel inhabited
- Realistic Minecraft Texture Packs — how texture packs interact with lighting to transform the look of your interiors