Terraforming biomes for better building in Minecraft means reshaping terrain and surface details so your structures look like they belong there, not just placed on top. It covers everything from large-scale landforms to subtle block variation and biome-aware decoration that transforms generic landscapes into purposeful building sites.
Whether you’re preparing a mountain plateau for a Nordic fortress, carving a desert mesa for a pueblo village, or sculpting a forest clearing for a Victorian manor, thoughtful terraforming turns awkward natural terrain into the perfect canvas for architectural projects. The difference between a build that fights its environment and one that flows naturally from the landscape often comes down to how well you’ve shaped the ground beneath it.
This guide walks through planning strategies, core techniques, biome-specific approaches, and the tools that make large-scale terrain work practical. By the end, you’ll understand how to read a landscape, identify what needs changing, and execute those changes efficiently without losing the organic character that makes Minecraft worlds feel alive.
Why Terraform For Builds
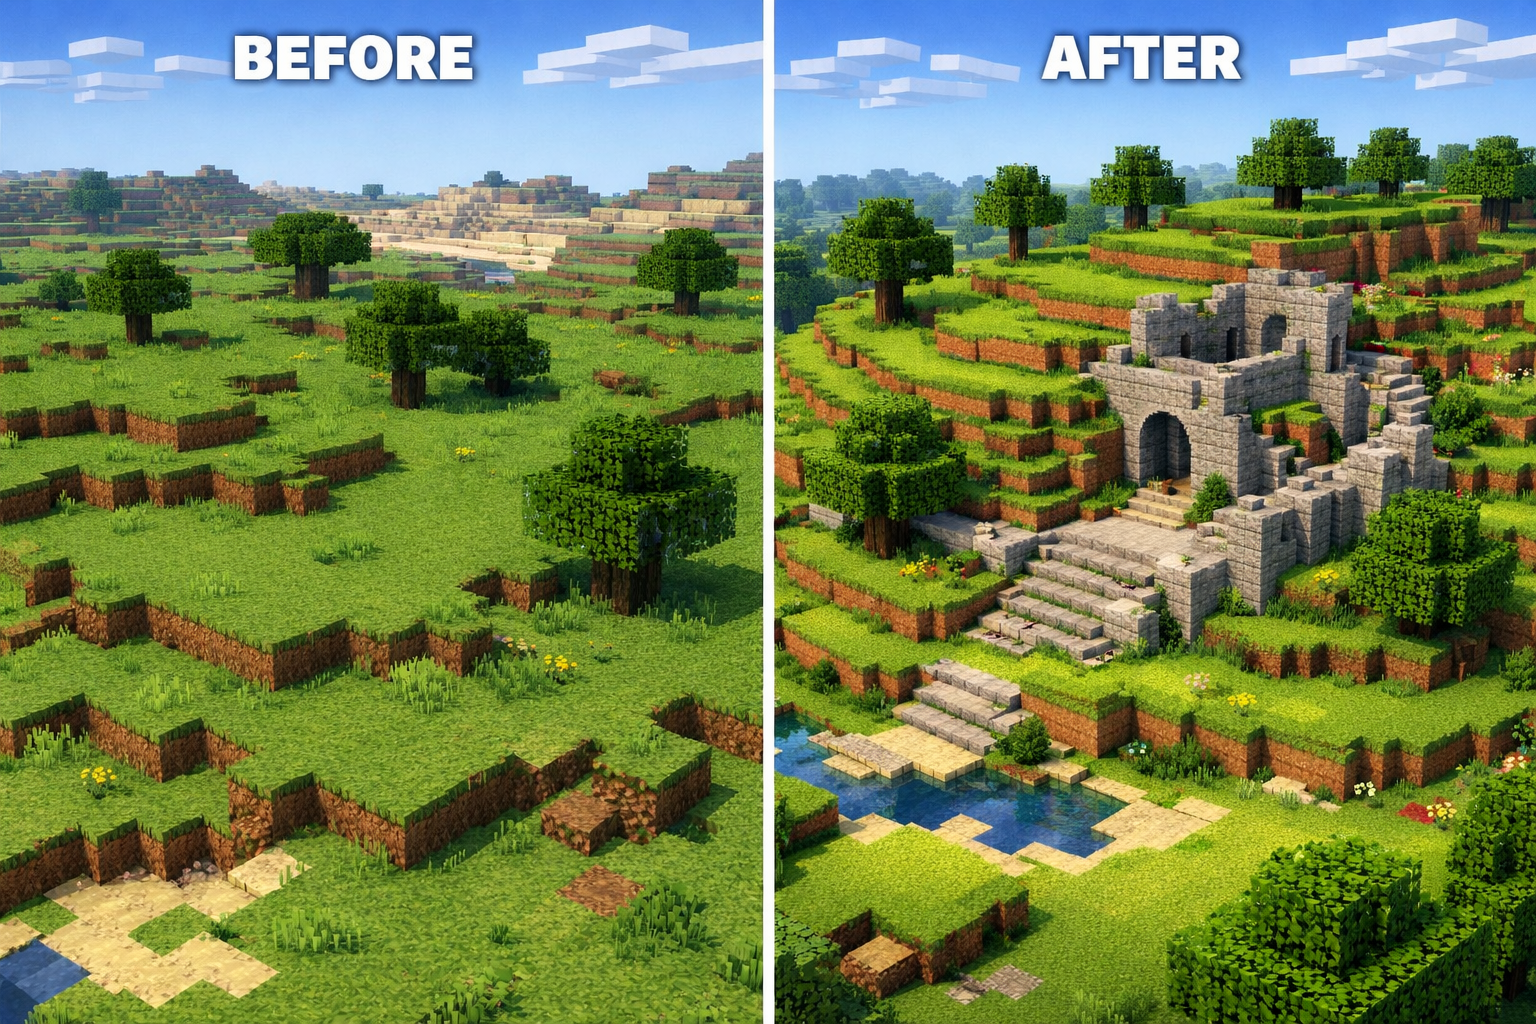
Terraforming lets you create landforms that actually fit your build concept instead of forcing the build into awkward default terrain. Default world generation produces interesting but random shapes—sometimes a perfect valley spawns exactly where you need it, but more often you’re working around inconvenient hills, awkward water placement, or slopes that don’t align with your structure’s footprint.
Strategic terrain reshaping solves spatial problems before they become architectural compromises. That mountain base you’re planning needs accessible paths, flat platforms for buildings, and dramatic cliff backdrops—default terrain rarely delivers all three. Terraform first, build second, and your structures feel intentional rather than improvised.
Beyond practical functionality, terraforming makes bases feel “grown out of” the landscape, which dramatically improves immersion and screenshots. When you blend retaining walls into natural stone faces, when your pathways follow contour lines instead of cutting straight through hills, when your custom trees frame views of distant builds—that’s when visitors stop seeing blocks and start seeing places.
Good terrain prep also improves usability in ways that aren’t immediately obvious until you’re living in the space. Clearer paths between buildings, better access to farms and storage, smarter placement for villages and trading halls, sightlines that actually frame what you want to see—all of these come from thinking about the land as part of your project, not just the thing underneath it.
Planning Before You Shape
Start with a vision: reference real-world landscapes or concept images, and decide on climate, elevation, and major features like rivers, cliffs, bays, or plateaus before placing a single block. Terraforming without a plan produces terrain that’s technically different but not functionally better. You need to know why you’re moving dirt before you start moving it.
Look at reference images of actual landscapes that match your build concept. Planning a Mediterranean village? Study photos of Greek islands with their white buildings cascading down hillsides. Building a Nordic settlement in cold biomes? Research Norwegian fjords and Swedish forests. The shapes, slopes, and relationships between terrain features in real landscapes translate directly to better Minecraft terrain decisions.
Mark out rough outlines with temporary blocks or scaffolding to set max height, slope direction, and where points of interest (base, town, farms, custom trees) will sit. I use bright wool or concrete for these markers—something that stands out visually but breaks quickly when you’re ready to remove it. This markup phase is where you catch problems: “This platform is too small,” “That pathway grade is too steep,” “These two buildings can’t actually see each other from here.”
Think in zones: building platforms, backdrop terrain, and “transition” areas that blend your project into untouched world. Building platforms need specific characteristics—flatness, accessibility, visibility. Backdrop terrain exists to frame views and provide context—it can be more dramatic, less detailed. Transition zones are the critical buffer that prevents hard edges where your terraform ends and natural world begins. Most amateur terraforming fails because builders forget to plan these transition zones, so their projects look like digital islands floating in an unrelated landscape.
For biome-specific building projects, consider how the terrain should emphasize biome characteristics. Desert builds benefit from dramatic mesas and deep wadis. Swamp bases need elevated platforms and careful water management. Plains biome megabases work best when you create subtle undulation rather than perfect flatness—completely flat terrain feels unnatural and boring.
🏔️ Minecraft Terraform Progress Tracker
Track your terrain shaping journey from planning to polish
📋 Phase 1: Planning & Vision 5 tasks
▼⛏️ Phase 2: Rough Shaping 6 tasks
▼🎨 Phase 3: Texturing & Block Mixing 5 tasks
▼✨ Phase 4: Detail & Decoration 7 tasks
▼🔍 Phase 5: Integration Check 4 tasks
▼💎 Phase 6: Final Polish 5 tasks
▼Core Terraforming Techniques
Work with contours instead of carving giant flat rectangles; preserve interesting rock forms and let them drive your layout. The biggest mistake new terraformers make is over-flattening. They see an interesting hill, decide they need a flat area, and remove the entire thing. What they should do: carve a terrace into the hillside, wrap a building around the rock outcrop, or use the natural slope for a multi-level structure.
Study the existing terrain and identify “hero features”—those naturally dramatic elements worth preserving and enhancing. Maybe it’s a particularly interesting cliff face, a natural arch, an unusual stone formation. These become focal points that make your terraform unique. Remove what’s awkward or cluttering, enhance what’s interesting, and create new features only where the terrain genuinely needs them.
Build hills and cliffs in layers: staggered steps that don’t line up vertically, then smooth with slabs, stairs, and occasional overhangs. The natural world doesn’t create perfectly smooth slopes or uniform cliff faces. Real erosion produces complex surfaces with varied depth, irregular edges, and horizontal variation. To replicate this, terraform in rough layers first—big volume changes with full blocks. Then refine with slabs and stairs to create graduated slopes. Finally add detail with occasional blocks that break the plane: small overhangs, jutting stones, cave openings.
Shape top-down and outside-in: establish the silhouette first (ridge line, hill shape, shoreline) before worrying about tiny details. When you’re terraforming a large area, work at the macro scale before dropping down to micro details. Block out the overall shapes—where valleys go, where ridges run, where water flows. This prevents you from spending three hours perfecting a cliff face only to realize the entire hill needs to move twenty blocks west.
Think about sightlines throughout this process. Where will players first see this area? What views do you want to frame from your structures? Where should the eye travel as someone walks through the space? Landscape building that accounts for player perspective creates much stronger impressions than technically perfect terrain that nobody sees from flattering angles.
Texturing And Block Mixing
Avoid single-block surfaces; mix base blocks (stone, grass, sand) with 2–3 complementary variants like andesite, gravel, coarse dirt, or concrete powder. Real landscapes don’t come in one color or texture. Soil contains rocks, organic matter, different mineral compositions. Cliff faces show varying stone types, weathering patterns, lichen growth. Your terrain should reflect this complexity.
The key to effective block mixing is maintaining a clear base material while adding variation. If you’re creating a stone hillside, stone variants should still make up 70-80% of the surface. The remaining 20-30% comes from andesite, cobblestone, maybe small patches of gravel where “erosion” has occurred. Too much variety creates visual noise. Too little creates monotony. Find the balance where the surface reads as one material type with natural variation.
Use texture to communicate micro-biomes: more coarse dirt and dead bushes in “dry” areas, mossy and leafy blocks in “wet” or shaded spots. Within a single terraform project, you might have multiple micro-environments. The south-facing slope gets more direct sun, so it’s grassier with more flowers. The north-facing slope stays shaded and damp, so it gets moss stone and ferns. The valley floor collects water, so it’s darker dirt with mushrooms. These micro-biome textures help the terrain tell a story about how water, sun, and time shape the landscape.
🎨 Block Mixing Ratio Visualizer
Create natural-looking terrain with realistic block variation
Quick Presets
Custom Mix
Export Mix Recipe
Reserve high-contrast or rare blocks for edges and focal features (path borders, rock seams, cliff scars) so terrain reads clearly at a distance. If you scatter rare blocks randomly across your terrain, they become visual noise rather than intentional detail. Instead, use them strategically: a vein of coal ore running through a cliff face, copper oxidation patterns on ancient stone, quartz streaks in granite formations. These become the details that reward closer inspection without cluttering the overall composition.
For desert biome architecture, consider mixing sandstone variants with terracotta to create stratified rock layers that mimic real desert geology. In swamp builds, incorporate mud, clay, and moss-covered stone to emphasize the waterlogged environment.
Biome-Aware Shaping And Blending
Match block choices and vegetation to the biome mood: spruce and stone-heavy terrain in cold mountains, sandstone and dead bushes for arid builds, lush foliage and water in temperate zones. Biomes in Minecraft come with distinct visual languages, and your terraform should speak those languages fluently. Don’t just consider the dominant block—think about the entire palette.
Mountain biome construction benefits from dramatic elevation changes, exposed stone, and strategic snow placement that creates clear tree lines and summit definition. Taiga building needs careful attention to the boundary between dense forest floor and cleared areas, with podzol and coarse dirt providing texture variation.
Use transition bands—mixed grass/sand, changing tree types, and gradual height shifts—to blend between neighboring biomes instead of sharp cutoffs. Real biomes don’t have hard borders. You don’t walk from forest to desert in three steps. There’s a transition zone where the forest thins out, grass becomes patchy, sand starts mixing with dirt. These gradual transitions make your terraform feel geographically plausible.
When building near biome borders, acknowledge both environments in your terraform. Create terrain that makes sense for why the biome boundary sits where it does—maybe there’s a river that naturally separates wet forest from dry plains, or an elevation change that explains why one side stays cold while the other doesn’t. Give the landscape a reason for its biome patterns.
Consider light and weather: snowy or foggy areas benefit from bold silhouettes and strong contrast, while bright, warm biomes can handle softer, flatter terrain forms. Visibility changes everything about how terrain reads visually. In clear desert biomes, subtle details remain visible at great distances, so your texture work matters even on distant background hills. In foggy forest biomes, only the immediate foreground shows clearly, so you can simplify distant terrain as long as the silhouette remains interesting.
Integrating Builds Into Terrain
Carve builds into terrain rather than dropping them on top: cliff houses, hobbit-hole bases, and mountain compounds are examples that reuse natural walls and ceilings. This integration strategy saves enormous amounts of block placement while creating structures that feel ancient and permanent rather than recent constructions.
Design platforms with organic outlines that follow the land, then support them visually with pillars, retaining walls, and integrated rock. Square platforms on natural terrain always look artificial. Instead, trace irregular edges that follow terrain contours. Where you need retaining walls, make them look like they’re holding back actual earth—taper the wall thickness, show some of the dirt/stone behind it breaking through, add erosion patterns at water drainage points.
Plan sightlines: terraform so key views from windows, bridges, and towers frame valleys, rivers, or feature builds instead of random clutter. Every major structure should have one or two carefully framed views that reward players for reaching that location. This might mean removing an inconvenient hill that blocks a vista, or adding a small ridge that hides a less attractive area. Photography works with what exists; architecture gets to shape what will be photographed.
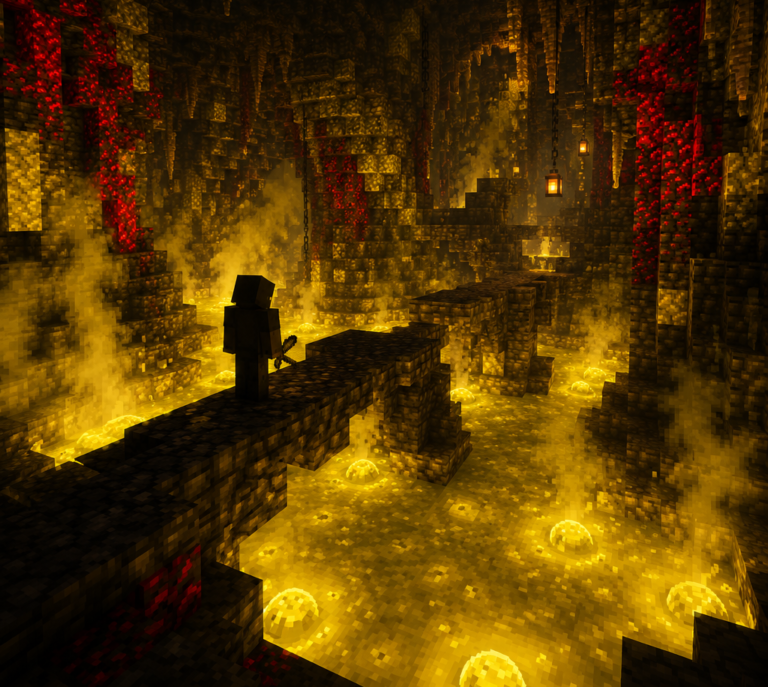
For Nether building, integration takes different forms since the terrain is already dramatic. Here you’re often creating stable platforms within chaotic landscapes, using the existing lava flows and netherrack formations as backdrop rather than foundation. Basalt deltas present unique terraforming challenges due to their vertical columnar structures—work with these formations rather than removing them entirely.
Interior spaces benefit from terraforming too. Kitchen designs, bedroom layouts, and living room arrangements all function better when you’ve shaped the surrounding terrain to provide appropriate context and spatial flow.
Tools, Mods, And Efficiency
In survival, rely on enchanted shovels and pickaxes, beacons for fast mining, and lots of scaffolding to handle vertical work safely and quickly. Efficiency V, Unbreaking III, and Mending turn terraform from tedious to manageable. Beacons with Haste II make stone excavation almost pleasant. Scaffolding revolutionized vertical terraforming—you can build towers, create temporary bridges, and access cliff faces that were previously nightmares to reach.
In creative or modded worlds, use tools like WorldEdit and builder-friendly mods to speed up rough shaping, then hand-detail for natural variation. WorldEdit excels at volume changes—carving valleys, raising plateaus, creating smooth spheres for custom mountains. But it can’t replicate the organic irregularity of hand-placed detail. The ideal workflow combines both: WorldEdit for the rough work, manual placement for the finishing touches.
We’ve just started a new server where we’re testing Axiom as a terraforming tool, and early impressions suggest it might bridge the gap between pure creative freedom and efficient large-scale work. The real-time brush preview and terrain smoothing tools look promising for the kind of organic shaping that’s tedious in WorldEdit but time-consuming when done entirely by hand. We’re still in the learning stages, so I’ll share more detailed thoughts once we’ve put it through proper testing on a major terraform project.
Clear or fill small features that break immersion—odd holes, noisy ponds, stray sand edges—before doing fine decoration. Default world generation creates visual clutter: random water pools, pointless caves opening mid-cliff, single-block inconsistencies. Address these during your rough terraform pass. Once you start decorating with custom trees and detail work, you’ll forget about these underlying issues until they show up in screenshots and drive you crazy.
Consider the best spawn biomes when selecting your build location, as starting with naturally favorable terrain reduces the total terraforming workload. Sometimes the smartest terraform is choosing better terrain in the first place.
Decoration, Detail, And Final Pass
Add custom trees, boulders, small caves, and waterfalls as “hero features” that tie builds and terrain together. These detail elements bridge the gap between “shaped terrain” and “living landscape.” Custom trees deserve particular attention—default world generation often creates sparse or oddly distributed forests. Hand-placing trees (or using good building mods) in clusters with appropriate undergrowth makes terrain feel deliberately designed rather than accidentally generated.
Use paths and roads early: they guide where you refine slopes, place stairs, and add walls, and they visually connect structures into one coherent area. Paths are functional infrastructure but also compositional tools. They lead the eye, create rhythm through the landscape, and provide a sense of scale (viewers instinctively understand path width, so it becomes a measuring reference). Well-placed paths can make a small terraform feel expansive by encouraging exploration.
Finish with micro-detail: flowers, grass patches, patches of snow, and minor block swaps that break up any remaining uniform surfaces. The final five percent of terraform work produces fifty percent of the visual impact. These last details—a few tall grass here, stone buttons as pebbles there, the occasional lily pad—are what transform technically correct terrain into believable environment.
For massive builds, check out our guide on planning massive structures, as terrain work scales up significantly when your project spans thousands of blocks. Large-scale projects require systematic approaches to terraform—working in sections, maintaining consistent elevation references, creating visual hierarchy so not everything demands equal attention.
Don’t neglect defense considerations if you’re in survival mode. Terrain can be your best defensive feature: steep approaches force predictable attack paths, water features create mob barriers, elevated platforms provide archer advantages.
Biome-Specific Terraforming Applications
Different biomes demand different terraforming strategies. What works brilliantly in plains feels wrong in mountains, and desert techniques fail in swamps. Let’s look at how core principles adapt to specific environments:
Desert Biomes: Focus on dramatic elevation through mesas and canyon systems. Desert architecture benefits from terraced building sites carved into cliff faces. Create stratified layers with different sandstone and terracotta blocks to mimic sedimentary rock formations. Include oasis features as natural gathering points and water sources that break up expansive sand plains.
Mountain Terrain: Emphasize vertical drama and dramatic sightlines. Mountain bases work best when you carve into existing rock rather than building on top. Create switchback paths that acknowledge realistic climbing angles. Use snow strategically to define tree lines and summit areas. Stone type variation matters enormously—mix andesite, stone, and small amounts of gravel to suggest different geological layers and weathering patterns.
Swamp Environments: Manage water levels carefully and create elevated building platforms. Swamp biome building requires accepting that standing water is part of the aesthetic, not a problem to eliminate. Terraform drainage patterns that feel natural—water collects in low spots, flows through channels toward rivers. Use mud, clay, and moss-covered blocks extensively. Dead trees and mushrooms aren’t decoration—they’re essential environmental storytelling.
Plains and Grasslands: Create subtle undulation rather than perfect flatness. Plains biomes are deceptively challenging because they’re too workable—new builders flatten everything and create boring wastelands. Instead, terraform gentle rises and falls, create small valleys for creeks, add natural-looking tree clusters. The goal is terrain that feels expansive but not empty.
Forest Regions: Balance between clearing enough space for building and maintaining forest character. Forest biome construction often means selective thinning rather than wholesale clearing. Leave some mature trees as canopy, create meandering paths through undergrowth, terraform slight depressions where natural clearings would form. Leaf litter and fallen logs add detail that reinforces the woodland environment.
Taiga Landscapes: Work with the existing coniferous forest structure and snow accumulation patterns. Taiga building in snowy variants needs careful attention to where snow realistically settles—on flat surfaces, in sheltered areas, less on steep slopes. Podzol and coarse dirt create the distinctive forest floor texture. Incorporate granite and stone as exposed bedrock in areas where forest thins.
Nether Dimensions: The Nether demands completely different thinking. Nether material choices include blocks that don’t exist in the overworld, and the vertical scale is completely different. Gothic architecture in Nether fortresses benefits from enhancing the existing fortress generation rather than fighting it. Basalt delta construction means working with columnar basalt formations and creating stable platforms within inherently unstable terrain.
Integrating With Architectural Styles
Terraform decisions should align with architectural intentions. The terrain you create for a Victorian mansion looks completely different from the groundwork for Steampunk industrial buildings.
Victorian architecture benefits from formal, manicured landscapes: even terraces, defined garden spaces, cleared lots with maintained edges. Your terraform should create level platforms for the main structure while providing interesting grade changes for outbuildings, gardens, and decorative features.
Steampunk industrial builds need rougher terrain with exposed stone, coal seams, and dramatic industrial scars in the landscape—quarries, rail cuts, mine entrances. The terraform should suggest heavy industrial use over time.
Medieval castle interiors and exteriors work best when the terrain shows defensive considerations: high ground positioning, clear approach visibility, natural barriers enhanced through terraform. Courtyard levels should feel deliberately carved into hilltops, with ramparts following terrain contours.
Real architecture in Minecraft often requires adapting terrain to match the historical context of the reference building. If you’re recreating a structure that originally sat on coastal cliffs, your terraform needs to provide those cliffs. If the original occupied flat delta land, don’t force it onto a mountain.
Resource Management And Biome Comparison
Effective terraforming requires understanding what materials each biome provides naturally and what you’ll need to import. Our biome resource comparison breaks down the building blocks, decoration options, and unique materials available in each environment.
Desert biomes give you abundant sandstone variants but limited wood and no natural stone generation. If your desert terraform needs stone features, you’re importing that material. Plan for the logistics of moving thousands of stone blocks or rethink your design to work with what’s available locally.
Mountain biomes provide massive quantities of stone, stone variants, and ores, but limited soil and vegetation. Terraform projects here often involve more subtraction (carving away rock) than addition (building up with imported materials).
Plains offer balanced resources but lack distinctive materials—you might terraform plains specifically because you’re planning to import materials for a build that doesn’t match any specific biome aesthetic.
Advanced Techniques Worth Exploring
As you become comfortable with basic terraforming, several advanced techniques open up new possibilities:
- Vertical biome blending creates transitions not just horizontally between biomes but vertically through elevation changes—showing how temperature and precipitation create distinct zones as you climb from valley to peak.
- Erosion simulation involves deliberately creating terrain features that suggest water or wind erosion over time: carved channels, undercut cliffs, scattered boulders downslope from source cliffs, alluvial fan formations where streams exit mountains into valleys.
- Underground integration extends terraform below the surface, creating cave systems, underground rivers, or subsurface structures that connect to surface features in logical ways. When your terraform includes a river, consider where that water comes from and where it goes—perhaps there’s a cave system that feeds it.
- Multi-biome projects that span several biomes require extra attention to why those biome boundaries exist. Is there a mountain range creating a rain shadow that explains why one side is lush and the other arid? Is a river system the natural boundary between forest and plains? These explanations make your terraform feel geographically coherent.
Common Mistakes To Avoid
Over-flattening: Creating perfectly level surfaces that look unnatural and boring. Even building platforms benefit from very slight variation—1-2 block elevation changes across large areas prevent that “digital flat” appearance.
Ignoring drainage: Creating terrain that would logically flood or that has water sources with no outlet. Real landscapes show where water flows and collects. Your terraform should too.
Uniform texture: Using single blocks across large areas. Even terrain that should be relatively uniform (grass plains, sand deserts) benefits from subtle texture variation.
Forgetting scale: Creating terrain features that are too large or too small for the structures they support. A massive palace needs appropriately grand landscape features. A small cottage looks ridiculous on a heavily terraformed mountaintop.
Sharp edges: Letting terraform projects end abruptly with straight lines and obvious cutoffs. Always plan transition zones that gradually blend your work into natural generation.
Missing context: Terraforming in isolation without considering how the area connects to surrounding landscape, sightlines from distant locations, or how the land would function in reality.
Planning Your First Major Terraform
If you’re ready to start your first significant terraform project, work through this systematic approach:
- Survey and photograph the area from multiple angles at different times of day. Note what’s worth keeping, what needs modification, what should be removed entirely.
- Create a rough plan identifying zones: where structures go, where terrain provides backdrop, where transitions blend to natural world. Mark these with temporary blocks in creative, or map them on paper.
- Execute rough shaping first—major volume changes, overall contours, primary paths and platforms. Don’t worry about detail yet. Get the big shapes right.
- Add texture layers progressively—start with broader block mixing, then refine to more subtle variations. Step back regularly to check how it reads from player perspective.
- Detail pass last—custom trees, boulder placement, micro-terrain variation, flowers and grass, final path definition.
- Integration check—place at least sketches of your intended structures to verify the terrain actually works for your building plans. Better to discover problems now than after everything’s built.
- Transition zones get final attention—make sure your terraform blends smoothly into natural generation without obvious seams.
Conclusion: From Terrain To Territory
Good terraforming transforms random Minecraft terrain into purposeful building sites that make your architecture look intentional and grounded. The techniques covered here—from block mixing and biome-aware shaping to integration strategies and detail work—give you the tools to read a landscape, identify what it needs, and execute those changes efficiently.
Remember that terraform isn’t about creating perfect terrain—it’s about creating terrain that’s perfect for your specific build. A desert trading post needs different ground than a mountain monastery, and both differ entirely from a swamp hideout or plains megabase.
Start with a clear vision, work at appropriate scales (rough first, detail last), use tools strategically to stay efficient, and always consider how your terraform integrates with both your builds and the natural world beyond your project borders. The landscapes you create become the foundation—literally and figuratively—for memorable builds that feel like they grew naturally from their environment rather than being dropped onto it.
Whether you’re preparing ground for your first major build or refining techniques for a massive server project, thoughtful terraform work rewards the time invested. Your structures will photograph better, feel more immersive to explore, and create that intangible sense of place that turns good builds into great ones.
What biome are you planning to terraform first? Share your project plans in the comments below—I’d love to hear what terrain challenges you’re tackling and what architectural visions are driving your landscape work.
Looking for more building guidance? Check out our complete biome exploration checklist or explore architectural fundamentals to pair with your terraforming skills.